
How to Use Fingerprint Sensor ROG Ally – Easy Guide
Why lose time typing PIN every time you need to unlock the console? Continue reading and find out how to set up the fingerprint sensor! 🔓
Many gamers wondered how to use fingerprint sensor ROG Ally, so we decided to make a complete guide combining all the necessary details you have to know. Starting with the reasons you should use it, how to activate and what to do if it doesn’t work, you will have all the necessary information after reading this guide.
Do you want to increase your FPS in games on this handheld console? Learn how to boost gaming performance on ROG Ally.
Why use the fingerprint sensor ROG Ally?
Use the fingerprint sensor on ROG Ally to speed up unlocking time and keep your device safe even if it gets stolen, or somebody tries to access your console without authorization. Remember, ROG Ally has access to the internet and, with it, possibly to your social media, files, email, and other sensitive information.
How to use the fingerprint sensor on ROG Ally?
Setting up a fingerprint sensor on ROG Ally will take only a couple of minutes, and every time you want to unlock the console, it will be much easier, as the fingerprint reading takes much less than entering a PIN.
💡 If you manually update the BIOS or the update comes automatically, you must reconfigure the fingerprint sensor on your ROG Ally.
Time needed: 3 minutes
ROG Ally runs Windows 11 operating system, which comes with integrated Windows Hello. This means you can follow the steps for setting up Windows Hello fingerprint to apply it on your handheld console.
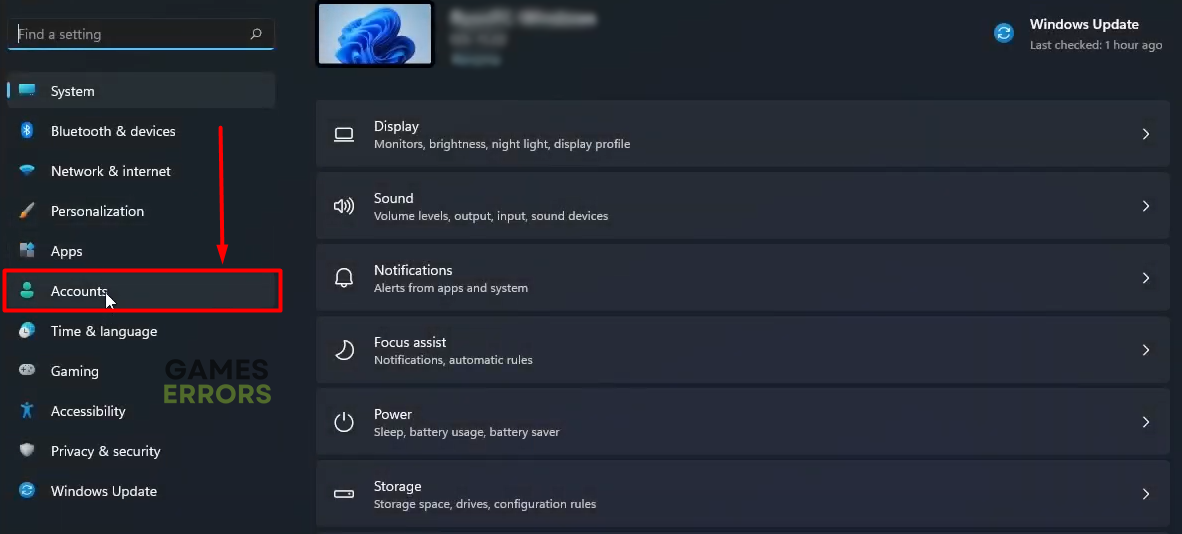
- Select the Windows icon, select Settings, and navigate to the Accounts tab.

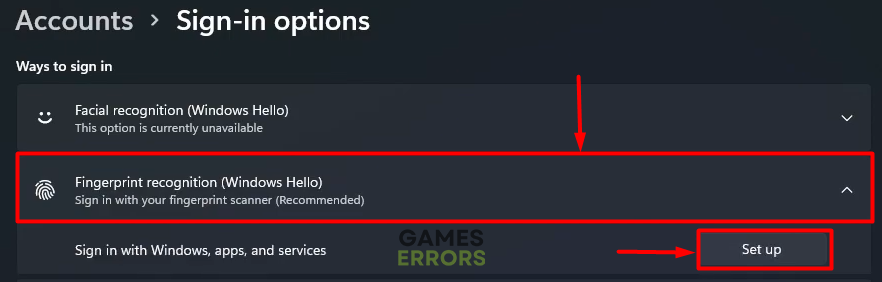
- Select the Sign-in options.

- Select Fingerprint recognition (Windows Hello) so it expands, and hit the Set up button.

- Select Get Started and type in your current PIN.
- Touch the fingerprint sensor on ROG Ally (the power button).
You will have to put your finger from various angles multiple times.

- Once the process is completed, you will get the ‘All set!’ message.


How to update the fingerprint driver ROG Ally?
If the previously described steps didn’t work for you, there is a chance that you are missing a fingerprint driver. Download and install it easily from the official ASUS website.
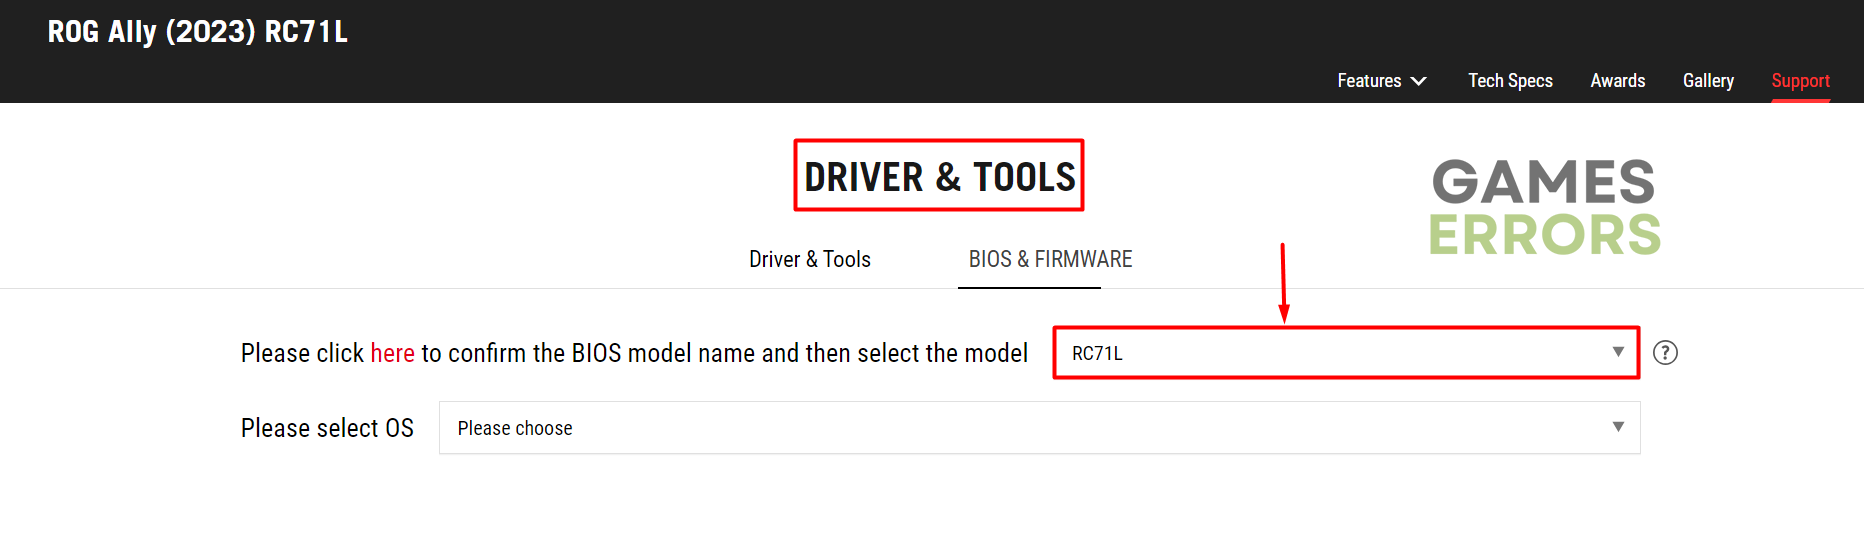
- Head to the Asus Driver & Tools page and select your ROG Ally model.

- Select Windows 11 for your OS.

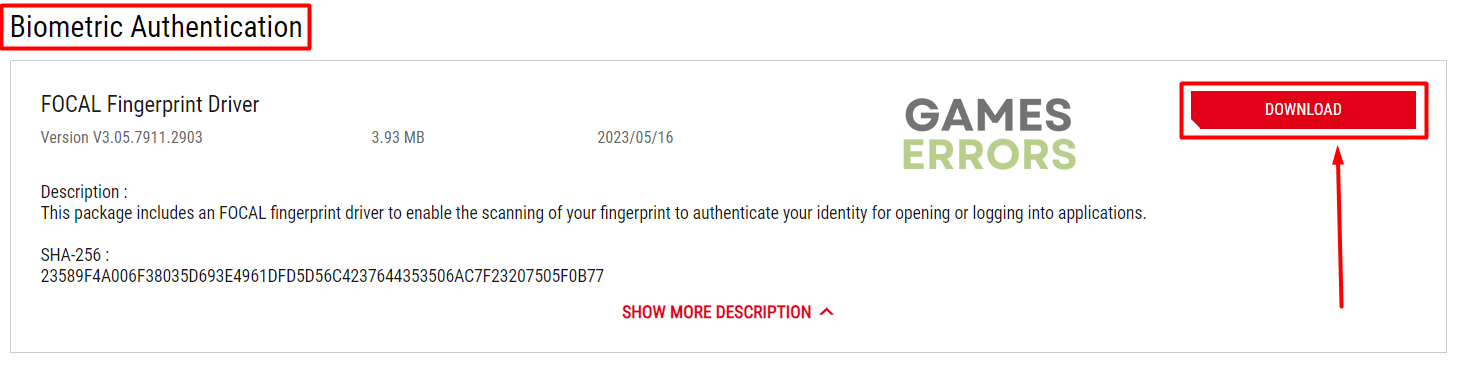
- Click the Download button under the Biometric Authentication section.

- Run the installation on your ROG Ally and follow the steps.

⚠ Some gamers claim that the fingerprint sensor on their ROG Ally console won’t work even though they have the driver installed. If this is your case, the sensor might be faulty, so we advise you promptly contact the reseller.
Where is ROG Ally fingerprint sensor?
The fingerprint sensor on ROG Ally is integrated into your console’s power button. Instead of pressing the button to wake up the console and typing PIN, with fingerprint enabled, you can press the power button, and the console will automatically verify your identity.
Related articles:
- ROG Ally Not Detecting SD Card: How To Make It Work
- ROG Ally Left Bumper Not Working: How To Fix It Quickly
- Games Crashing On ROG Ally? Here Are The Best Fixes!
- Games Won’t Launch ROG Ally: Fix It Quickly
- Cloud Recovery Server Authentication Failed ROG Ally [Fixed]
Conclusion
Hopefully, how to use the fingerprint sensor on ROG Ally is clear after reading our guide. All you have to do is to set up Windows Hello and install the Biometric Authentication if you already don’t have it. Remember, the fingerprint is located on the power button, and it’s an excellent way to protect your privacy while not losing time on unlocking your ROG Ally whenever you want to play your favorite games!