

Destiny 2 Error Code Centipede: How to Fix It in 2 Minutes
Destiny 2 Centipede error code is a common and annoying problem that our solutions can quickly fix. 🚑
Bungie’s Destiny 2 is a mix of a shooter and an action RPG packed with MMO elements, and it’s a pretty original and fun game. In addition to its enormous popularity, the game can sometimes be annoying with errors with a strange name. Unfortunately, the Centipede error code isn’t funny and usually prevents you from playing the game. We’ve created this guide to get you out of trouble and enjoy this timeless hit.
What is Error Code Centipede in Destiny 2?
Error Code Centipede is an issue that occurs due to an unstable internet connection. It can be easily fixed by checking your internet connection, enabling UPnP and changing the router’s NAT, enabling port forwarding, using another Wi-Fi or cable, and using a VPN. According to the official Bungie Help website, “Centipede error is a general networking error code. This can be caused by a loss of connection to our servers.” As seen before, there is not only one solution to this problem but a mix of various solutions concerning network settings on the client side.
How do I fix Error Code Centipede in Destiny 2?
We have collected proven solutions that can help you solve this error. Of course, you don’t have to apply them all, but go step by step through our tips until you find the one that will work for you. So try these fixes:
- Check the status of Bungie’s Destiny 2 servers
- Check your Internet connection
- Enable UPnP and change the router’s NAT
- Enable port forwarding
- Use VPN
1. Check the status of Bungie’s Destiny 2 servers
The first step we recommend for solving the Centipede error is to check the status of the Bungie servers. If the servers are down or scheduled for maintenance, you must wait until the servers are operational.
You can view the server status on the Bungie help page, where maintenance schedules and various up-to-date notifications are displayed. If the Destiny servers are working, the next step is to check your internet connection.
2. Check your Internet connection
Do you use a Wi-Fi network for gaming? How far are the network devices (router and modem) from your PC or console? You can quickly get a Centipede error code in the game if you have a weak and slow internet connection. We recommend that you do the following:
- Place your network devices closer to your PC or console for a better signal.
- Check that the Wi-Fi network is not overloaded and turn off unnecessary devices.
- Unplug the power cords on the router or modem for 60 seconds, then plug them back in.
- Get a wireless network extender.
- If possible, switch from wireless to a wired ethernet connection, giving you a faster and more stable Internet connection.
3. Enable UPnP and change the Router’s Nat
Time needed: 1 minute
One common reason for the Centipede error code in Destiny 2 can be that your NAT (Network Address Translation) is too restrictive. Ensure it is set to Type 3 or Strict, then change it to Type 1/Open. To configure your NAT settings, you must enable UPnP or port forwarding.
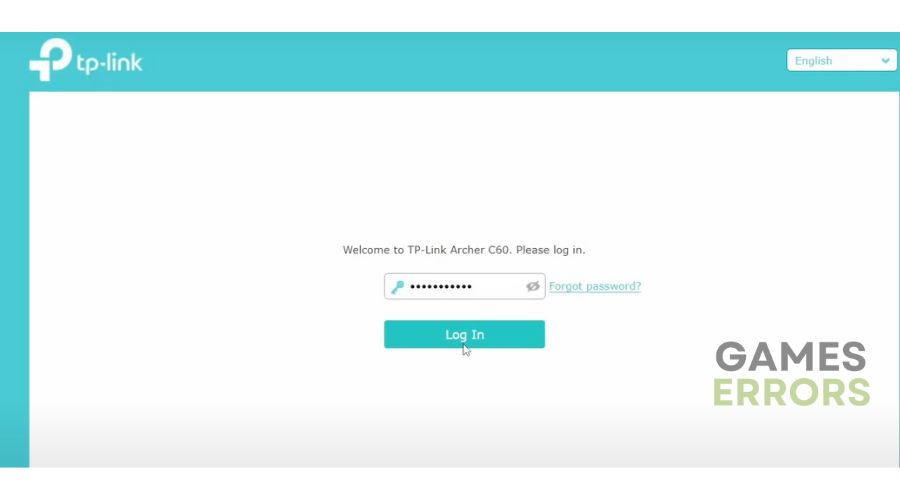
- Log in to your router
Log into your router control panel via the admin account.

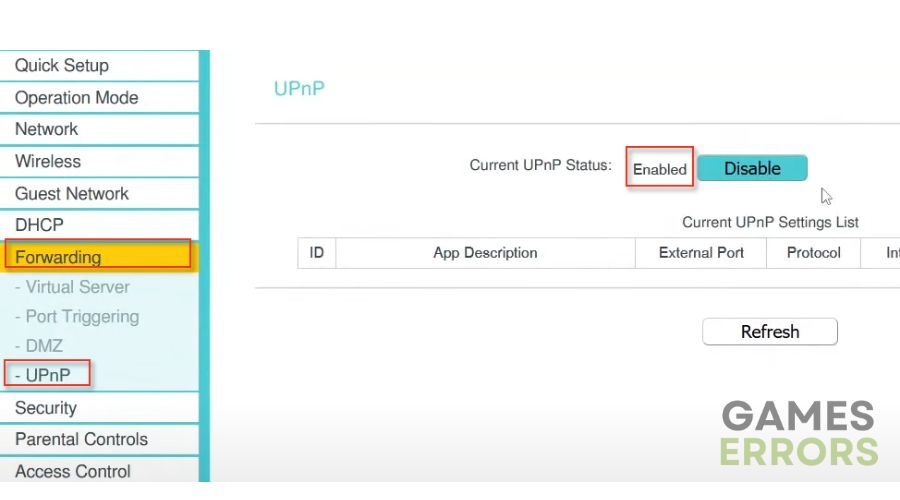
- Find the UPnP option
Find the UPnP setting in the router menu and select Enable.
- Exit router settings and launch Destiny 2
If the game works as it should, and without the Centipede error code, you have solved the problem
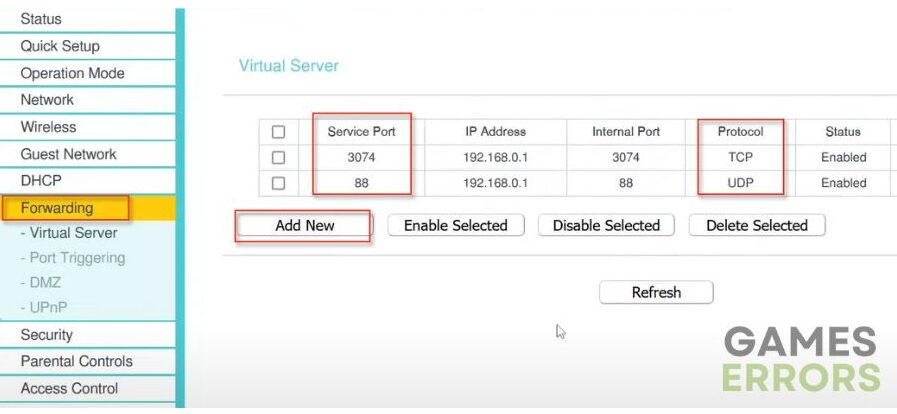
4. Enable port forwarding
As Bungie advises, enabling UPnP is the easiest way to overcome NAT limitations. However, the downside of this method is that UPnP does automated port forwarding for you, which can lead to an insecure connection vulnerable to Internet threats. We recommend a more secure port forwarding method to overcome UPnP security issues. Here’s how to set it up:
1. Disable UPnP in the router menu.
2. Choose the Port forwarding option.
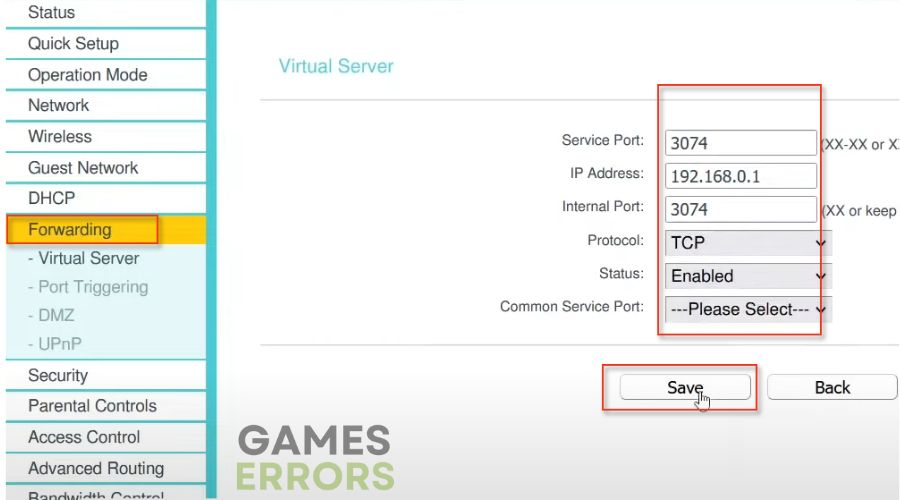
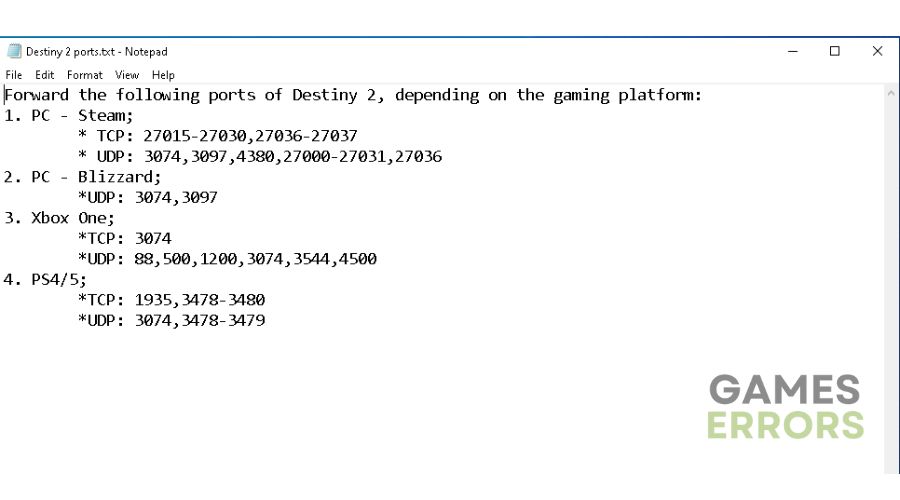
3. Enter the recommended UDP and TCP ports in the respective boxes and click Save.
4. Repeat the process until you have entered all the ports via the Add New option.
5. Use a VPN
Sometimes you cannot change your NAT settings because you may be in an intentionally restrictive environment, such as a workplace or campus. You can’t make any changes if you don’t have an admin account, and you’ll probably get a Centipede Destiny 2 error code. Luckily you can use a VPN, and we recommend a popular VPN compatible with Destiny 2, such as Express VPN. Bungie doesn’t have anything against players who use a VPN, so we suggest you also try this way of eliminating the Centipede error.
Related articles:
- Destiny 2 Stuck On Loading Screen: How To Fix It Quickly
- Destiny 2 Lightfall Stuck On Loading Screen: How To Fix
- Destiny 2 Stuck On Connecting Screen: Fix It Quickly
Conclusion
Based on our tips, we hope you can successfully fix Destiny 2 error code Centipede. If you have a different solution to the problem, drop a comment below.