When it comes to implementing bullet physics in Unity, understanding how to efficiently spawn and control bullet movement, as well as handle collisions with fast-moving objects, becomes crucial. In this article, we will see, how to implement bullet physics, ensuring their smooth movement and accurate collision detection.
We will also discuss a Raycast technique that doesn’t require bullet prefabs. If you are totally new to Unity physics, then I would suggest going through our collision detection guide before continuing. Let’s get started.
Watch tutorial as Video
Spawning Bullets
The place where we spawn the bullets will depend on the type of game you are making. If it’s a third person shooter game, then you need to spawn it at the gun’s barrel end. In case of a first-person shooter game, you need to spawn it at the camera position.

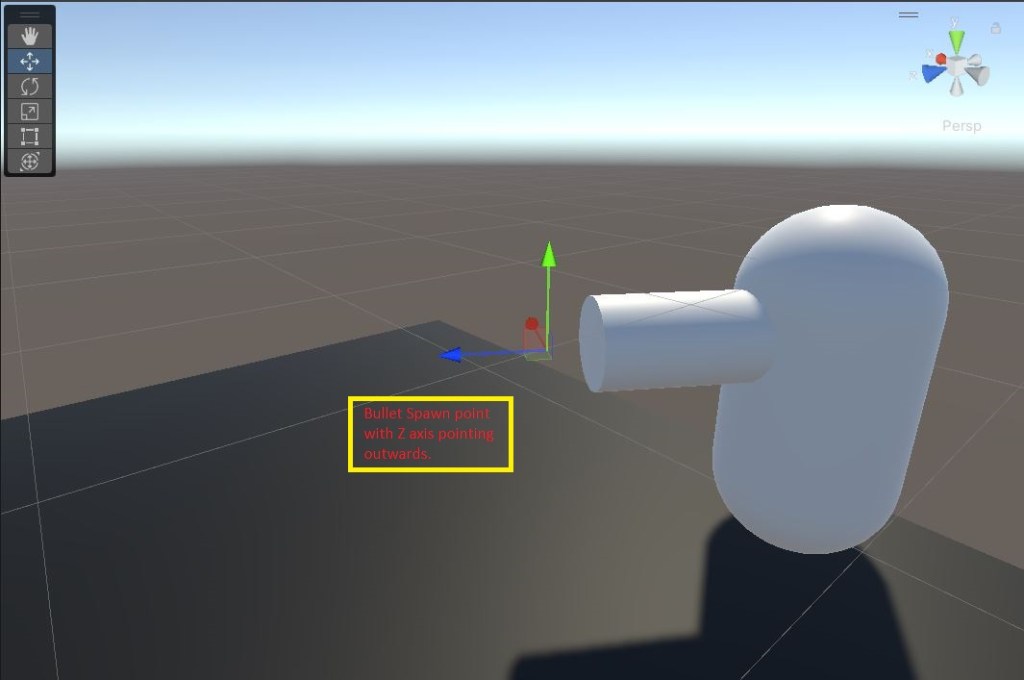
For the purpose of this tutorial, let’s create an empty game object for the bullet spawn point. We can move this spawn point to any location of our choice, depending on the game. We will be moving the bullet in the Z direction, so make sure the positive Z direction is in the outward direction from the gun.
Creating Bullet Prefab
Make the spawn point a child of the player or the gun, so that it will rotate with player.
For the bullet prefab, let’s use the default Unity sphere and resize it to a scale of 0.2. Make sure the bullet’s z axis is aligned with the spawn point direction. Add a Rigidbody component and add a script to move the bullet forward on instantiation.
In the bullet move script, we will get the Rigidbody component and set the velocity equal to the “bulletSpeed” parameter. Then we use collision detection, to destroy the bullet on collision. Here is the bullet move script.
using UnityEngine;

public class BulletMove : MonoBehaviour
{
    Rigidbody rb;
    [SerializeField]float bulletSpeed;

    //Move bullet forward
    void Start()
    {
        rb=GetComponent<Rigidbody>();
        rb.velocity=transform.forward*bulletSpeed;
    }

    //destroy bullet on collision
    void OnCollisionEnter(Collision col)
    {
        Destroy(gameObject);
    }

}
Move the bullet to the project window to make it into a prefab. Delete it from the hierarchy window.
Bullet spawn script
Now that we have the bullet prefab and spawn position, we can spawn the bullet on mouse click. Let’s add a script to our player for that.
Let’s call the script “Shooting”. Here is our shooting script.
using UnityEngine;

public class shooting : MonoBehaviour
{
    [SerializeField] GameObject bulletPrefab;
    [SerializeField] Transform bulletSpawnPoint;
    void Update()
    {
        //spawn bullet on mouse left click
        if(Input.GetMouseButtonDown(0))
        {
            Instantiate(bulletPrefab,bulletSpawnPoint.position,bulletSpawnPoint.rotation);
        }

    }

}
Now we if assign all parameters and play the game, you can see that the bullet is spawned on mouse left click and starts moving in the direction, our player is facing.
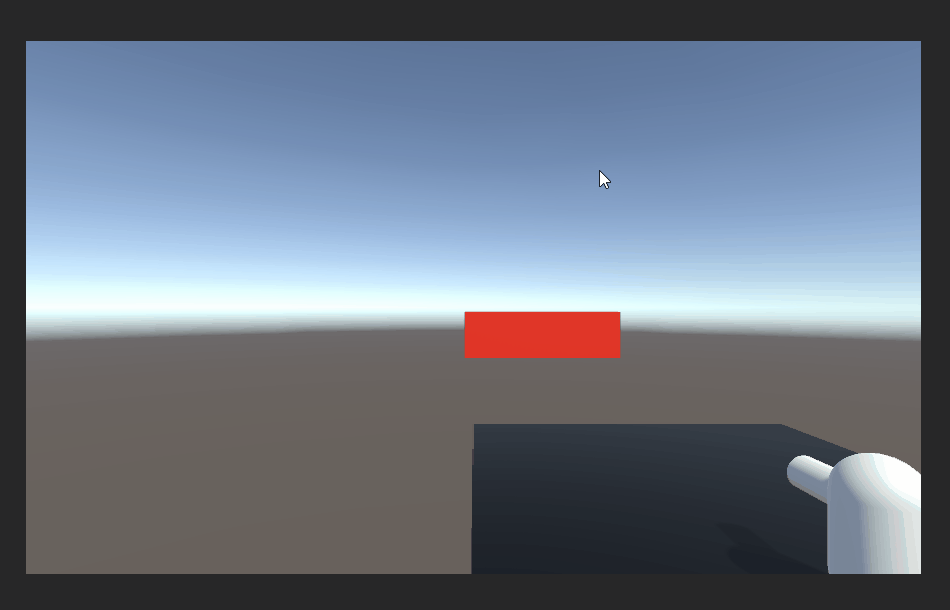
Everything is good until we increase the speed of the bullet. When the bullet is very fast, the collision is not detected and the bullet goes through the wall.
Collision Detection for high-speed Bullet
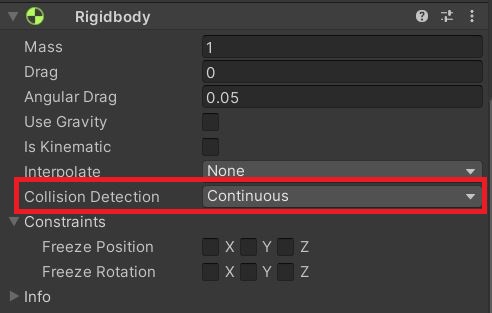
In most cases, setting the collision detection to continuous should solve the problem. To set the collision detection to continous, select the bullet prefab, go to the Rigidbody component and set the collision detection from discrete to continous.
Using continous collision detection may have solved the problem but it has a huge effect on performance. Imagine thousands of bullets using continous collision detection at the same time in an online multiplayer.
Also setting the bullet’s collision detection to continous will not help if you have a moving target. You need to set the moving target’s collision detection to continous dynamic for collision detection to work.
The second option is to increase the size of the collider. This can help up to a certain speed but the accuracy of the collision will be affected by this.
This brings us to the option of Raycasting in Unity.
Collision detection with Raycast
We can cast a ray in the movement direction from the bullet and destroy the bullet if the ray hits something. We will keep the ray length short to minimize performance overhead.
Let’s replace the collision detection part of the bullet with a Raycast. Here is the bullet script with Raycast for collision detection.
using UnityEngine;

public class BulletMove : MonoBehaviour
{
    Rigidbody rb;
    [SerializeField]float bulletSpeed;

    //Move bullet forward
    void Start()
    {
        rb=GetComponent<Rigidbody>();
        rb.velocity=transform.forward*bulletSpeed;
    }
    void Update()
    {
        if(Physics.Raycast(transform.position,transform.forward*3,3.0f))
        {
            Destroy(gameObject);
        }
    }


}
Even with Raycast, you can detect collision only up to a certain speed. So, if your plan is to have a very high-speed bullet that makes collision detection difficult, then it’s better to not use bullets and only use Raycast for shooting.
Shooting mechanics without bullets(using Raycast)
The high-speed bullet is not going to be visible in any case. So, it’s better to Raycast from the bullet spawn point in the forward direction. You can keep the Raycast length fairly long to hit distant objects.
Advantages of this method
- No prefabs required.
- No collision calculations.
- No need to instantiate and destroy hundreds of bullets.
- You can implement friendly fire by ignoring a layer in Raycast.
We can remove the instantiation script from the player and delete the bullet prefab. Now, let’s add a new script to the bullet spawn point to cast a ray of length 300 units.
using UnityEngine;

public class RayShooting : MonoBehaviour
{
    RaycastHit hit;
    void Update()
    {
        if(Input.GetMouseButtonDown(0))
        {
            if(Physics.Raycast(transform.position,transform.forward,out hit,300f))
            {
                //your code to deal damage to the object
                Debug.Log(hit.collider.gameObject);
            }

        }
    }

}
The way you want to implement bullet physics is totally dependent on your game. But using the Raycast method without bullet prefabs is very performance friendly as one Raycast replaces all the prefab physics and collision detection.
Now it’s your turn to try it out. If you have any further questions, feel free to leave them in the comment box below.