
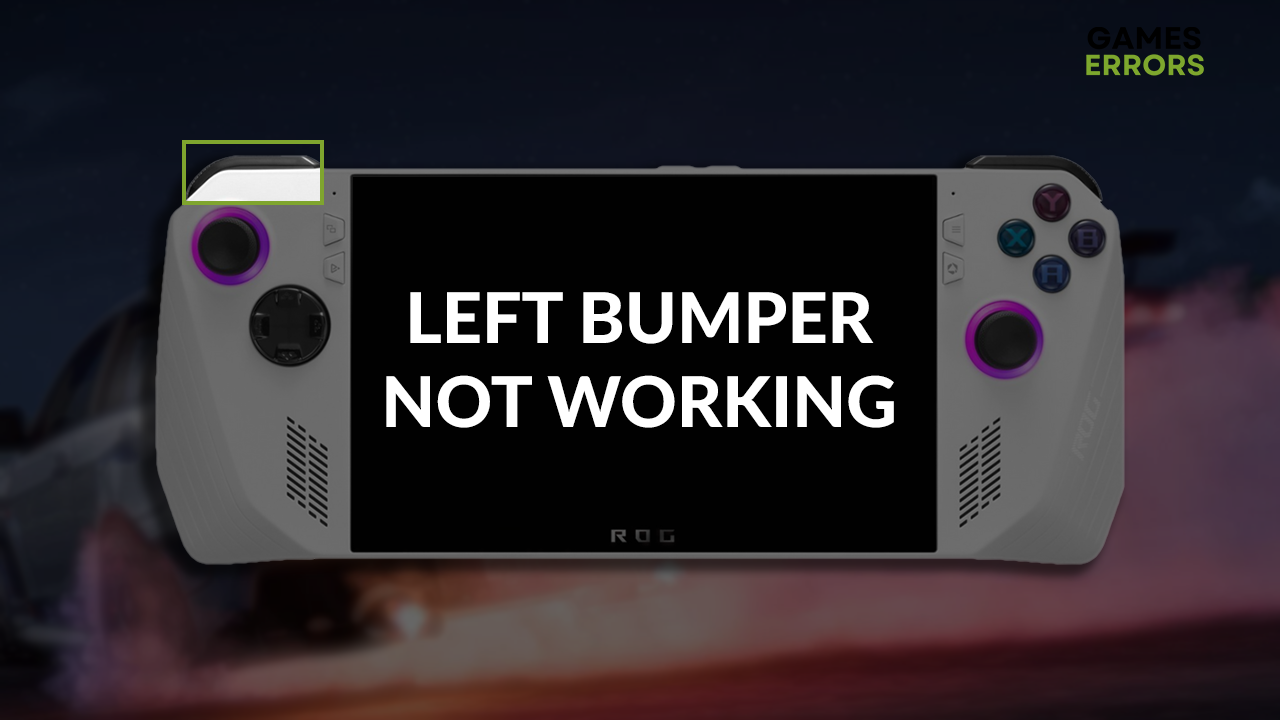
ROG Ally Left Bumper Not Working: How to Fix It Quickly
Playing games without the left bumper will be very difficult, so here are the options to follow if it happens. 🎮
ROG Ally left bumper not working problem will make the console much less functional and the overall experience terrible. The obvious thing to do is to contact the shop from where you purchased your console, but before doing so, you can try a few quick fixes that you can apply yourself.
If your problems are related to stability issues, learn what to do when games start crashing on ROG Ally.
Why is ROG Ally left bumper not working?
ROG Ally left bumper is not working due to mechanical issues, misplaced rubber that should hold the bumper or an outdated BIOS version.
How to fix ROG Ally left bumper not working?
Here are some tricks to remove mechanical problems with ROG Ally left bumper:
- Push it slightly: Don’t apply too much force so you don’t break it, but try to squeeze it if you don’t feel it is clicking. This might fix the problem if it is mechanical.
- Adjust the rubber: If you previously opened your ROG Ally, there is a chance that the rubber holding the left bumper was misplaced. Open the console again and adjust the rubber’s position.
⚠ Be careful when fixing the mechanical issue on your console! If you damage it, there is a chance you won’t be able to replace it if it turns out to be unfixable.
Follow the solution described below if the button is correctly placed but doesn’t work.
Update BIOS on your ROG Ally
Time needed: 3 minutes
An outdated BIOS might cause non-mechanical issues stopping the left bumper from working on your ROG Ally. Follow the steps below to update the BIOS.
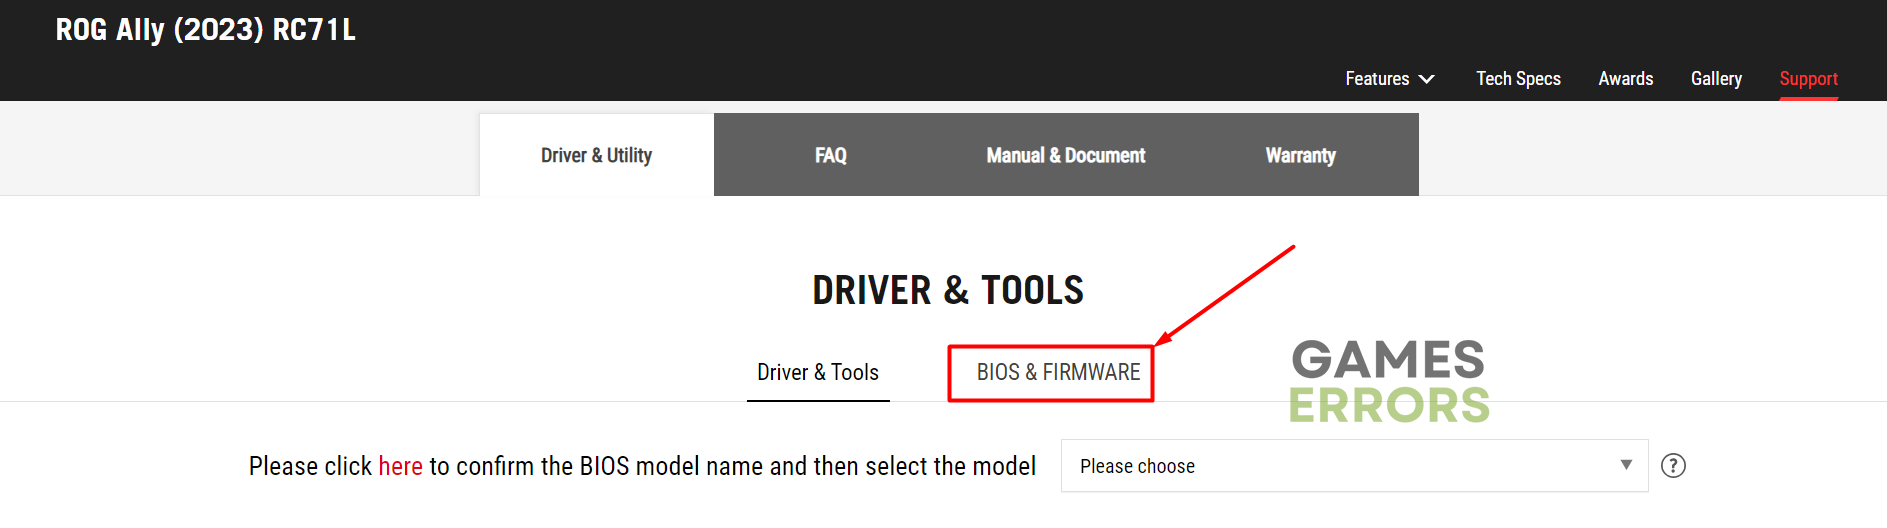
- Head to the Asus Driver & Tools page and select Bios & Firmware.

- Select your ROG Ally model.

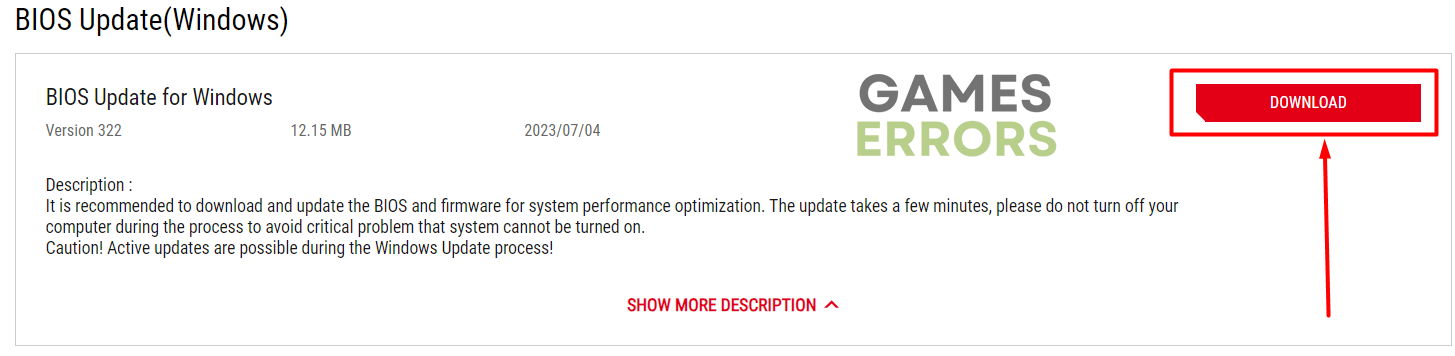
- Click on the Download button for BIOS Update for Windows.

- Run the executable (.exe) file once downloaded.

💡 An alternative to returning the ROG Ally to the shop is to program another button, for example, the left button, to be the left bumper.
How to fix ROG Ally left joystick not working?
Some gamers might experience issues with the left joystick as well. Here is what to do if it’s not working:
- Gently rotate the joystick: Try to make a complete circle with the joystick and pay attention to any mechanical blocks. If you find any mechanical problems, return the console to the shop.
- Reset Windows: A few gamers claim that resetting and configuring the operating system on ROG Ally resolved the issue with an unresponsive left joystick.
- Update BIOS: Like with the left bumper, the joystick might be unable to communicate with the console due to an outdated BIOS.
Related articles:
- Games Crashing On ROG Ally? Here Are The Best Fixes!
- ROG Ally Cloud Recovery Stuck On The Checking [Quick Fix]
- Cloud Recovery Server Authentication Failed ROG Ally [Fixed]
- ROG Ally Not Detecting SD Card: How To Make It Work
Conclusion
Troubleshooting the ROG Ally left bumper not working problem is straightforward: check for mechanical issues and update the BIOS. If you previously opened the console, there is a chance you misplaced the rubber, so you better return it as it was. Don’t forget to be careful when checking for mechanical problems because there is a chance you might take your console back to the shop!