
Intro
Unity Engine introduces an awesome tools to empower your game development process. And even before an era of SRPs (Scriptable Render Pipelines), there was a good amount of solid features like today’s topic: Render textures.
In this post I’m going to explain to you how to use render textures in your game.
Project Setup
I have created a new project in Unity 2018.4 using legacy rendering, but the features I used work in SRPs too. I imported the Post processing Stack v2 from the package manager and set up some Color Grading, Ambient Occlusion and Vignette. For shaders, I used Amplify Shader Editor to add some visual effects on top of the render texture.
What is a Render Texture
Basically, render textures are images rendered by a specific camera. Setting one is super simple. You just have to create a new asset using Create > Render Texture and then assign it to your camera.
My advice is to create separate cameras for the render textures and for the gameplay.
This is how Render Texture Inspector looks like. I can control such parameters as size, color format and some standard texture options.
I can now use this asset like any other texture in the project.

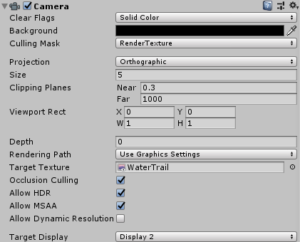
Next, I need to set up a camera and assign our render texture to the right input. It’s good to change Clear Flags to Solid Color and select black, so that everything not rendered by our camera remains in this particular color, and then set opacity for black to 0. I have also set up Culling Mask so that the camera captures only the things with the correct layer. This is not obligatory though, you can also render everything.
Setting the projection to orthographic serves for the purpose of only one example and is also optional.
Now the render texture will capture everything that the camera renders in real time.
Portal Texture
As for the first example, I have created render texture that shows what awaits us on the other side of the portal. It’s a simple way to demonstrate the nature of render texture and the manner to modify it in-game to get neat results.
This is how my setup for camera looks like (the camera is capturing another element described in this article). Then I’ve put the recorded render texture to a Standard Shader.
On top of this, I added another mesh with custom shader, this time, for refraction. This is how the shader looks like:
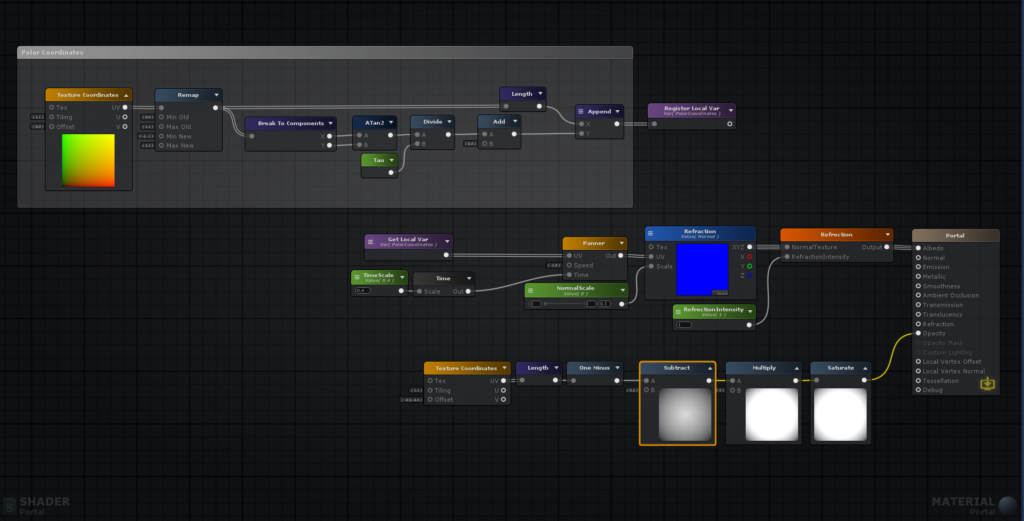
This shader includes such features as calculating polar coordinates and radial mask for opacity. I need polar coordinates to wrap the normal map to a circular shape maintaining its ability to offset over the UVs.
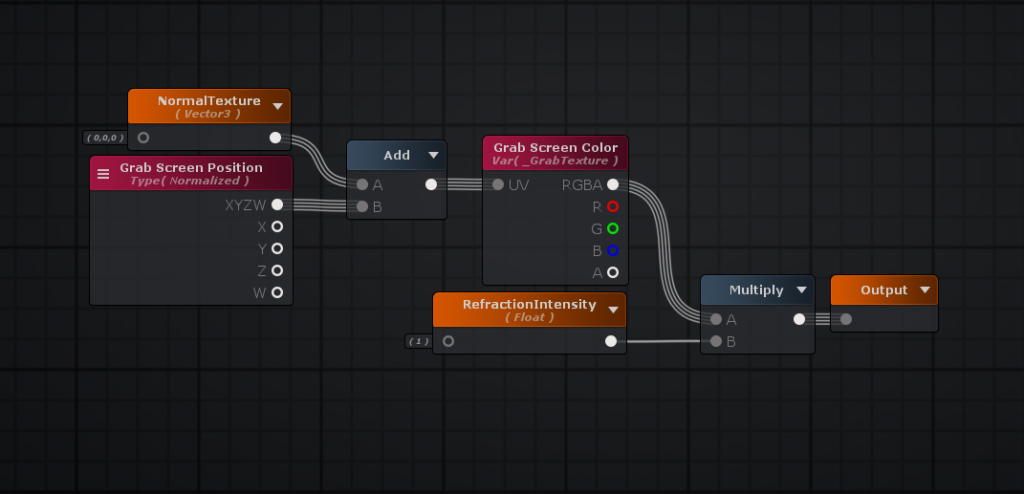
Inside Amplify, I have created a custom function for refraction setup to save some nodes in the graph. The custom node presents basic approach for the refraction effect. It brings some more depth to the effect and makes it more visually appealing.
And the outcome of the shader looks like this:
And that’s it. Setting up render texture is pretty straightforward and uncomplicated. Now you also have an idea how refraction in Unity works.
Water Trails
Render textures can also be used for water trails. I’m going to create a particle system and then transfer it to the render texture to plug it into a simple water shader.
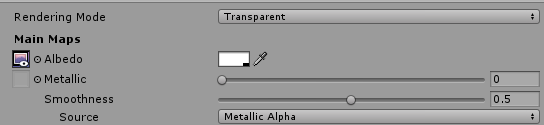
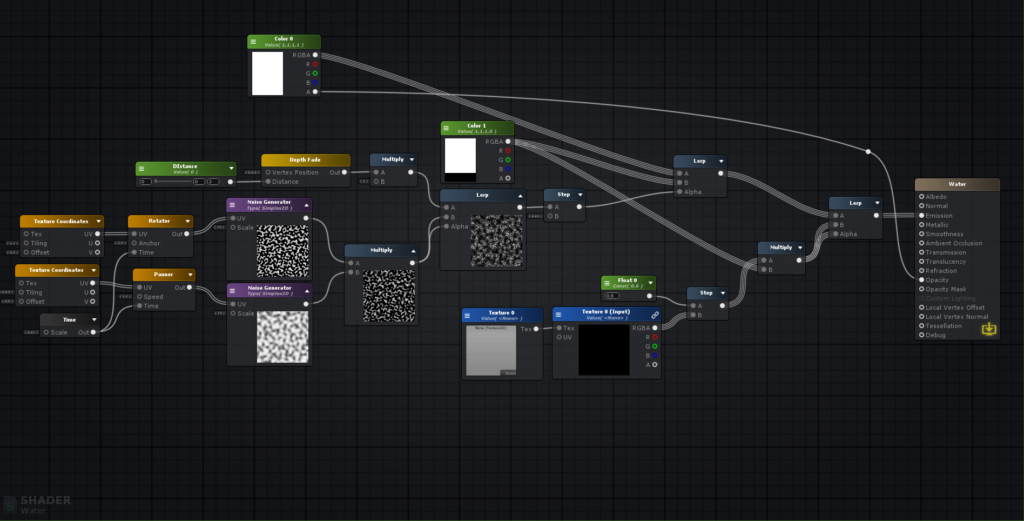
For simple water, I have created a shader using depth buffer to mask out noise textures on the edges of other objects. With a good amount of transparency, it will be sufficient to work as water.
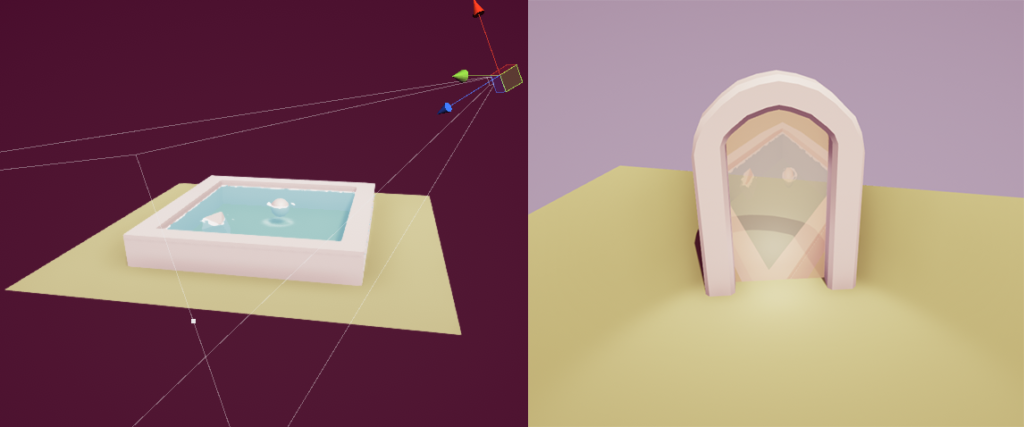
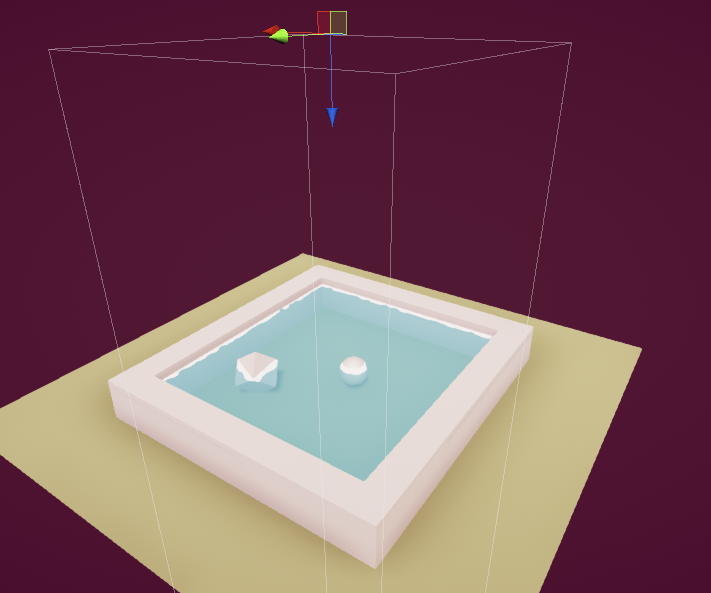
The setup for the render texture looks like in the picture below. I have created an orthographic camera above the water surface. This camera is only rendering a particle system on a specific layer and then saves it to the render texture. This way, it doesn’t have to render unnecessary elements twice, and the captured texture has black background, so I can use it as alpha.
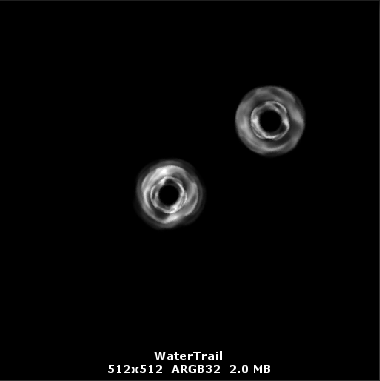
The texture I made is now ready to be eroded, which means that when I subtract alpha from the texture, it will gradually lose coverage.
Then the texture is plugged into the created shader. In the particle system, I’m using colour over lifetime to fade the basic texture, so in the shader it will erode upon using step function.
Upon plugging the render texture into the water shader, the trails on the water will appear in the same spot that the particle system is placed. Note that in Main Camera you should disable layer with particles so that the basic particle system is not rendered. Only its projection on the water surface will be visible.
And this is it. Now water trails will appear on the water surface and not on a separate object. The particle system will not be seen outside the water; otherwise, I would have to place trails when the object is in the water. This method saves time and makes trails only on the water surface.
Imagine that you place a normal map over the standard texture. It will make cool distortions on the water surface and give a more realistic result.
Conclusion
The Render Texture is a fairly straightforward tool to start with. It allows us to make both simple projections on planes and more difficult operations such as creating trails on the water surface. This feature opens many ways to step up your game (literally!). Be aware though that every in-game camera will cost you additional memory, so use it with caution and have fun!