Unity Cinemachine was launched along with Unity 2017.1 and was immediately praised by developers. Unity Cinemachine made the Unity Camera smart and lot of camera tricks that required coding could be done with ease. But beginner Unity users still create these effects with code because they are not familiar with Cinemachine. In this tutorial, we will try to break down and understand how Cinemachine works and how you can use it to do things with Unity camera.
What is Unity Cinemachine?
Unity Cinemachine is a dynamic, smart camera system for Unity that gives developers the tools to make camera shots that would otherwise require a lot of coding. It provides an easy-to-use and intuitive interface for creating and adjusting camera shots in real-time, allowing developers to quickly and easily create compelling and dynamic camera work for their games and interactive content. Cinemachine is designed to work seamlessly with Unity’s Timeline editor, allowing developers to create and edit their camera shots in a visual, non-destructive way.
Installing Cinemachine Package
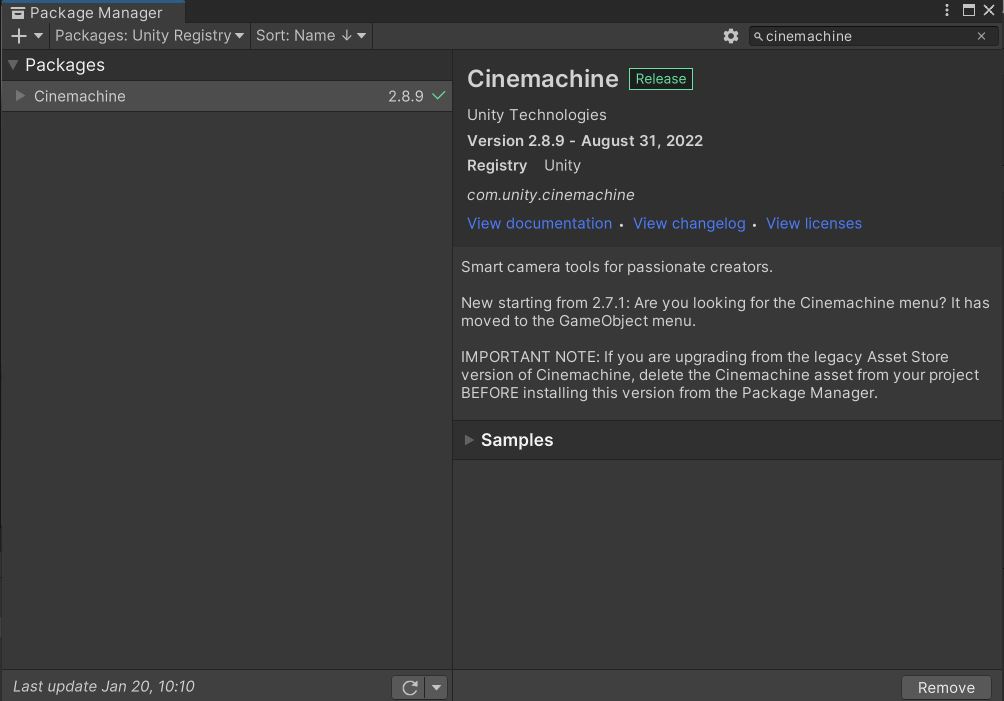
Cinemachine is added as a separate package but is not included by default in all Unity projects. To add the Cinemachine package,

- Go to Window>Package Manager.
- Select Unity Registry from the drop down in the left top corner.
- Search for Cinemachine and select the package.
- Click on Install, to install Unity Cinemachine.
What are Virtual Cameras?
Virtual Cameras are script based components with user adjustable settings that control the main camera in a game in Unity. Cinemachine doesn’t add any new cameras to the scene. Instead, it uses virtual cameras to control the view, position and other aspects of the scene camera.
To add a Virtual camera. Click on the + sign in the Hierarchy window, go to Cinemachine and select Virtual Camera. This will add a Virtual camera to the scene. Your scene view plays an important part in this as the Virtual camera is added to the place where your scene camera is positioned.
Properties of Virtual Camera

- Status Shows the current status of the Virtual Cam. At a given time, more than one virtual Cam can be active. If you want to test the virtual cam view then you can use the Solo button to make it temporarily live.
- Game Window Guides checkbox allows you to set whether or not you need guidelines in the game window.
- Save during Play allows you to save the changes made to a virtual cam during play mode.
- Priority is taken into consideration when more than one virtual camera is live.
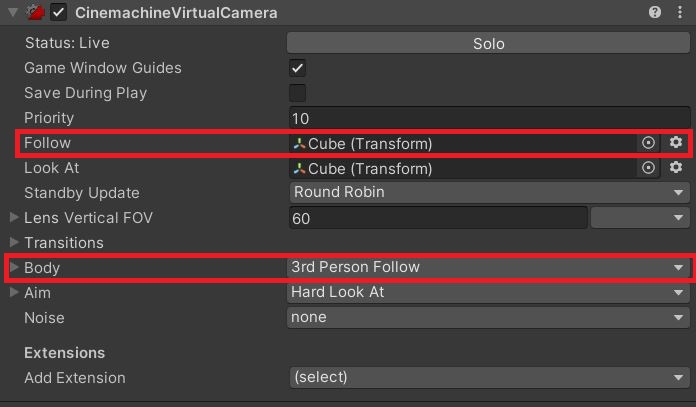
- Follow property takes in a game object that the virtual camera needs to follow. Other setting of camera follow needs to be set under the Body property.
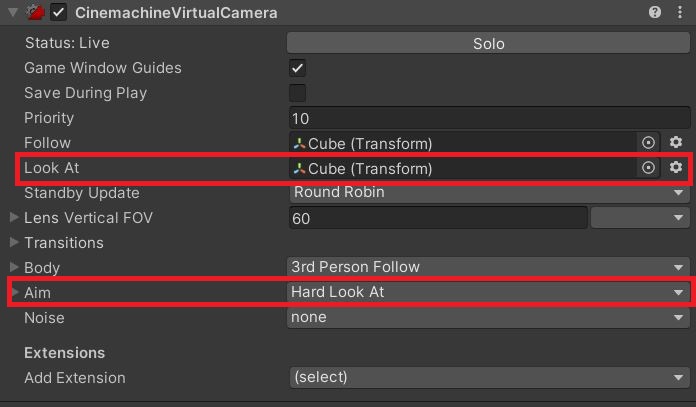
- Look At takes in a game object that the virtual camera needs to look at. This property can be tuned under the AIM property.
- Standby Update specifies how the live virtual cameras in the scene will get updated.
- Lens Property allows you to set the Camera lens properties like FOV, near clip plane and far clip plane.
Body Options
- Do Nothing: does not move the Virtual Camera.
- 3rd Person follow: Pivots the camera horizontally and vertically around the player, to the Follow target.
- Framing Transposer: moves in a fixed screen-space relationship to the Follow target.
- Hard Lock to Target: uses the same position at the Follow target.
- Orbital Transposer: moves in a variable relationship to the Follow target, optionally accepting player input.
- Tracked Dolly: moves along a predefined path.
- Transposer: moves in a fixed relationship to the Follow target.
Aim Options
- Do Nothing: Do not procedurally rotate the Virtual Camera.
- Composer: Keep the Look At target in the camera frame.
- Group Composer: Keep multiple Look At targets in the camera frame.
- Hard Look At: Keep the Look At target in the center of the camera frame.
- POV: Rotate the Virtual Camera based on the user’s input.
- Same As Follow Target: Set the camera’s rotation to the rotation of the Follow target.
Noise
Noise allows you to simulate Camera shake in real world. You can work with the build in Basic Multi Channel Perlin noise profile or you can create your own.
Cinemachine Brain
Cinemachine Brain component is added to the Unity Camera when a new virtual camera is added to the scene. Unity Cinemachine Brain is the component that decides which virtual camera will control the main camera in the scene. It is also responsible for the change between virtual cameras. There are some settings that you can set to control these transitions.
Making the Camera Look at an Object using Cinemachine
Generally, to make the camera look at an object, you need to find the position of the object every frame and then rotate the camera to the position. This is made very simple with Unity Cinemachine. All that you need to do is drag and drop the object to the virtual camera’s Look At parameter and set the Aim settings to hard look.
Making the Camera Follow an Object using Cinemachine
Similar to Look at, you can also make the Camera follow the object by dragging and dropping the object to the Follow parameter. Then you can fine tune the properties using the body settings.
This Follow settings can be used for more than just follow the gameobject. You can use shoot cinematic shots around the player using different settings in body parameter.
Creating a Cinemachine track
After Installing the Cinemachine package follow the steps below.
Adding Virtual Camera to your scene
- Go to Gameobject>Cinemachine>Virtual Camera
- A virtual camera gets added to your scene and a CineMachineBrain component is added to your main camera.
- Add three virtual cameras to the scene.
- Place them in three different locations and set them in the view you want.
Creating a Timeline
- Click Create an Empty Gameobject.
- Go to Windows>Sequencing> Timeline.
- Select the Gameobject and click create on the Timeline window.
- Save the timeline with any name.
Adding a Cinemachine track
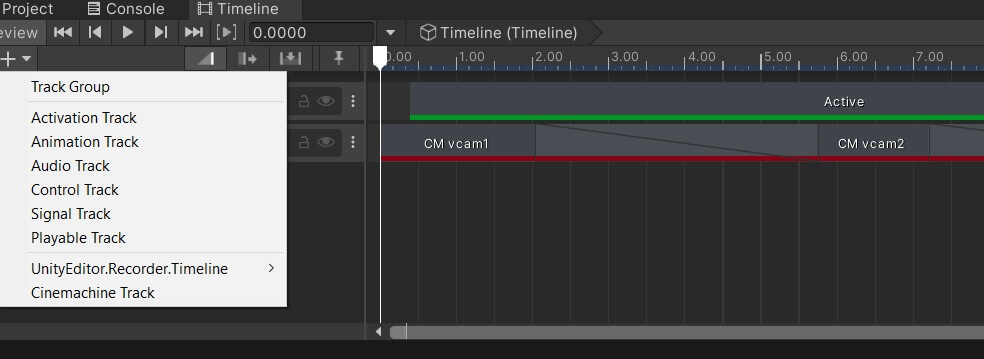
- Click on the + button.
- Select Cinemachine Track.
- Drag and drop the main camera to the Cinemachine Track.
- Drag and drop the virtual cameras to the Timeline.
- You can overlap the virtual cameras to make a smooth transition between them.
- I am adding an Activation track for the fire particles.
- Adjust time and overlap period to get the best effect.
That’s it, play the game and you should see the cutscene. Here is the end product of my tutorial.