
Hello, BGFX!
by Hristo Iliev |
Published on
category C / C++
In this article I will show you a basic example using my BIG2 stack and it could be also taken as a “Hello, World!” tutorial for BGFX. I will mostly focus on the bgfx library an usage and we will be drawing a simple triangle to the screen.
Table of Contents
Project Introduction
If you saw my last article I got you introduced into a simple stack of libraries for easy graphical programming. It is also related to this article about custom game engine packages that you can use when creating your own engines. Here I will show you how to easily use the so called BIG2 stack to work on your next C++ graphical project. You could of course use this for UI or in games.
To start you need to create a CMake project that depends on BIG2. To do this I have the following structure:
- triangle
- shaders
- varying.def.sc
- vs_basic.sc
- fs_basic.sc
- src
- main.cpp
- CMakeLists.txt
- shaders
- CMakeLists.txt
Then in the root CMakeLists.txt file we will add a very simple project information and dependency on BIG2 using the following code:
cmake_minimum_required(VERSION 3.22)
project(hello-triangle)

include(FetchContent)

fetchcontent_declare(
        big2
        GIT_REPOSITORY "https://github.com/Paper-Cranes-Ltd/big2-stack.git"
        GIT_TAG "v0.1.2"
        GIT_SHALLOW TRUE
)

fetchcontent_makeavailable(big2)

add_subdirectory(triangle)
If you are unfamiliar with how I approach dependencies you can take a look at previous articles that I wrote on the topic. There are also other tutorials on this site about CMake but if you want the full visual experience then check out my course on the topic.
To finish with the CMake part we will look also at the code inside the triangle directory:
project(triangle)

add_shaders_directory("${CMAKE_CURRENT_SOURCE_DIR}/shaders" SHADERS_TARGET_NAME)

add_executable("${PROJECT_NAME}" src/main.cpp)
target_link_libraries("${PROJECT_NAME}" PUBLIC "${SHADERS_TARGET_NAME}")
If you now add a simple main function inside main.cpp you can get to compile this program by running the terminal commands for configuring & building with cmake:
cmake -S . -B ./build
cmake --build ./build
Creating a window
Next part of this tutorial is to create a window. This is very simple and can be achieved through the glfw library. We open up main.cpp and write the following code to have a window open:
#define GLFW_INCLUDE_NONE
#include <GLFW/glfw3.h>
#include <iostream>

static void GlfwErrorCallback(int error, const char* description)
{
    std::cerr << "GLFW Error " << error << ": " << description << std::endl;
}

int main(int, char**)
{
    glfwSetErrorCallback(GlfwErrorCallback);
    if(!glfwInit())
    {
        return 1;
    }

    GLFWwindow* window = glfwCreateWindow(800, 600, "Hello, BGFX!", nullptr, nullptr);
    if (window == nullptr)
    {
        glfwTerminate();
        return 1;
    }

    while (!glfwWindowShouldClose(window))
    {
        glfwPollEvents();
    }

    glfwDestroyWindow(window);
    glfwTerminate();
}
This should open up a nice empty window with a white background. Nothing will be drawn and this is expected. The only implemented functionality is that you can close the window and this will terminate the program.
Adding BGFX
To work with BGFX we need to set up a few things. First we need to initialize it and give it the native window. We can also select the backend graphics renderer that we prefer though I will use the default one. In the example I will use some functionality that you can find in the big2 repository for setting up the native window. So here we go with the changes that we need to add:
First we add new headers
// Headers
#include <big2.h>
#include <cstdint>
Second thing is we add some code to initialize bgfx:
// Inside main after window is created and before main loop
bgfx::Init init_object;
big2::SetNativeWindowData(init_object, window);

std::int32_t width;
std::int32_t height;
glfwGetWindowSize(window, &width, &height);
init_object.resolution.width = static_cast<uint32_t>(width);
init_object.resolution.height = static_cast<uint32_t>(height);
init_object.resolution.reset = BGFX_RESET_VSYNC;

if (!bgfx::init(init_object))
{
    return 1;
}

// We will use this to reference where we're drawing
const bgfx::ViewId main_view_id = 0;

// This is set once to determine the clear color to use on starting a new frame
bgfx::setViewClear(main_view_id, BGFX_CLEAR_COLOR, 0x000000FF);

// This is set to determine the size of the drawable surface
bgfx::setViewRect(main_view_id, 0, 0, static_cast<std::uint16_t>(width), static_cast<std::uint16_t>(height));
And lastly we setup some draw code to clear the screen and render the frame inside the while loop:
// Inside the main loop after glfwPollEvents
// Check if window size changed and update the view respectively
std::int32_t display_w, display_h;
glfwGetFramebufferSize(window, &display_w, &display_h);
bgfx::reset(display_w, display_h, BGFX_RESET_VSYNC);
bgfx::setViewRect(main_view_id, 0, 0, bgfx::BackbufferRatio::Equal);

// Ensure the view is redrawn even if no graphic commands are called
bgfx::touch(main_view_id);

// End the frame
bgfx::frame();
This should be enough to get a black frame drawing onto our window.
Drawing a triangle
In this last section we will tackle the complex process of drawing a triangle. To do this we need to compile vertex and fragment shaders and then pass data to the GPU asking it to draw a few vertices with the compiled shaders.
Bgfx is a bit specific around shaders and requires you to write on a modified GLSL. This modified glsl is based around a few concepts – a file called varying.def.sc which determines the in and out attributes of the shaders, a special tool called shaderc which compiles the input shader files, and some predefined uniform variables. We will not be looking at the predefined uniforms in this article since we only want to draw a triangle.
Shaders
To start we need to detemine the varying.def.sc file. This file has a special syntax and determines the in and out parameters between the vertex and the fragment shader. We currently want to draw a colored triangle on a 2D screen. To do this we would need two in parameters as vertex attributes: a position and a color. We would set the position in the vertex shader and pass the color to the fragment shader so we have one out paramenter for a color.
vec2 a_position  : POSITION;
vec4 a_color0    : COLOR0;

vec4 v_color0    : COLOR0    = vec4(1.0, 0.0, 0.0, 1.0);
Since we’re on the theme about shaders anyway let’s also define the vertex and fragment shaders. For the vertex shader we want to set the gl_Position and also pass the color to the out parameter. We also need to define which input and output parameters we will use from the varying.def.sc. And one more thing is that we need to include bgfx’s shader header which defines common functions that will get translated to the respective shading language for each renderer. Let’s not waste any more time and write down our shader vs_basic.sc:
$input a_position, a_color0
$output v_color0

#include <bgfx_shader.sh>

void main()
{
	gl_Position = vec4(a_position, 0.0, 1.0);
	v_color0 = a_color0;
}
As you can see we define the input and output variables for the shader. Then we include the bgfx’s header and lastly we just set the position and pass the color for the current vertex to the fragment shader.
Next on the fragment shader we need to set the color for each fragment (pixel):
$input v_color0

#include <bgfx_shader.sh>

void main()
{
	gl_FragColor = v_color0;
}
Here the v_color0 is an input parameter since it is coming from the vertex shader. We include the bgfx_shader.sh again and set the gl_FragColor with the value coming from the vertex shader. This value will be interpolated. Since we’re drawing 3 vertices which create an triangle area (called a face) inside this face the color will be some medium value between the colors of each of the triangle points. So if we have a red point and a blue point in our triangle the pixels between these points will be violet.
This is everything we need to do for our shaders. The CMake build system will pick up the shaders from the shaders directory and embed them into our application because of this line here:
add_shaders_directory("${CMAKE_CURRENT_SOURCE_DIR}/shaders" SHADERS_TARGET_NAME)You will be able to use these embedded shaders with the help of some bgfx utility functions and by including them through the following include statements (add them on top of the main file):
// with includes
#include <big2/embedded_shader.h>
#include <generated/shaders/examples/all.h>

static const bgfx::EmbeddedShader kEmbeddedShaders[] =
        {
                BGFX_EMBEDDED_SHADER(vs_basic),
                BGFX_EMBEDDED_SHADER(fs_basic),
                BGFX_EMBEDDED_SHADER_END()
        };
And we can compile the shaders by adding the following code in the main function somewhere after bgfx’s initialization and before the main loop:
// after bgfx init

bgfx::RendererType::Enum renderer_type = bgfx::getRendererType();
bgfx::ProgramHandle program = bgfx::createProgram(
        bgfx::createEmbeddedShader(kEmbeddedShaders, renderer_type, "vs_basic"),
        bgfx::createEmbeddedShader(kEmbeddedShaders, renderer_type, "fs_basic"),
        true
);

// before main loop
Buffers & Data
Next thing we need to do is that we need to define our layout. During the shader compilation we already defined that we will be passing two values to our shader. The 2D position and the color. To do this we can define the following struct:
// with includes
#include <glm/glm.hpp>

struct NormalColorVertex
{
    glm::vec2 position;
    uint32_t color;
};
Next inside the main function we need to add a few more statements. First we need to define our layout:
bgfx::VertexLayout color_vertex_layout;
color_vertex_layout.begin()
                   .add(bgfx::Attrib::Position, 2, bgfx::AttribType::Float)
                   .add(bgfx::Attrib::Color0, 4, bgfx::AttribType::Uint8, true)
                   .end();
Here you can notice that we pass four unsigned integers with a size of 8 bits. These will match the 32 bit size in our struct. Otherwise it is important to define them in the same order as in the struct. With this layout we can now define our data and pass that data to the GPU.
NormalColorVertex kTriangleVertices[] =
        {
                {{-0.5f, -0.5f}, 0x339933FF},
                {{0.5f, -0.5f}, 0x993333FF},
                {{0.0f, 0.5f}, 0x333399FF},
        };

const uint16_t kTriangleIndices[] =
        {
                0, 1, 2,
        };

bgfx::VertexBufferHandle vertex_buffer = bgfx::createVertexBuffer(bgfx::makeRef(kTriangleVertices, sizeof(kTriangleVertices)), color_vertex_layout);
bgfx::IndexBufferHandle index_buffer = bgfx::createIndexBuffer(bgfx::makeRef(kTriangleIndices, sizeof(kTriangleIndices)));
This will create a triangle with coordinates for the middle of the drawable screen. We pass some hex colors also to each of its points. I also define an index buffer with one set of indices to draw our triangle. If you just want to order one set of vertices you don’t really need an index buffer in this case but I wanted to feature them since they are important for most models.
Drawing a Triangle
The last part of this tutorial is to write the draw code to render our triangle. Since the screen is cleared on each frame – each frame we need to tell our triangle to draw. So we go into the main loop and write the following code:
bgfx::setState(
        BGFX_STATE_WRITE_R
                | BGFX_STATE_WRITE_G
                | BGFX_STATE_WRITE_B
                | BGFX_STATE_WRITE_A
);

bgfx::setVertexBuffer(0, vertex_buffer);
bgfx::setIndexBuffer(index_buffer); // not needed if you don't do indexed draws
bgfx::submit(main_view_id, program);
This sets that we’re rendering colored output and we also set our vertex and index buffers. Then we select the program that we use to render this and submit the graphics commands.
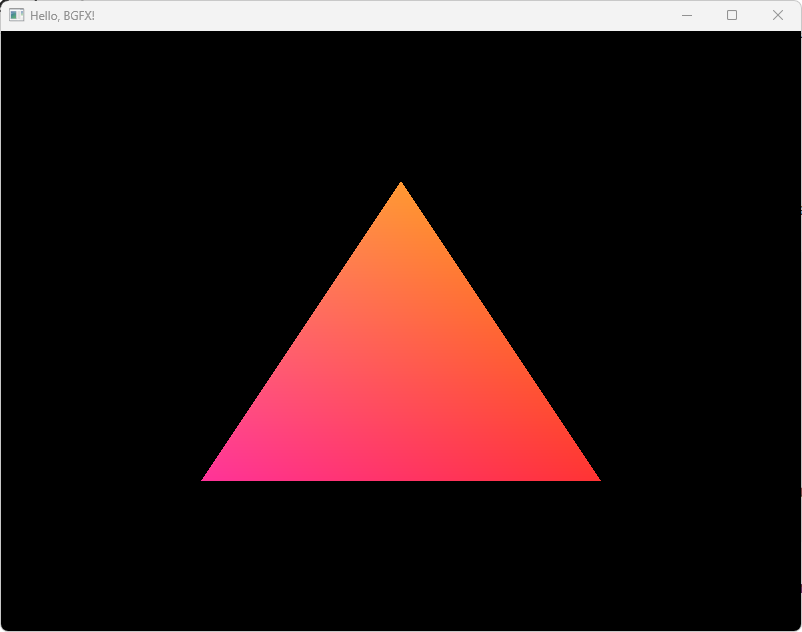
The end result should look like this:
Conclusion
You can now render things out by using the bgfx library. This way you no longer need to search for abstractios between mutiple APIs and your code will be cross-platform almost by default. If you’re interested I will be posting more articles in the future and you can subscribe to the site’s newsletter or push notifications.
If you have any problems check out the original code in this example.

Interactive UI Programming with ImGui
You can get my course on ImGui that covers the basics of UI programming through imediate mode UIs. You can get the best price from here:

Graphics Programming with Vulkan
You can get my course on Vulkan which covers the basics of graphics programming through the Vulkan specification. You can get the best price from here:

I need to ask this. Why did you not program a C++ API from the ground up? With current design, we'll need to create a wrapper library to add minimal safety at compile-time. Despite its toll on performance and syntax, this wouldn't provide any safeguards against possible bugs down the C implementation which are quite probable. Had the project been designed in C++, using core guidelines, a wrapper for C would still be possible; but the code was safer, faster, and more maintainable.

Hey, indeed I am working on a course and there will be more basic information there. If you want to learn more about shaders until then, there is a really good site called Learn OpenGL

That's really good stuff. I didn't understand all of it - never really worked at that level, specially the shaders parts - but if you were to create a course where you go through some fundamentals and then create a simple application, a game, whatever, I'd buy it haha. Your CMake Course is really good, and I am sure this one would be too. Be well, Hristo. Greetings from Germany.
Leave a comment