

Valorant Critical Update Required: Quick Fixes
If you are experiencing Valorant Critical Update Required error on PC, check out the solutions here in this article. Good Luck 😉
Valorant is a first-person tactical hero shooter game developed and published by Riot. Players of this game complain about the daunting message, “Critical Update Required” which they encounter at launching or during gameplay.
However, if you find yourself battling with the Valorant Critical Update Required problem on your PC, we have discussed quick fixes that are effective in resolving this issue and improving your gaming experience.
Why am I getting critical updates required in Valorant?
The Critical Update Required error in Valorant is a problem not from the developer’s end. Usually, the error indicates that your PC, specifically your Windows Operating System, has run into a problem and consequently crashes Valorant.
You can encounter this problem at any stage of the game, during gameplay, or at startup. However, you should implement all the fixes discussed in this article until the problem becomes resolved and you enjoy a seamless gameplay in Valorant.
How do I fix critical updates required in Valorant?
There are a few proven solutions that work, but before we delve into them, try out the following troubleshooting tips:
- Unplug all peripheral connections
- Run the game as an administrator
If you are unable to resolve the problem after trying out the aforementioned tips, implement the proven fixes highlighted and discussed as follows:
- Update Graphics Drivers
- Run Valorant in Compatibility Mode
- Disable Windows Defender Firewall
- Perform Clean Boot
1. Update Graphics Drivers
Keeping your graphics card drivers updated is key to optimal performance and compatibility with games like Valorant. An outdated driver can impact several issues, including the Critical Update Required in Valorant.
Therefore, you should update your graphics drivers by the steps below:
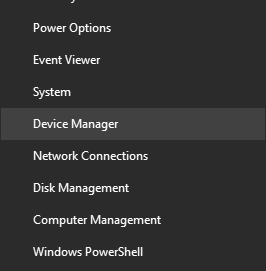
- Open Device Manage on your PC from the quick link by pressing Windows key + X on your keyboard.
- Double-click on Display adapters to expand your graphics drivers.
- Right-click on your graphics driver and select Update driver from the context menu.

- Click on the Search automatically for driver option, and wait for the drivers to be installed.
- Restart the PC afterward, then launch Valorant to confirm that the problem has been resolved.
Perhaps you are having a challenge with the steps mentioned above; use Outbyte Driver Updater to update your graphics drivers automatically.
2. Run Valorant in Compatibility Mode
Time needed: 3 minutes
You may also need to set Valorant to run in compatibility mode with a previous Windows version, this will optimize the game for a smooth running performance. Follow the steps outlined below to run Valorant in compatibility mode:
- Locate the installation directory for Valorant on your PC.
- Right-click on VALORANT.exe and select Properties from the context menu.
- Select the Compatibility tab and in the Compatibility mode section, check “Run this program in compatibility mode for:”

- Select Windows 8 from the option that follows.
- Save the changes by clicking OK and Apply. Restart your PC afterward and launch Valorant.

3. Disable Windows Defender Firewall
Windows Defender Firewall can block legitimate traffic and causes performance lag which may result in crashes. Disabling the Windows Firewall on your PC generally helps you improve your gaming experience in Valorant. Follow the steps below:
- Open the Control Panel on your PC and go to System and Security < Windows Defender.
- Select Turn Windows Defender Firewall on or off from the left panel of the screen.
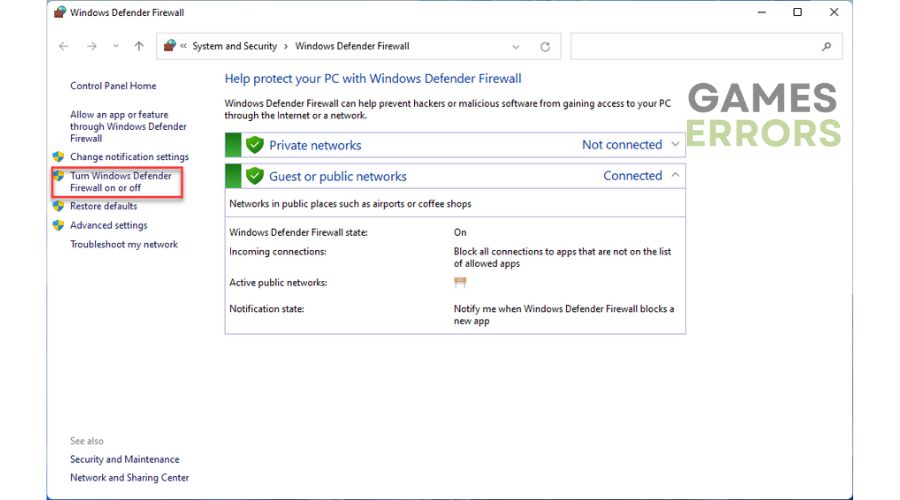
- Choose the Turn off Windows Defender Firewall (not recommended) for both private and public network settings option.
- Save the change by clicking OK. Restart your PC and launch the game again.
4. Perform Clean Boot
The Valorant Critical Update Required problem may also be a result of conflicting services or programs. To ascertain the program responsible for such a frustrating experience, you should perform a clean boot operation. Follow the steps below:
- Open the Run command box by pressing the Windows key + R on your keyboard.
- Type msconfig in the box and press Enter to open the System Configuration window.
- Click on the Services tab, then check the box next to Hide all Microsoft services.
- Click on Disable all at the bottom left corner of the window.
- Click on the Startup tab and select Open Task Manager.
- Click the Startup tab to show all Startup apps on your PC.
- Right-click each of the apps on the list and select Disable.
- Exit the Task Manager window and navigate to the System Configuration window.
- Save the changes by clicking OK, then Restart your PC in a clean state and launch the game.
If this solves the problem, go back to steps 7, 8, and 9, then enable the programs one after the other to determine the one responsible for the Valorant Critical Update Required problem on your PC.
Related Articles: