Daily news, dev blogs, and stories from Game Developer straight to your inbox
Sponsored By
Featured Blog | This community-written post highlights the best of what the game industry has to offer. Read more like it on the Game Developer Blogs.
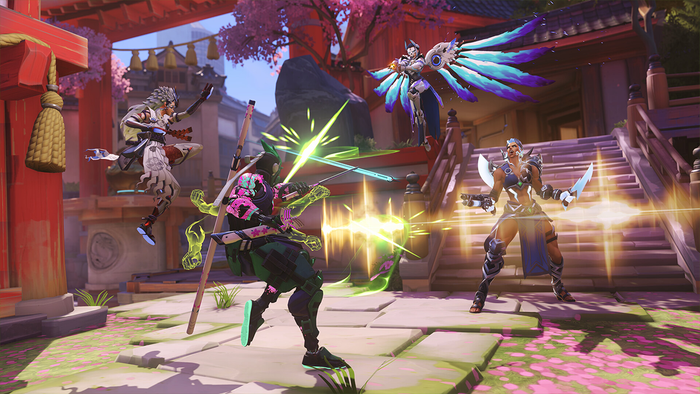
Principle Graphics Engineer Ben Hopkins looks into the tools, tricks, and techniques used to bring Owlchemy Labs’ latest VR game Cosmonious High to the Quest 2.
9 Min Read
Introduction
Principle Graphics Engineer Ben Hopkins looks into the tools, tricks, and techniques used to bring Owlchemy Labs’ latest VR game Cosmonious High to the Quest 2.
Custom Tools
When it comes to the tools we use at Owlchemy Labs, we live by the credo, “If it doesn’t exist, build it!”. Nowhere is this as important as performance and optimization. For the Quest 2 version of Cosmonious High, we built two new tools of note; the A/B Test Framework and the Multisample Anti Aliasing (MSAA) Cost visualizer.

Wanting to squeeze as much performance out of the Quest’s GPU as possible required finely tuned optimizations to shaders and rendering tech. RenderDoc is our most commonly used tool for GPU profiling and debugging on Quest; however, the timings it returns are relative to one another and not necessarily reflective of real-world cost.
Desiring more accurate GPU profiling, we wrote our benchmarking tool we call the A/B Test Framework. Using a collection of runtime components and editor code, we can quickly set up test suites (Scenes) containing any number of individual tests (GameObjects), which can then be automatically built, pushed, and run on the device in a single click. Once the test has finished running, results can be pulled from the device, saved to a special project asset, and displayed as a filterable graph.
While the AB Test component placed on each GameObject representing a test exposes a fair amount of additional conveniences, the underlying premise for testing is simple. At runtime:
Disable all head tracking and fix foveated rendering
Deactivate all test GameObjects
For each test in the suite
Activate the test
Every Update adds AppGPUTime to a list
Several seconds later, deactivate the test
Calculate the min, max, and average AppGPUTime
Write test results to a JSON file on the device
When creating a test suite, the goal is for all tests to be deterministic and identical except for the element you want to profile and compare. A typical example would be comparing several different optimization options for a specific shader. In this case, we would duplicate the shader for potential optimization or use keywords in a single shader to enable/disable each one. The suite for this scenario would contain a test for each optimization with a parented MeshRenderer and a material using the appropriate shader/keywords. When this test suite is run on the device, the results will demonstrate which optimization is the fastest and the exact cost for rendering the assigned mesh.

Antialiasing is extremely important in VR as stair-stepping and shimmering pixels caused by the relatively low resolution and optics of the HMD can be a real immersion breaker. We use MSAA x4 in all of our Quest titles because it can be considered an optimized version of super sampling, with each pixel storing a specific number of subsamples. When rasterizing a triangle, a depth test is performed at the higher resolution; however, the pixel shader is still called per pixel, with the result then written to each subsample covered by the triangle. While this approach makes MSAA essentially free inside the triangle, it is not free if a pixel’s subsamples are covered by more than one triangle. For this reason, highly dense meshes and meshes rendered shrunk in screen space can be real problem areas when it comes to MSAA cost.
To help the team tune the mesh level of detail, we wrote a tool to visualize and quantify MSAA cost in a scene. The MSAA Cost Visualizer renders a specified scene view using a special shader that records coverage via the SV_Coverage semantic, the output of this render is then color coded to convey the number of pixel shader invocations per pixel. A compute shader is also run per render to count the number of 1, 2, 3, and 4 sample pixels to display estimated cost metrics in the tool.

Using the MSAA Cost Visualizer, anyone on the team could very quickly identify MSAA hotspots by simply moving around the scene view, looking for large areas of yellow/red pixels. Finding them meant that general mesh density could be reduced or LOD distances tweaked.
Some Bite-size Tricks!
Regarding Quest rendering performance, we apply some common optimization strategies across the board, such as reducing drawcalls and minimizing texture reads. However, to maximize impact, we often look for unique, game-specific requirements that could be significantly sped up with creative thinking. Below are a few examples of such tricks we deployed when building Cosmonious High for Quest 2.
Optimized Texture Atlasing
In Cosmonious High, we have a lot of pickup-able objects, and we also give the player a backpack tostore and retrieve items. Giving players the freedom to transport any number of items from one location to another means that it is possible for every object in the game to end up in a single scene. In previous games, we’ve relied on basic texture packing to create atlases, attempting to group objects based on the likelihood of them being in close proximity to one another within a single scene. We needed to do better with Cosmonious High containing more items and greater rendering complexity.
The first step towards our optimized atlas generation was to find a solution that could optimally pack UV islands as complex shapes instead of the simpler bounding box approach. Eventually, we found the Blender plugin UV Packmaster 3, which can pack any kind of shapes (including with holes) and is also blazingly fast with parallel CPU and GPU support. After writing some Unity editor code and Blender Python scripts, we found a solution that can non-destructively pack around 100 unique objects into a single texture with only a few clicks!

The general pipeline looks like this:
Select all prefabs you want to include in an atlas.
Our editor code generates a special asset for tracking prefabs and references for this atlas and exports an FBX containing all meshes found within the prefabs.
Importing this FBX into Blender, our custom script sets up each mesh for processing and then runs UV Packmaster’s algorithm, packing all meshes’ UVs into a single secondary UV set.
Exporting the updated FBX from Blender, our editor code finally bakes texture and optionally shading from the original UVs to the newly packed UVs in our new atlas.
Finally, new meshes are created containing the updated Uvs, and all prefabs are updated to reference these new meshes.

Roaming the halls of Cosmonious High are many 3D shape creatures called Pliks. These creatures come in 3 varieties; circle, square, and triangle, and use our special 2.5D shader that renders them with correct perspective while appearing as a 2D plane when viewed in stereo. Wanting to minimize Plik drawcalls while not relying on dynamic batching, we devised an alternative solution: packing the three shapes into a single mesh and reconstructing in the vertex shader!

To generate this special mesh, we first ensured that each original shape mesh used the same number of vertices, then used the Blender shrinkwrap modifier to turn the circle mesh into each of the other two shapes. Once exported from Blender, some editor code took 2 of the meshes and packed their vertex positions and normals in several UV sets of the 3rd mesh. Inside our Plik shader, we now interpolate the positions and normals based on a single instanced property allowing us to morph between shapes smoothly!

Being a high school in space, our skyboxes in Cosmonious High contain planets, and some of these planets have large numbers of asteroids orbiting them. For these asteroid belts, we used regular Unity particle systems; however, we didn’t want to use mesh particles, instead relying on basic textured quads. Wanting our fake asteroids to be lit, we initially used normal maps. We later realized that we could forgo that cost by simply calculating the normal instead. Our asteroids are all generally spherical, so we calculate the world space particle center in the vertex shader and pass that to the pixel shader. In the pixel shader, we subtract the particle center from the pixel position, normalize it, and use the resulting vector as our normal!


Our skybox shader in Cosmonious High produces dynamic animated nebulas. These awesome semi-procedural nebulas require several texture reads and some math to calculate the underlying animated noise that drives them. Considering that space is largely visible in many scenes, this skybox shader is definitely costly, so we looked for an alternative approach.

Rather than rendering a sky sphere, we generate a custom mesh and project it to the far clip plane. The special mesh used for sky rendering is a 1x1 quad tessellated so that geometric density is highest in the center of view and falls off as we move towards the edges. All noise calculations are transferred to the vertex shader with the pixel shader using the interpolated result for shading. By tuning the tessellation of this mesh, we can control the cost-to-quality ratio for any area of a frame, essentially our own form of fixed foveated rendering specifically for sky rendering.

In Cosmonious High, both the player and the creatures around them are capable of painting over every surface in the world. Painting can mean actual paint (via the Prismi’s fluid power) or the result of various other reactions such as fire and ice. This capability is powered by one of our internal systems called SplatTech. Bringing SplatTech to Quest was a monumental endeavor that resulted in a complete rewrite that relied on many (many) optimization tricks working in unison. You can read/watch more about SplatTech on the Owlchemy Blog and the Unity YouTube channel!
Ker-SPLAT: World Interactions in Cosmonious High | Owlchemy Labs Blog
Ker-SPLAT: Overhauling world interactions in Cosmonious High | Unite 2022
Takeaways
When maximizing performance, particularly on low-powered devices such as the Quest, there is no one size fits all solution. Every game is different, and within your game, many areas are waiting for a creative solution to squeeze out a little more performance. Use all the tools to discover these areas and prove that any optimization has a positive impact. And if the tools you need don’t exist, build them!
Read more about:
Featured BlogsAbout the Author(s)
You May Also Like