
Hueneme Negev in MW2 & Warzone 2: Here’s How You Can Fix It
This connection-related error occurs for players on different platforms. You can fix it regardless if you are a PC or console gamer! 💻🎮
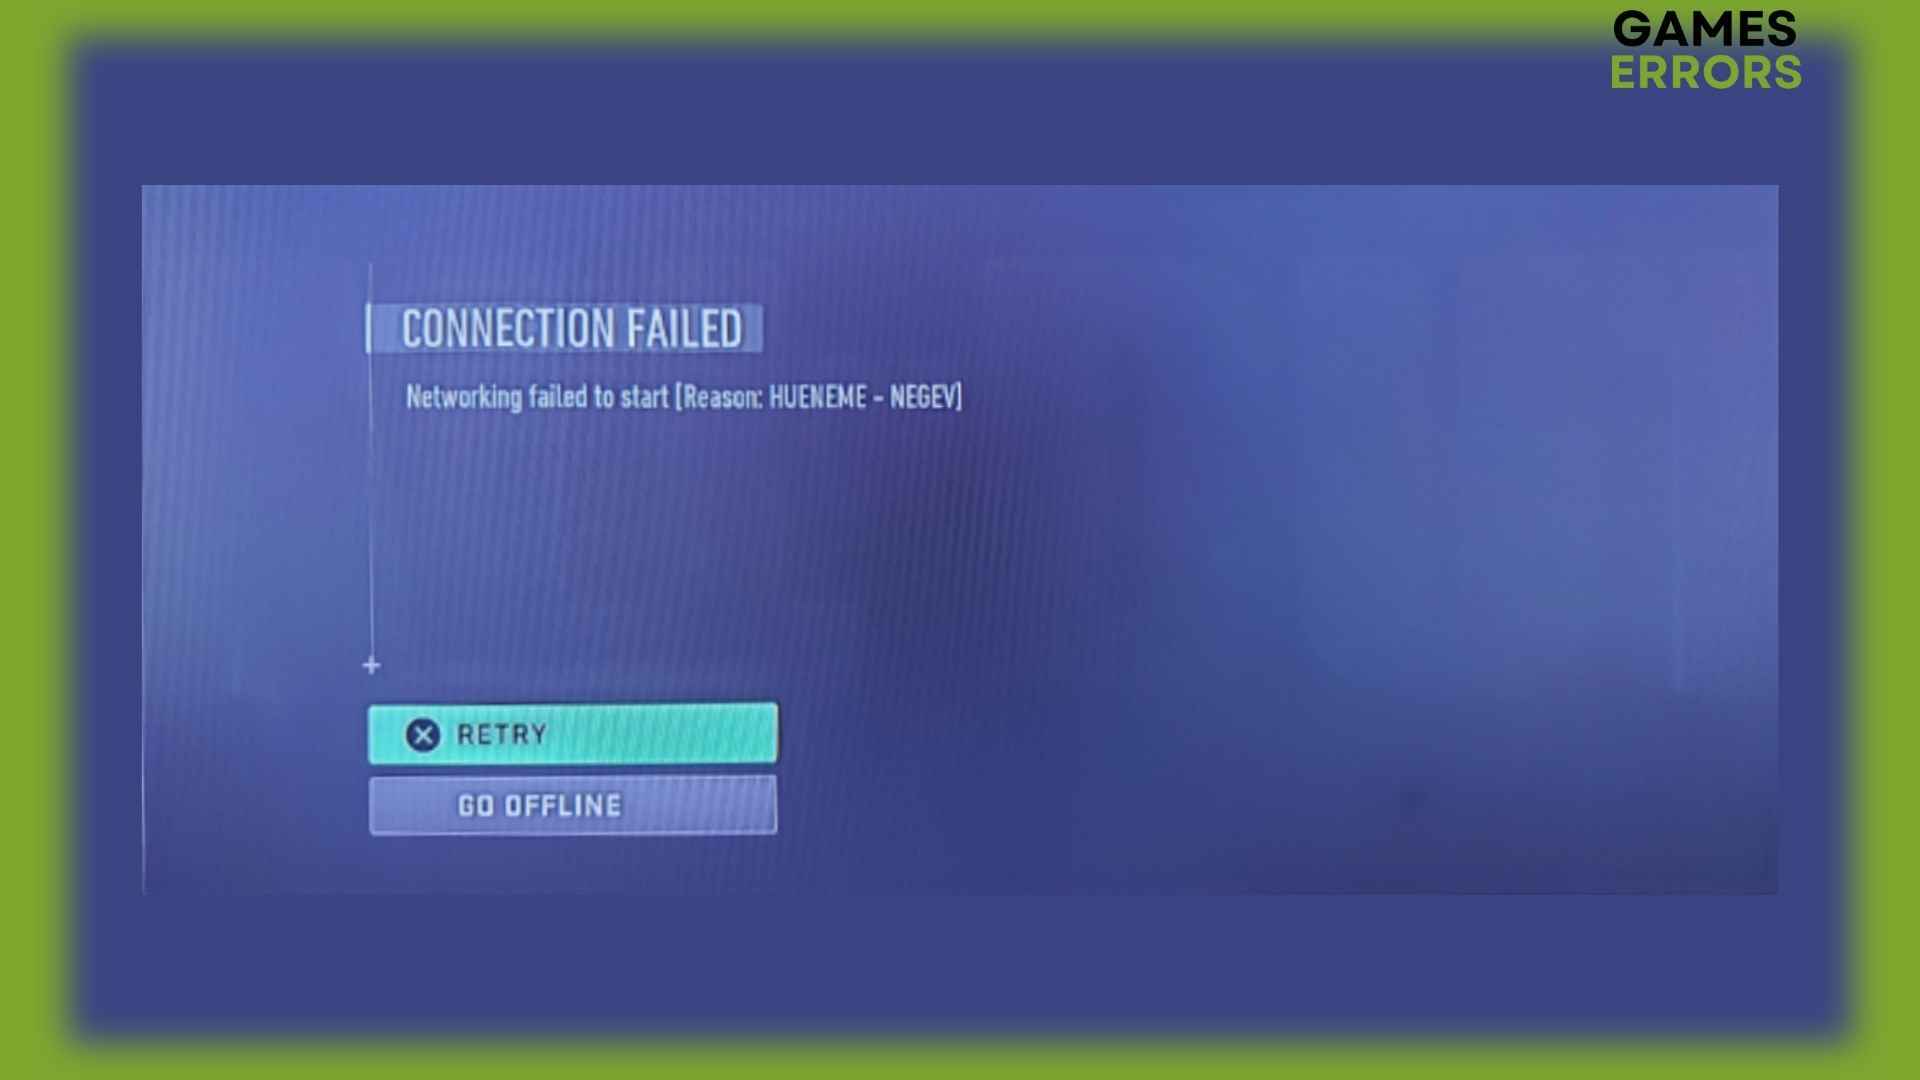
The “Hueneme Negev” error is a prevalent issue affecting players trying to connect to the game servers of both Modern Warfare 2 and Warzone 2. This connection error, displaying as ‘networking failed to start reason Hueneme Negev’, has been reported across various platforms including PC, Xbox, and PlayStation 5. In response to its widespread nature, we’ve delved into its most frequent triggers and have compiled a list of potential remedies.
What is Hueneme Negev error?
Many gamers frequently encounter the “Hueneme Negev” error in MW2 when attempting to join a multiplayer match. Displayed as “Unable to connect to host. HUENEME – NEGEV,” this error signifies a connectivity issue. Although the exact origin remains unclear, understanding and troubleshooting this error is essential for an uninterrupted multiplayer experience. The “Hueneme Negev” error in MW2 is a topic of much discussion in the gaming community, and solutions are actively sought.
How do you fix Hueneme Negev in MW2 & Warzone 2?
To fix the Hueneme Negev error make sure that you have a stable internet connection, then you can start by applying the following easy fixes and pre-checks:
- Check if Activision servers are up and running. If they are operational, the problem comes from your side.
- Restart your internet modem or router.
- Contact your ISP and ask them to check if everything is okay with your internet connection.
- Try connecting with a different wireless or wired connection. (You can try using a mobile hotspot.)
If this doesn’t remove the Hueneme Negev error for you, proceed with the solutions below.
- Use Google DNS
- Update the network driver
- Use a VPN
- Disable Teredo
- Change the account address
- Flush the DNS Cache
- Clear the Game Cache
1. Use Google DNS
Time needed: 3 minutes
Many Reddit users removed the Hueneme Negev MW2 error after manually setting their DNS addresses to the ones provided by Google.
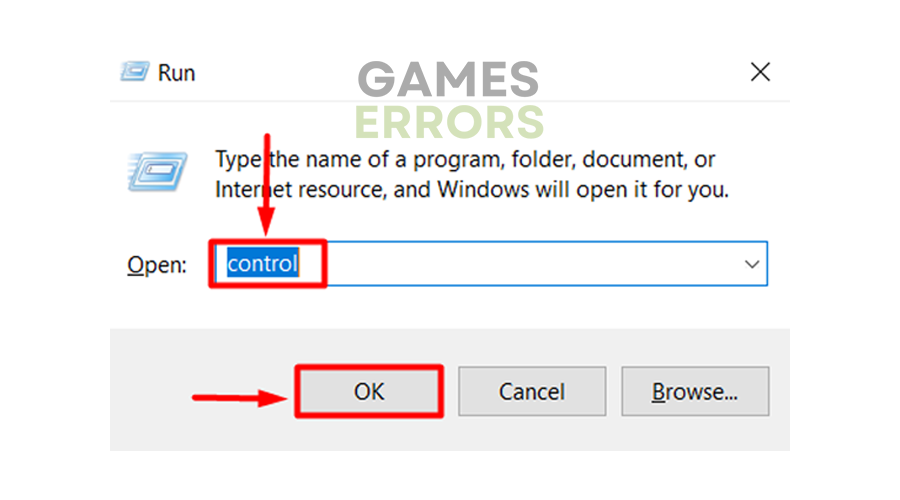
- Use the Windows Key + R shortcut to open the Run dialog, type control, and hit OK.

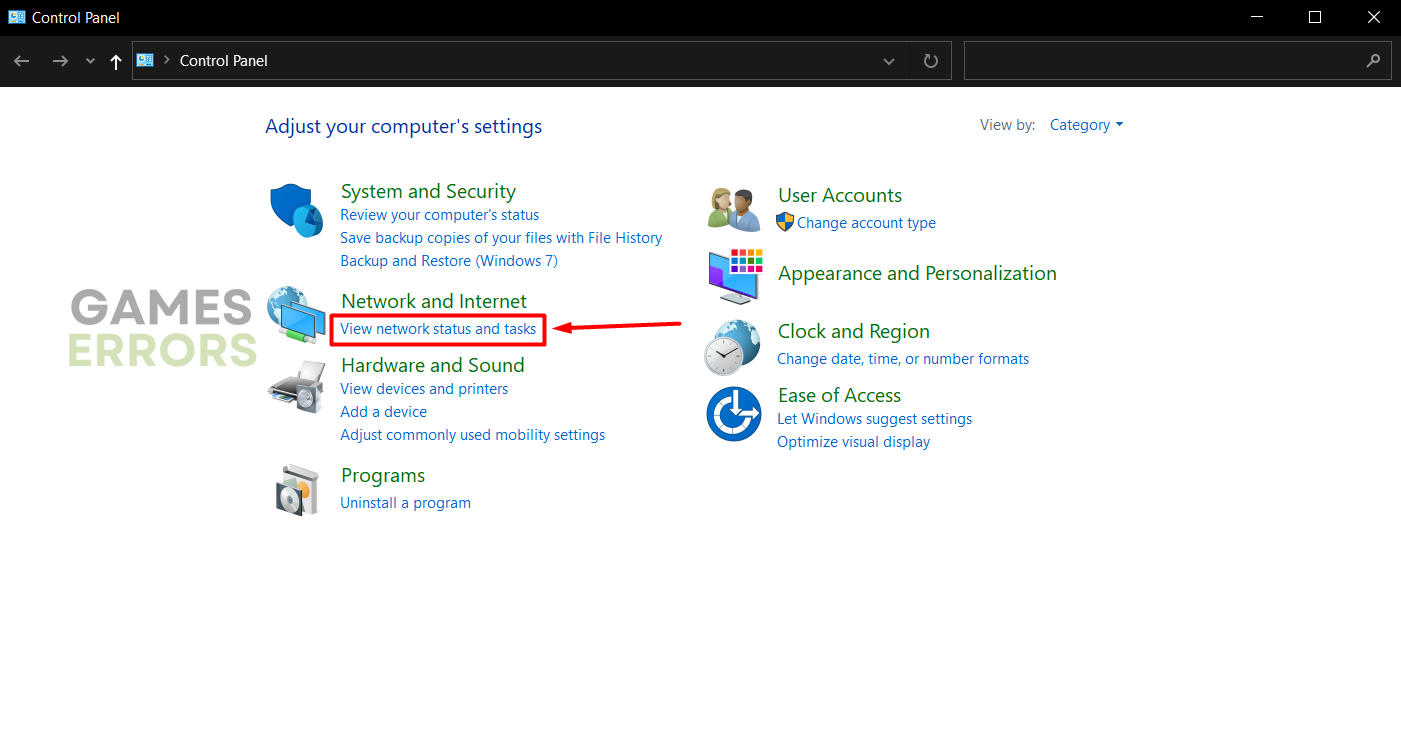
- Choose View network status and tasks under the Network and internet section.

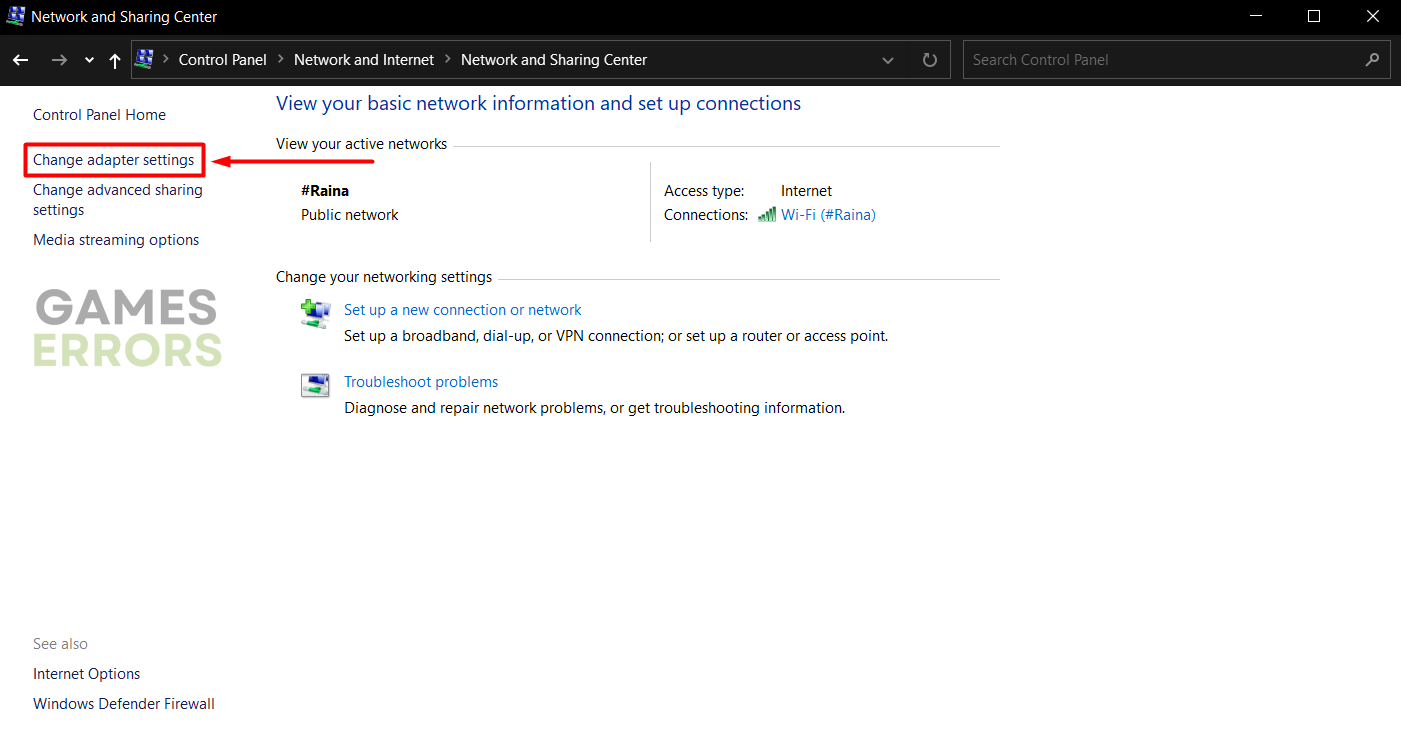
- Click on the Change adapter settings in the panel on the left.

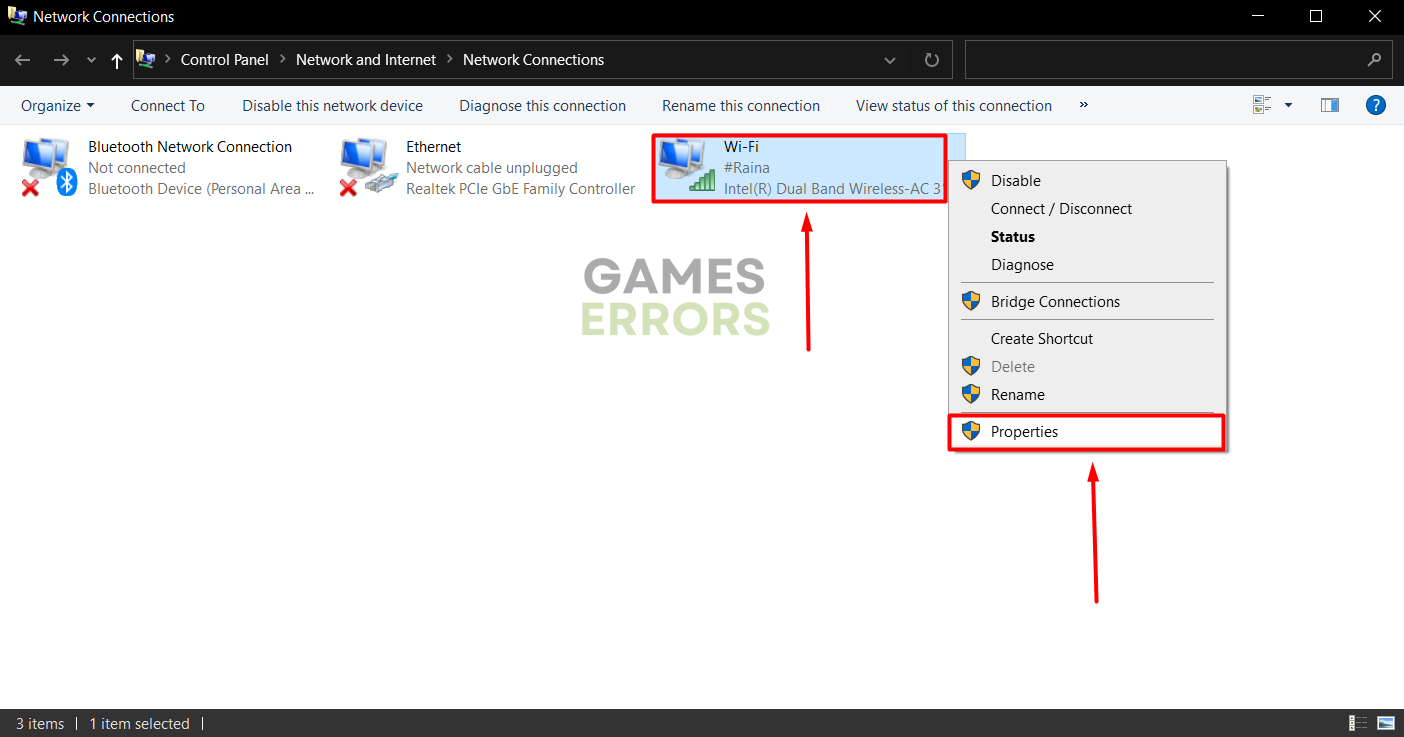
- Right-click your internet network and select Properties.
The green signal icon marks wireless, and the cable icon marks wired network.

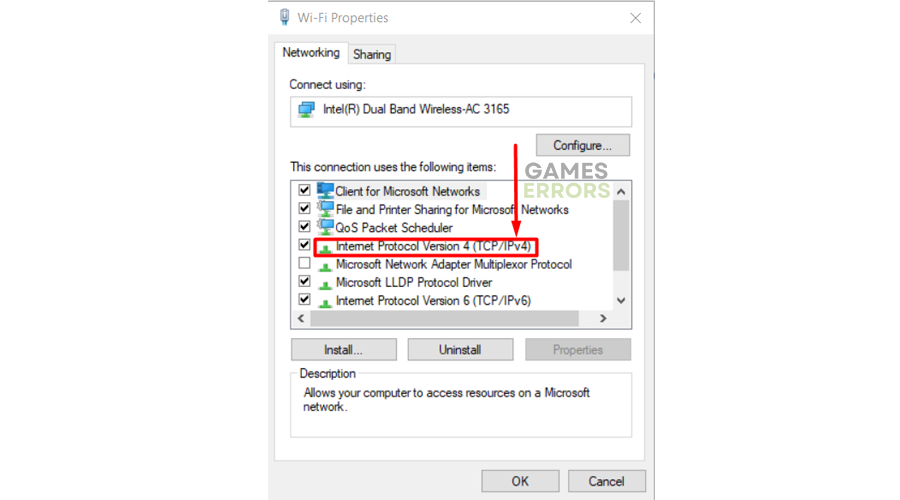
- Double-click Internet Protocol Version 4 (TCP/IPv4).
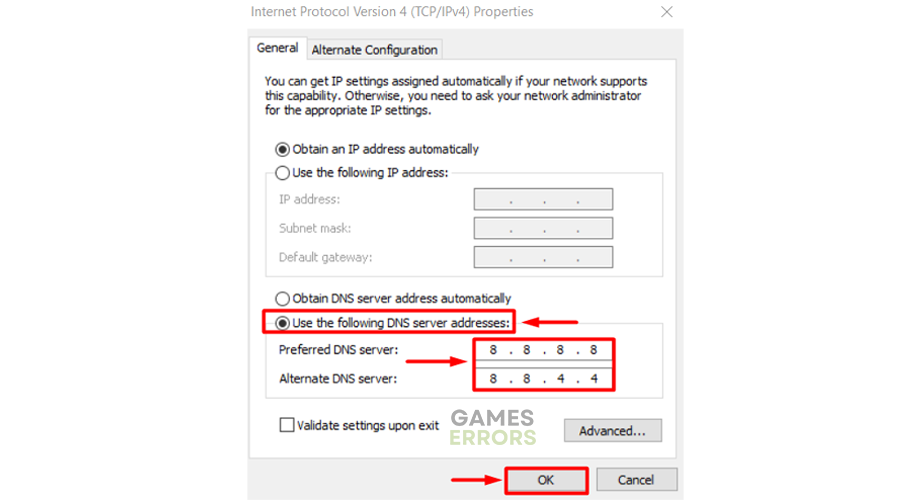
- Enable manual DNS server addresses and type 8.8.8.8 for the Preferred DNS server and 8.8.4.4 for the Alternate DNS server.
- Press the OK button and restart the PC.
2. Update the network driver
If your PC has an outdated network driver, it will prevent the game from properly communicating with your local network and the internet, and this might be the reason you encounter the Hueneme Negev in MW2. To avoid such problems, keep your drivers updated regularly.
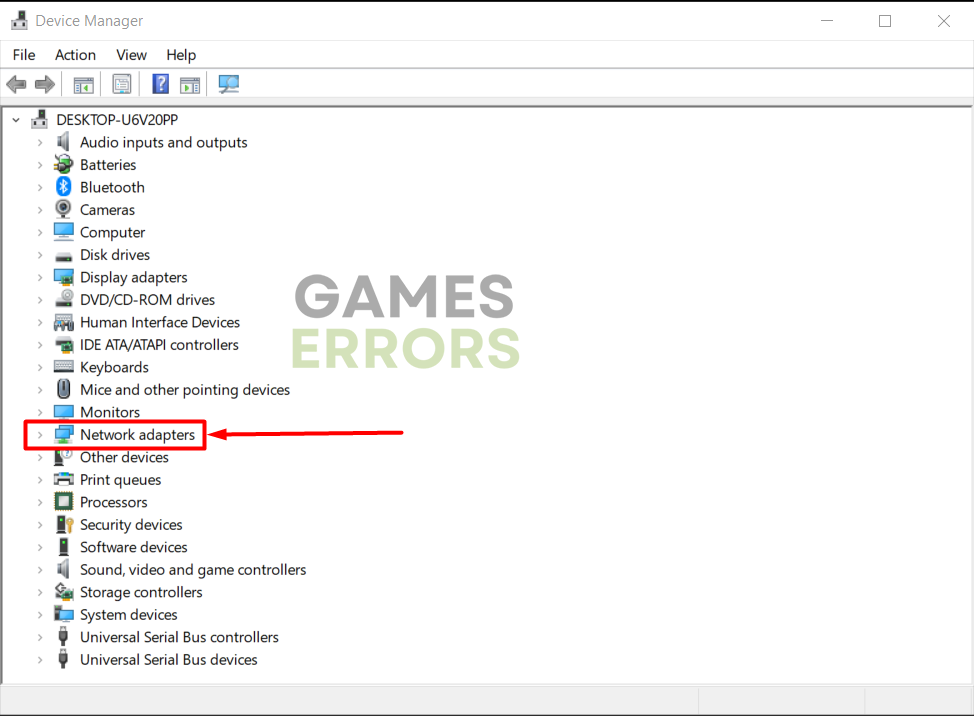
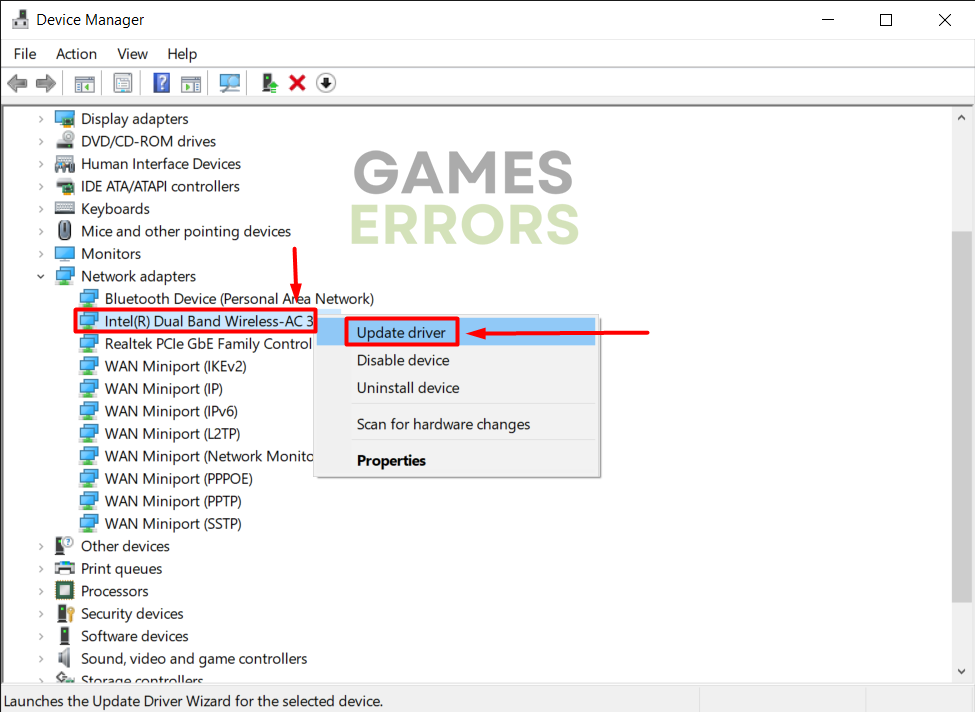
- Click the Windows icon, type Device Manager, find it under Best match, and click to open.

- Double-click on the Network adapters.

- Right-click on the network adapter you use for the internet connection and select the Update driver option.

- Choose the Search automatically for drivers option in the Update Driver Wizard.
- The Wizard will look for suitable drivers and prompt you with steps for installation if they are found.
- Restart your PC.
If the Update Driver Wizard fails to find suitable driver updates, we advise you to use Outbyte Driver Updater to double-check if any updates are available. This tool will perform an additional search, with the possibility to manage and update all necessary drivers for your PC.
👾 Another connection error some players experience is the Hueneme Concord error.
3. Use a VPN
Using a VPN can solve the network failed-to-start error in Modern Warfare 2 & Warzone 2 by providing a secure alternative connection that bypasses any network or firewall restrictions causing the error. Here is how you do it:
- Log out from your Steam or Batlle.net account.
- Connect the VPN to the dedicated country server.
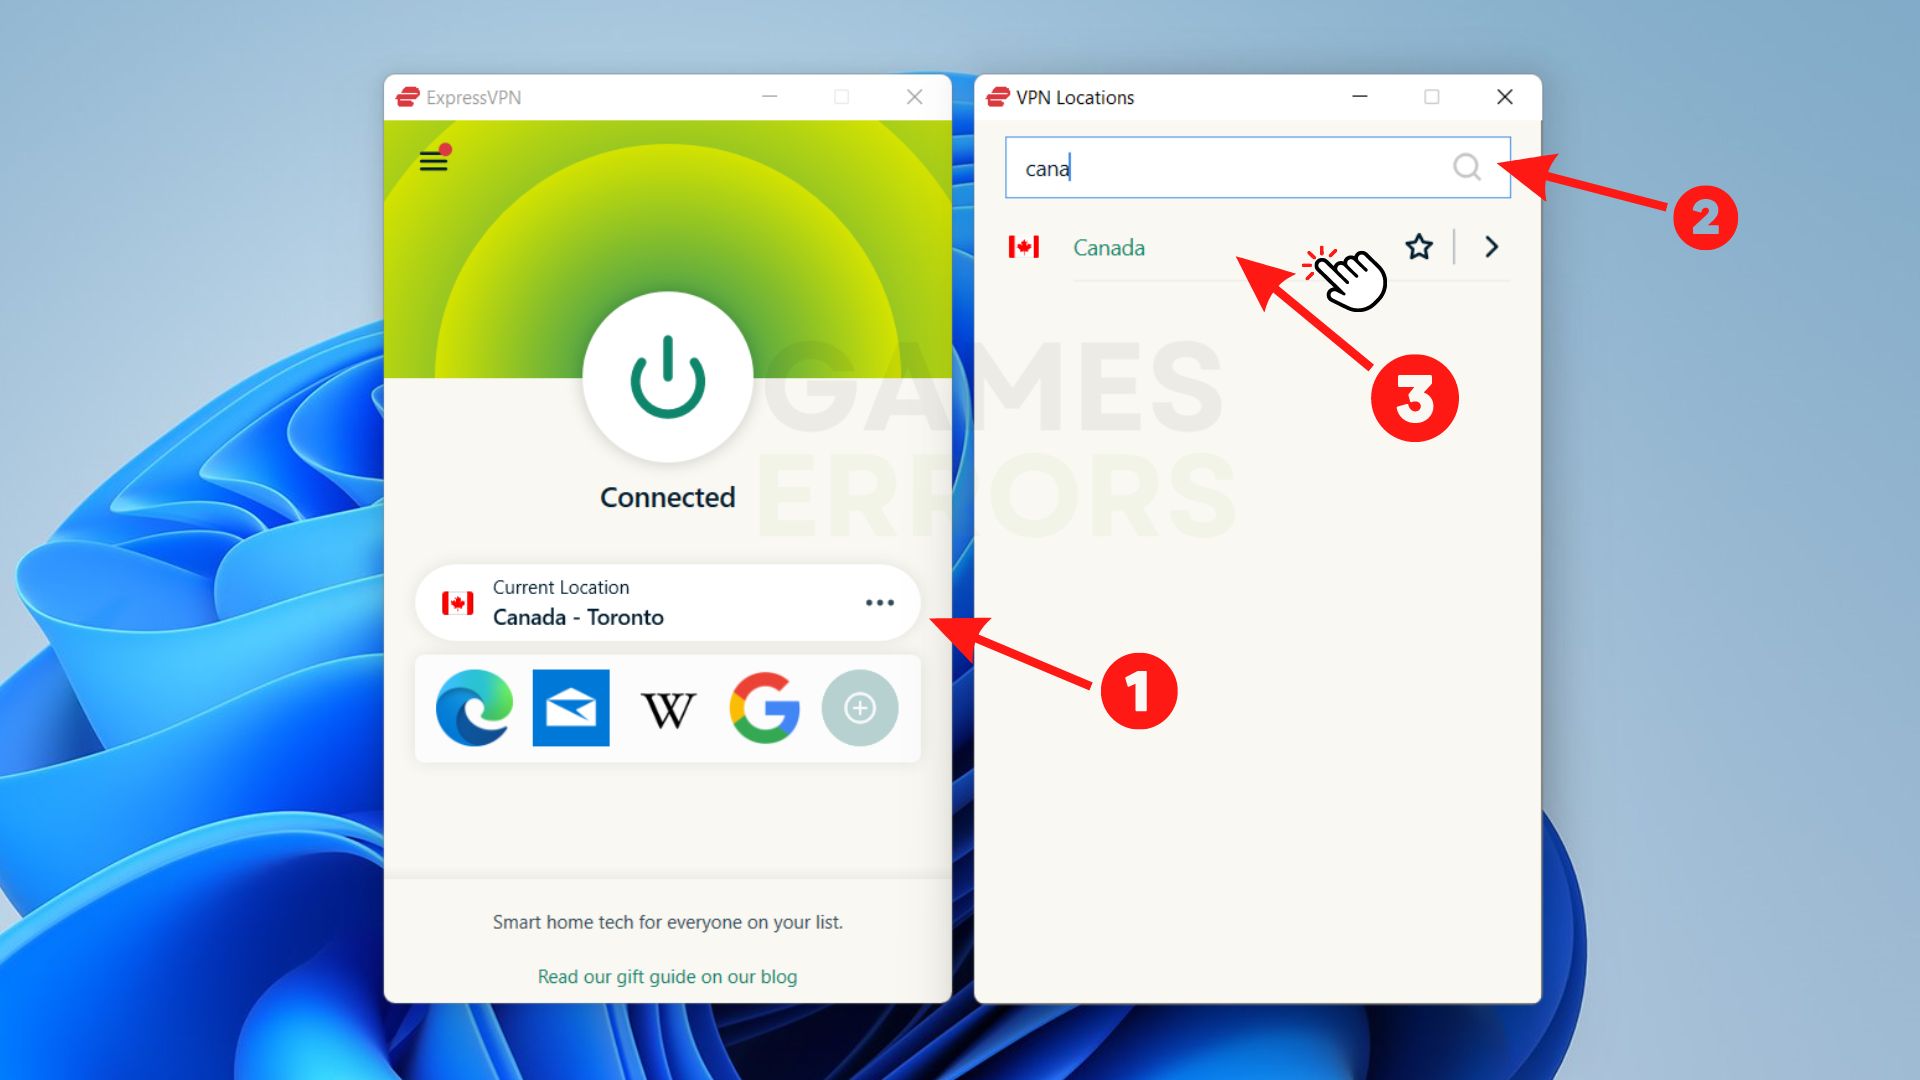
2.1. Download and install ExpressVPN.
2.2. Open the app and click three dots near the current location.
2.3. Write Canada (the most recommended server for MW2 & Warzone 2).
2.4. Click on Canada, and you will be connected to VPN.
- Log back into your Steam or Battle.net account.
4. Disable Teredo
Teredo is an IPv6 tunneling protocol known for causing the Hueneme Negev error in MW2 and Warzone 2. This built-in Windows feature can be disabled in a few easy steps.
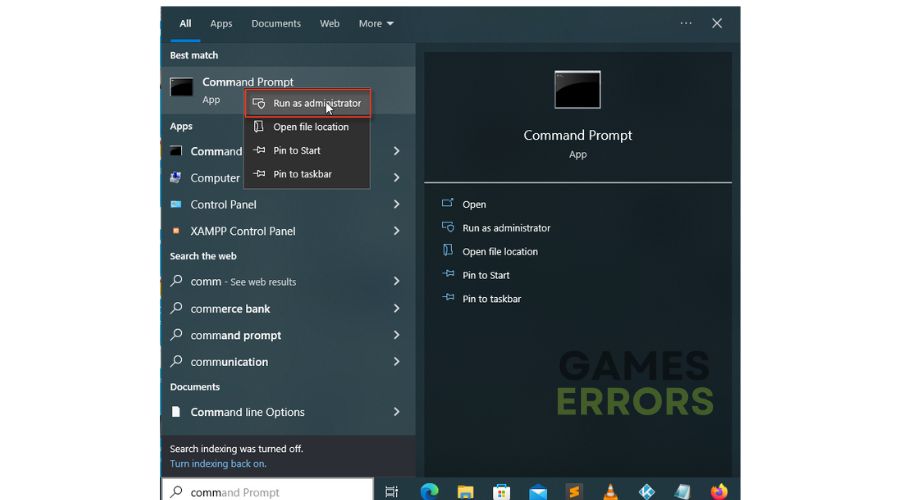
- Click on the Windows icon and type Command Prompt.
- Right-click Command Prompt under Best match, and select the Run as administrator option.
- Type the following command and hit Enter on your keyboard.
netsh interface teredo set state disabled - Restart your PC to apply the changes.
👉 If you want to re-enable Teredo, open the Command Prompt and type netsh interface teredo set state type=default and hit Enter.
5. Change the account address
You can try changing your account address using an Activision account to play Call of Duty. This should be done only if the address is incorrect, as an incorrect address can cause the MW2 Hueneme Negev error.
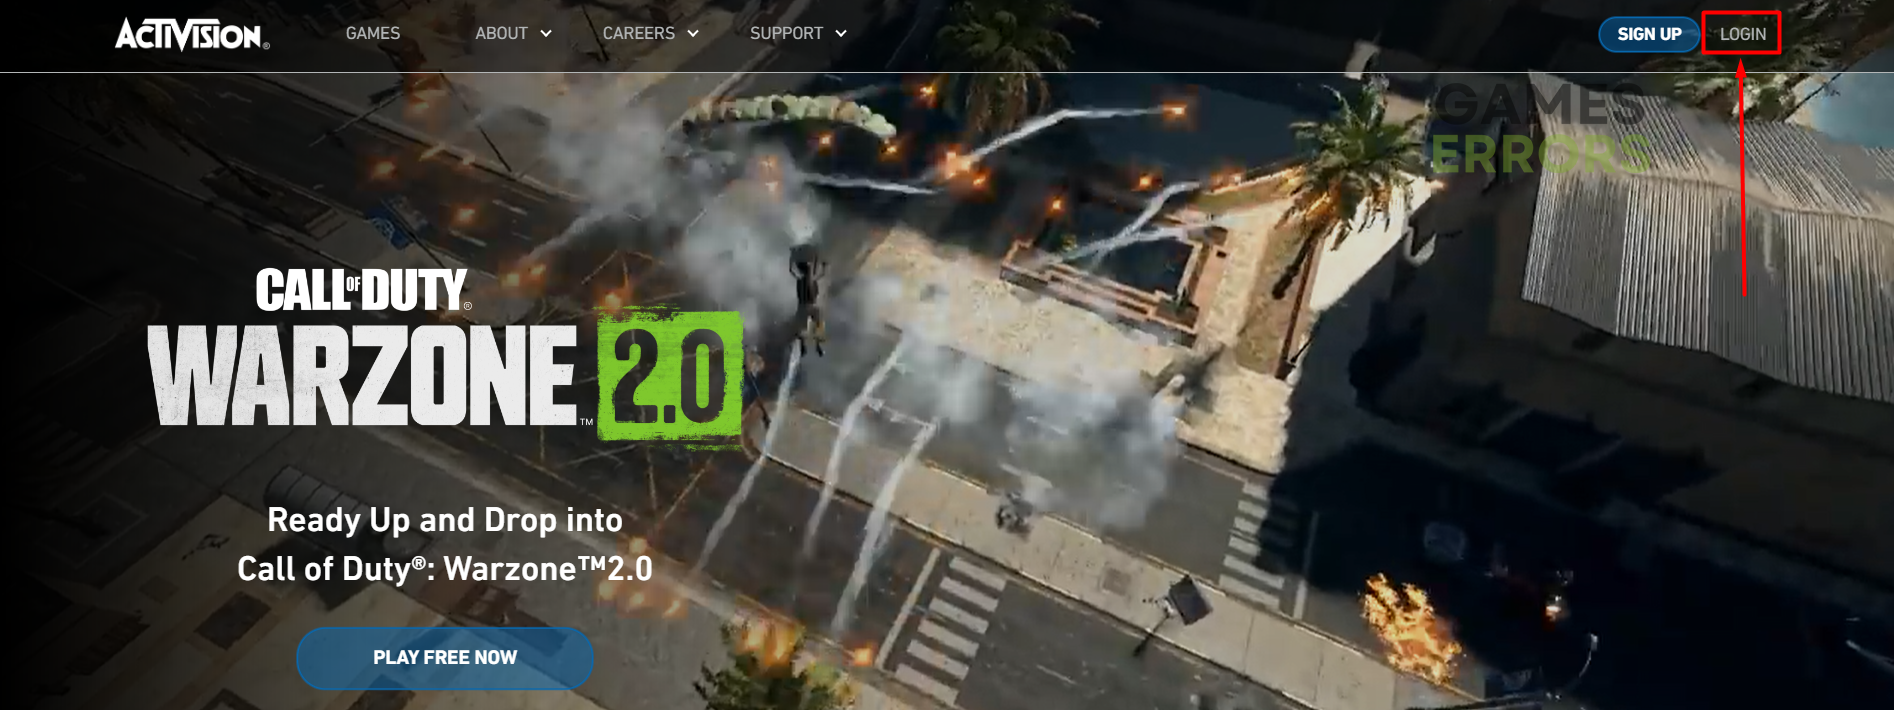
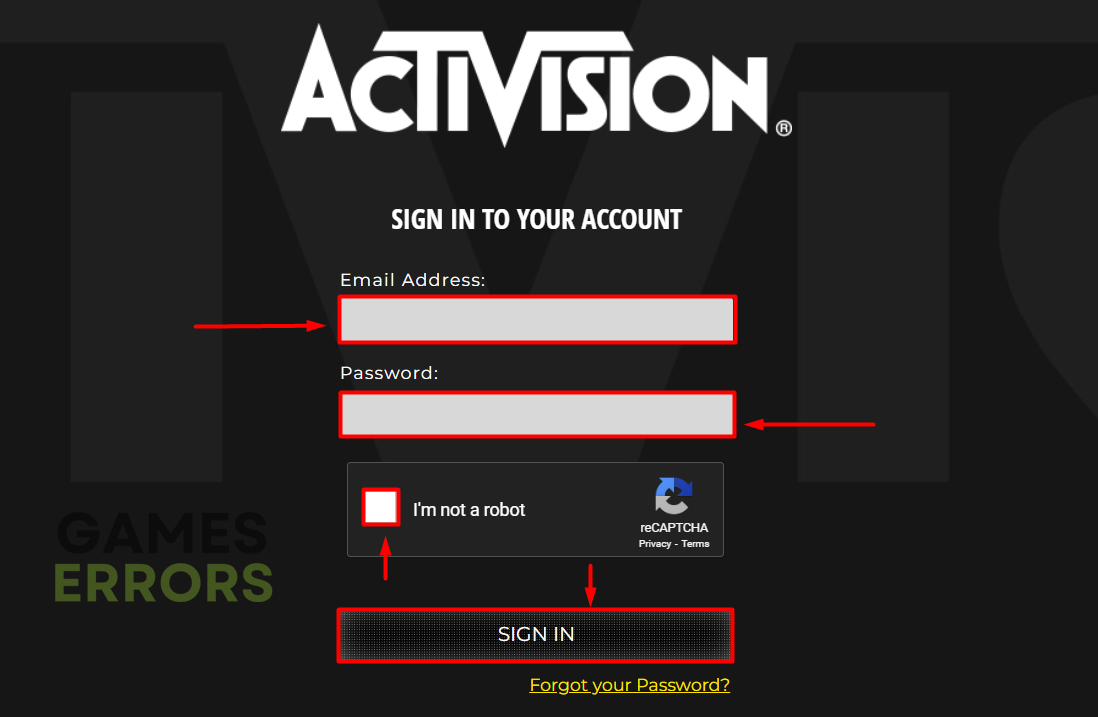
- Head to the Activision home page.
- Click on the Login button in the top right corner.

- Type in your email address and password, check the I’m not a robot checkbox, and click Sign In.

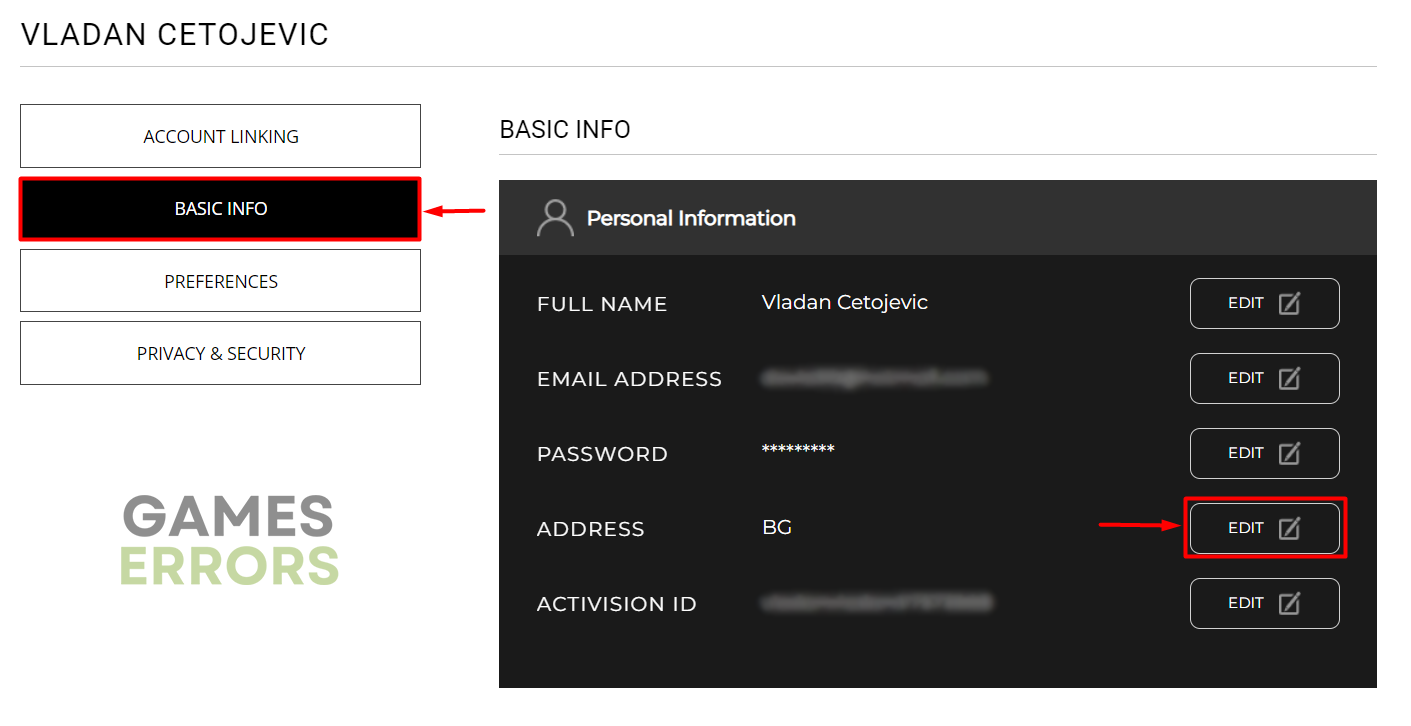
- Click on the Profile button in the top right corner.
- Select Basic Info from the left panel and click the Edit button next to the Address label.

- Update your information and hit the Save button.
6. Flush the DNS cache
The DNS cache might be the reason why you encounter the error message ‘networking failed to start reason Hueneme Negev’. To stop it from happening simply flush the DNS cache by following the steps below:
- Press Win + S and type Command Prompt.
- Run the Command Prompt as Administrator.
- If the User Account Control appears asking you to press Yes, proceed to do it.
- Type ipconfig /flushdns in the Command Prompt and press Enter.
- Close the command Prompt and Restart your PC.
7. Clear the Cache
By clearing the cache, you might get rid of the buggy files that might cause the Call of Duty Hueneme Negev error on MW2 and Warzone 2. By following the instructions below, you can learn how to clear the cache on Steam and most devices.
©For Steam
- Go to Settings and select the Downloads tab
- Click on the Clear Download Cache Button
- Press Ok to save the changes made.
🎮 For Xbox
- Open the guide menu with the Xbox button.
- From the Profile & System menu select Settings.
- Go to the System tab and press on Storage.
- Go to the Manage Storage Devices and press the Clear local saved games button for COD Warzone 2 and MW 2.
- You are good to go.
🕹️ For PS5
- Open Settings and navigate to the Application Saved Data Management
- Delete the storage files
- Select the game and chose the files to delete or select them all
- Press Delete and then OK and you are good to go.
Additional fixes for the MW2 Hueneme Negev error:
- Run the game as administrator
- Verify the integrity of game files
- Disable the Firewall and the Antivirus
- Make sure MW2 is updated
🎮 How to fix Hueneme Negev Xbox?
To Fix the MW2 Hueneme Negev error on Xbox try the effective solutions below:
- Reconnect Xbox to Wifi: Navigate to Settings, find General, and open Network settings. Disconnect from your WiFi network and connect again.
- Manually restart Xbox: Hold the power button on your Xbox until it turns off completely, wait a few minutes, and turn it back on.
- Clear MAC address: From Network settings, navigate to the Advanced Network Settings and open the Alternative Mac Address. Once there, hit the Clear button.
- Update your Xbox: Navigate to Settings, open System, and then Updates. If your console software is outdated, you will see the Console update available message.
🕹️ How to fix Hueneme Negev PS5?
To fix the Hueneme Negev Error in MW2 on PS5, follow the instructions below as they worked for various players.
- Restart PS5: Turn off your PS5, wait a few minutes, and then turn it back on.
- Clear the PS5 cache: Turn off your PS5, open the Safe Mode, and find Rebuild Database & Clear Cache option.
- Whitelist or unblock your PS5: Head to the admin panel of your network device, find Device Management or MAC Address Filtering menu, and remove your PS5 from the list of blocked devices.
- Update your PS5: Navigate to Settings, select System, and check if an update is available under System Software Update and Settings.
Related articles:
- Warzone 2 Keeps Crashing: Here’s Why & How To Fix It Quickly
- Warzone 2 DirectX Error: How To Fix It Quickly
- Warzone 2 Stuttering: Why & How To Make It Less Laggy
- Call Of Duty: Modern Warfare 2 Raid Is Not Working? [Fix]
- Modern Warfare 2 GPU Driver Version Error: Fixed
Conclusion
We hope that our guide helped you fix the MW2 Hueneme Negev error. Keep in mind that the most common solutions for the PC are to update your network driver, change your DNS, and disable Teredo. When it comes to Xbox and PS5, you should restart the console, clear the cache, or upgrade the device you are using. Make sure to bookmark this page to access it easier if needed.
For my Xbox One S, I just restarted it and it works fine
Tried changing dns and restarting ps5 but still no fix
So im getting this error and nothing works and the servers are up
Trying to fix this error on my ps5 when I tried to clear the cache it wouldn’t take my to the safe mode screen I held until two beeps and let go my hdmi cord works fine I tried another hdmi cord and it still didn’t work really not sure what to do from there
I tried everything to get my Xbox S to get rid of this network code it’s giving me. I reset my game changed ip an everything still nothing! An it’s saying the servers are up a running !
você solucionou o problema ?
After I log my account in COD19 on Steam,this problem appeared to my xbox game.