2D Platformer have been around for a long time but every now and then we get to see a new Platformer that is fun to play. If you are looking to make a 2D Platformer then this tutorial is all that you will need. We will go from the scratch and cover all aspect that you will need to make a 2D platformer in Unity.
Video Tutorial
Importing Sprites and Sprite Sheet
Getting the Sprites
The First Thing that we will need are the sprites. So, let’s go to Unity Asset store and get some sprites.
We will need one for the character and one for the Environment.

After a few Minutes of searching. I found a Knight Sprite sheet with all animations and a 2D Platformer Winter for the platform.
Creating a new 2D project
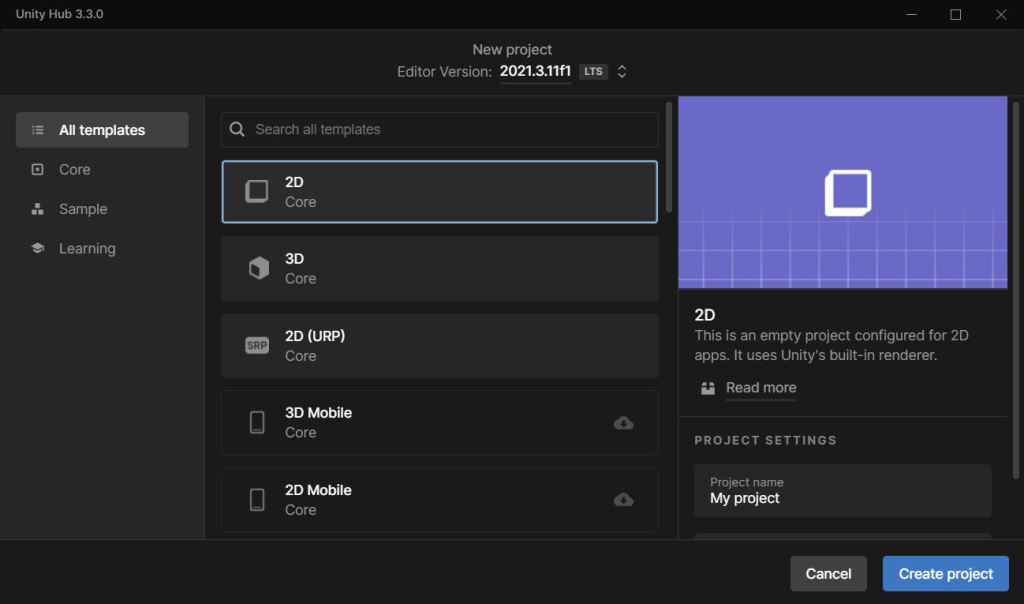
Now to Import the asset into Unity, we need to create a new Unity project.
- Open up Unity Hub and Click on new Project.
- Select 2D template and give the project a name.
- Click on Create Project.
Importing Assets into our 2D project
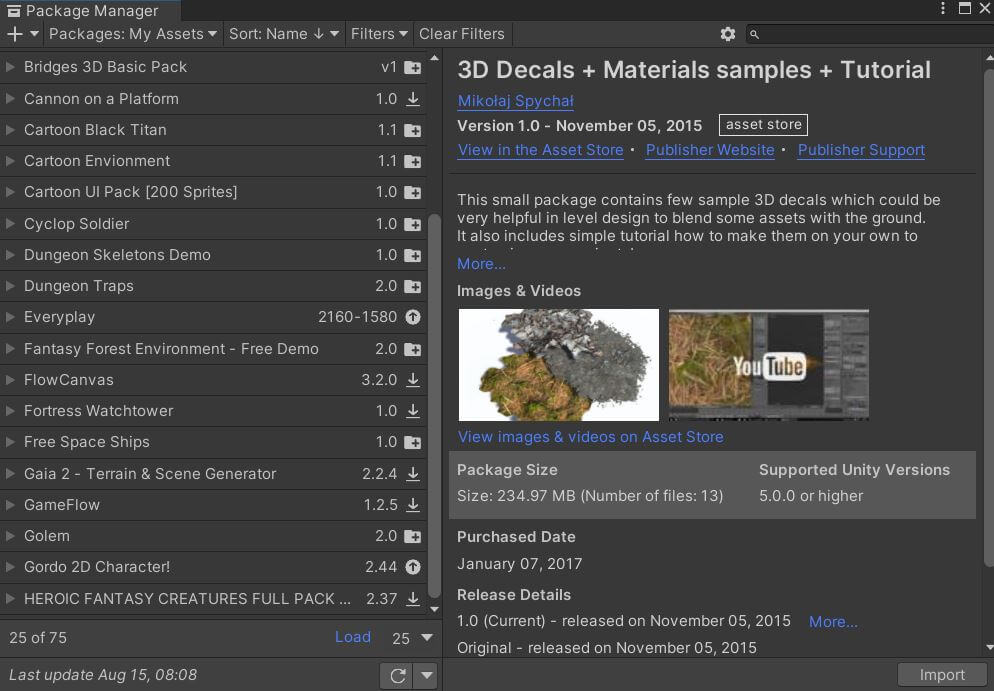
We need to use the Package Manager to Import assets into our Unity project
- Go to Window>Package manager. In the Drop down on the top left select “My Assets”.
- Search for the assets that you found on Unity asset store and click download.
- Once Download is complete now can click on Import to Import the assets into your project.
Creating Animation from Sprite Sheet
Now let’s create Animation from using the character sprites in the Sprite sheet.
Make sure you segregate the sprites based on the animation. Let’s shift the sprites required for Idle, attack, Walk and Jump to different folders. This is not required but it will be helpful to manage things.
- Go to Window>Animation>Animation.
- Select one of the idle sprites and drag and drop it in the hierarchy window.
- Select the sprite in the hierarchy window and click on create animation in the Animation window.
- Let’s call it Idle animation.
- Drag and drop all the idle sprites on to the Animation window. Set the time, so that the animation speed looks natural.
- Click on the Animation name and select create new.
- Follow the same steps to create Walk, Jump and Attack animations.
Once you create an Animation, you can see that Unity has added an Animator component to the game object.

Creating Environment Prefabs
It’s time to create Prefabs. Prefabs are pre-defined game objects that we can use in our game. To create a Prefab just drag and drop the game object from the hierarchy window to the Project window.
Let’s create prefabs for our platforms. Select the platforms that you want in your game and drag them to the Scene. You need to drag them one by one otherwise Unity will think you are creating an Animation.
Add a Box Collider2D to all the platforms. And drag them back to the project window to create prefabs.
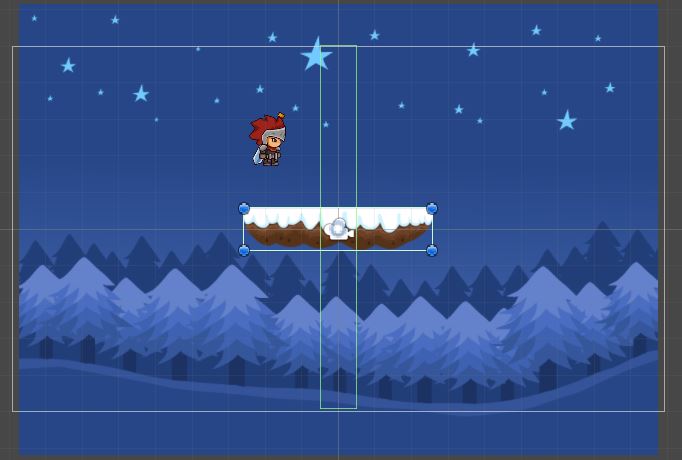
Now you can delete the platforms from the scene, except for the one below player. We are going to generate new platform when the player reaches the center of existing platform. Now our scene looks like this.
Player Setup and Movement Code
We will generate the platform once the player starts moving. To move the player, we are going to use Physics. To use Physics in Unity, you need to add Rigidbody2D to the player. Also let’s add a Box Collider 2D so that the player doesn’t fall through the ground.
Click on the Edit Collider Button on Box Collider 2D component in the inspector window and adjust the size of Box Collider to match the size of the Player.
Drag and drop the player on to the Prefabs folder to make it into a prefab. Now lift the player little above the ground and hit the play button. The player should fall down due to gravity and the collider must prevent the player from falling through the ground.
Basic player Movement Script
Let’s add a script to move the player. Create a new script called PlayerMovement. Get the Rigidbody component and add force based on player input.
using UnityEngine;

public class PlayerMovement : MonoBehaviour
{
    Rigidbody2D rb;
    float moveForce=2;

    // Start is called before the first frame update
    void Start()
    {
        rb=GetComponent<Rigidbody2D>();

    }

    // Update is called once per frame
    void Update()
    {
        rb.AddForce(Input.GetAxis("Horizontal")*moveForce*transform.right,ForceMode2D.Force);
    }
}
If your Player is not stopping after you let go the key. Increase the Linear drag parameter on the Rigidbody 2D component.
Setting up the Animator Window
We need the player to play the walk animation when it moves. So, let’s open up the Animator window to setup the transition.
Go to Window>Animation>Animator
Make sure that Idle is the default animation state. Right click on idle and select “Make Transition”. Click on the Walk animation to create a new transition.
Create a new Parameter of type bool called isWalking in the Animator. Select the transition from Idle to Walk and uncheck has exit time and the set the condition of transition to isWalking true.
Now let’s modify the code to change the animation state when moving.
using UnityEngine;

public class PlayerMovement : MonoBehaviour
{
    Rigidbody2D rb;
    float moveForce=2;
    Animator anim;

    // Start is called before the first frame update
    void Start()
    {
        rb=GetComponent<Rigidbody2D>();
        anim=GetComponent<Animator>();
    }

    // Update is called once per frame
    void Update()
    {
        rb.AddForce(Input.GetAxis("Horizontal")*moveForce*transform.right,ForceMode2D.Force);
        if(rb.velocity.magnitude>0.01)
        {
            anim.SetBool("isWalking",true);
            Debug.Log(rb.velocity.magnitude);
        }
        else{
            anim.SetBool("isWalking",false);
        }
    }
}
Setting Up Attack and Jump
Let’s set the Up Arrow for Jump and the Space key for attack. In case of the attack, we just need to play the attack animation but for jump we need to add an upward force so that the player can jump.
Before we modify the code lets add two Boolean variables to our Animator. One is Jump and the other is Attack. Let’s transition from Any state to Jump and attack using these variables and transition to idle after the animation has played.
Declare a new float called jumpForce and add the below code to your Update function for jump and attack.
if(Input.GetKeyDown(KeyCode.UpArrow))
        {
            rb.AddForce(transform.up*jumpForce,ForceMode2D.Impulse);
            anim.SetTrigger("Jump");
        }
        if(Input.GetKeyDown(KeyCode.Space))
        {
            anim.SetTrigger("Attack");
        }
For the sake of simplicity of this tutorial we are not doing the ground check while jumping. You can check out our complete tutorial on Jump in Unity for more details.
Our character does not turn in the direction of moving. We will use the Flip x parameter to change where the player looks when moving.
Player movement script with Jump and Attack animation
using UnityEngine;

public class PlayerMovement : MonoBehaviour
{
    Rigidbody2D rb;
    float moveForce=2;
    Animator anim;
    private float jumpForce=5;
    SpriteRenderer spr;

    // Start is called before the first frame update
    void Start()
    {
        rb=GetComponent<Rigidbody2D>();
        anim=GetComponent<Animator>();
        spr=GetComponent<SpriteRenderer>();
    }

    // Update is called once per frame
    void Update()
    {
        rb.AddForce(Input.GetAxis("Horizontal")*moveForce*transform.right,ForceMode2D.Force);
        if(rb.velocity.magnitude>0.01)
        {
            anim.SetBool("isWalking",true);
        }
        else{
            anim.SetBool("isWalking",false);
        }
        if(Input.GetKeyDown(KeyCode.UpArrow))
        {
            rb.AddForce(transform.up*jumpForce,ForceMode2D.Impulse);
            anim.SetTrigger("Jump");
        }
        if(Input.GetKeyDown(KeyCode.Space))
        {
            anim.SetTrigger("Attack");
        }
        if(rb.velocity.x<0)
        {
            spr.flipX=true;
        }
        else
        {
            spr.flipX=false;
        }
    }
}
Generating Platforms using code
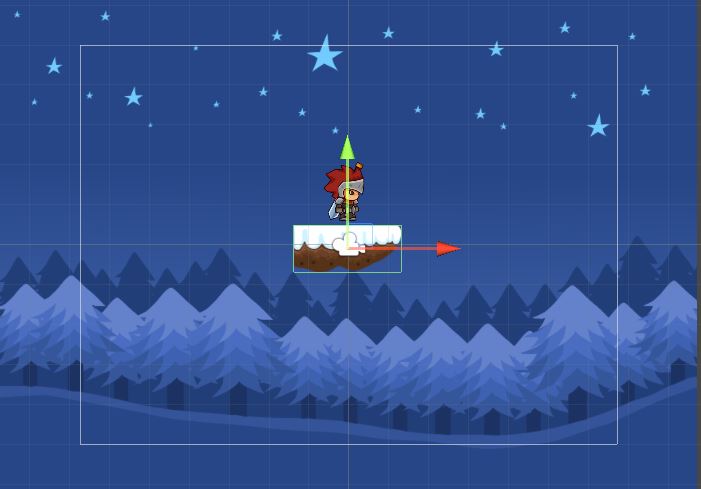
We are going to use the Platform prefabs that we created to generate platforms at run time. We need a spawn point to trigger the generation. So, let’s add an empty game object to the center to the platform prefab that we will be using. You need to add this to all platform prefabs that you will be using. For this tutorial, let’s add it to one.
Tag the object as Spawn and let’s add a Box Collider 2D to the game object and make the height equal to that of the scene. As soon as the player passes through this, we will create a new platform and destroy this object. Just to make sure that the object does not interfere with player movement let’s set the collider as Trigger.
Now let’s edit out player code to spawn platform as soon as the player interacts with out spawn trigger.
We will use a random range to generate the height of the platform and distance from current platform.
Here is the final Player movement script with Ontrigger function
using UnityEngine;

public class PlayerMovement : MonoBehaviour
{
    Rigidbody2D rb;
    Animator anim;
    SpriteRenderer spr;
    float moveForce=2;
    float jumpForce=5;
    public GameObject platform;
    // Start is called before the first frame update
    void Start()
    {
        rb=GetComponent<Rigidbody2D>();
        anim=GetComponent<Animator>();
        spr=GetComponent<SpriteRenderer>();
    }

    // Update is called once per frame
    void Update()
    {
        rb.AddForce(transform.right*moveForce*Input.GetAxis("Horizontal"),ForceMode2D.Force);
        if(rb.velocity.magnitude>0.01f)
        {
            anim.SetBool("isWalking",true);
        }
        else{
            anim.SetBool("isWalking",false);
        }
        if(rb.velocity.x<0.01f)
        {
            spr.flipX=true;
        }
        else{
            spr.flipX=false;
        }
        if(Input.GetKeyDown(KeyCode.UpArrow))
        {
            rb.AddForce(transform.up*jumpForce,ForceMode2D.Impulse);
            anim.SetTrigger("Jump");
        }
        if(Input.GetKeyDown(KeyCode.Space))
        {
            anim.SetTrigger("Attack");
        }
    }
    void OnTriggerEnter2D(Collider2D col)
    {
        if(col.tag=="Spawn")
        {
            float distance = Random.Range(5,8);
            float height=Random.Range(-4,3);
            Instantiate(platform,new Vector3(transform.position.x+distance,height,0),Quaternion.identity);
            Destroy(col.gameObject);
        }
    }
}
Camera Follow player
Now we are generating the platform at random position but our camera is not following the player. There are many ways to make the camera follow player in Unity. You can check out our complete tutorial on how to make a camera follow player in Unity for more details.
For this tutorial, we will create a simple script that updates the cameras x position to that of the player.
Select the Main Camera in the Hierarchy window and add a new script called camera follow.
We will get the player position and update the camera position to the player.
Attach the Below script to camera and assign the player variable
 using UnityEngine;

public class CameraFollow : MonoBehaviour
{
    public GameObject player;
    Vector3 pos=Vector3.zero;

    void Start()
    {
         pos=transform.position;
    }

    // Update is called once per frame
    void Update()
    {

        pos.x=player.transform.position.x;
        transform.position=pos;

    }
}
Now that we have the camera following the player the background does not repeat. Let’s fix that.
Repeating Infinite Background
One rule of thumb that you need to follow for infinite background is the starting and the ending of the image should look same so that when you stich them together it doesn’t look odd.
First let’s duplicate the background image one to the left and one to the right. So that it looks like in the image below.

We will shift the image to the end of the 3rd image when the player moves a distance equal to the size of the image away from the image. Let’s create a common script that we can use with all backgrounds.
Here is the code
using UnityEngine;

public class BackgroundFollow : MonoBehaviour
{
    public GameObject player;
    Vector3 pos;
    SpriteRenderer spr;
    // Start is called before the first frame update
    void Start()
    {
        pos=transform.position;
        spr=GetComponent<SpriteRenderer>();

    }

    // Update is called once per frame
    void Update()
    {
        if(player.transform.position.x-transform.position.x>spr.sprite.bounds.size.x)
        {
            pos.x+=3*spr.sprite.bounds.size.x;
            transform.position=pos;
        }

    }
}
Destroying Extra Platforms
Now the only thing that is left is to destroy the platforms that are far from player. If you don’t destroy the platforms then you will end up having infinite number of them after playing the game for a while.
Let’s add a simple script to the platform prefab, so that it destroys itself when it’s far from the player.
using UnityEngine;

public class SelfDestroy : MonoBehaviour
{
    GameObject player;
    // Start is called before the first frame update
    void Start()
    {
        player=GameObject.FindGameObjectWithTag("Player");
    }

    // Update is called once per frame
    void Update()
    {
        if(player.transform.position.x-transform.position.x>10)
        {
            Destroy(this.gameObject);
        }

    }
}
Next Step
Now our platformer is complete. This is just a simple prototype. Now to make it in to a complete game you can do the following
- Add enemies.
- Ground check for movement and jump.
- Random platform spawn
- More character animations.
Your creativity is the limit to the game. Have fun and make a great platformer.