
Even though Unity has made remarkable work with the UIToolKit approach to development, trying to mimic the same FE reactivity-like features, I could not feel that I went back a few years in time working with early versions of Angular 2. It was difficult to keep and share the UI states with the reaction timeline of the game or even data prop drilling around.
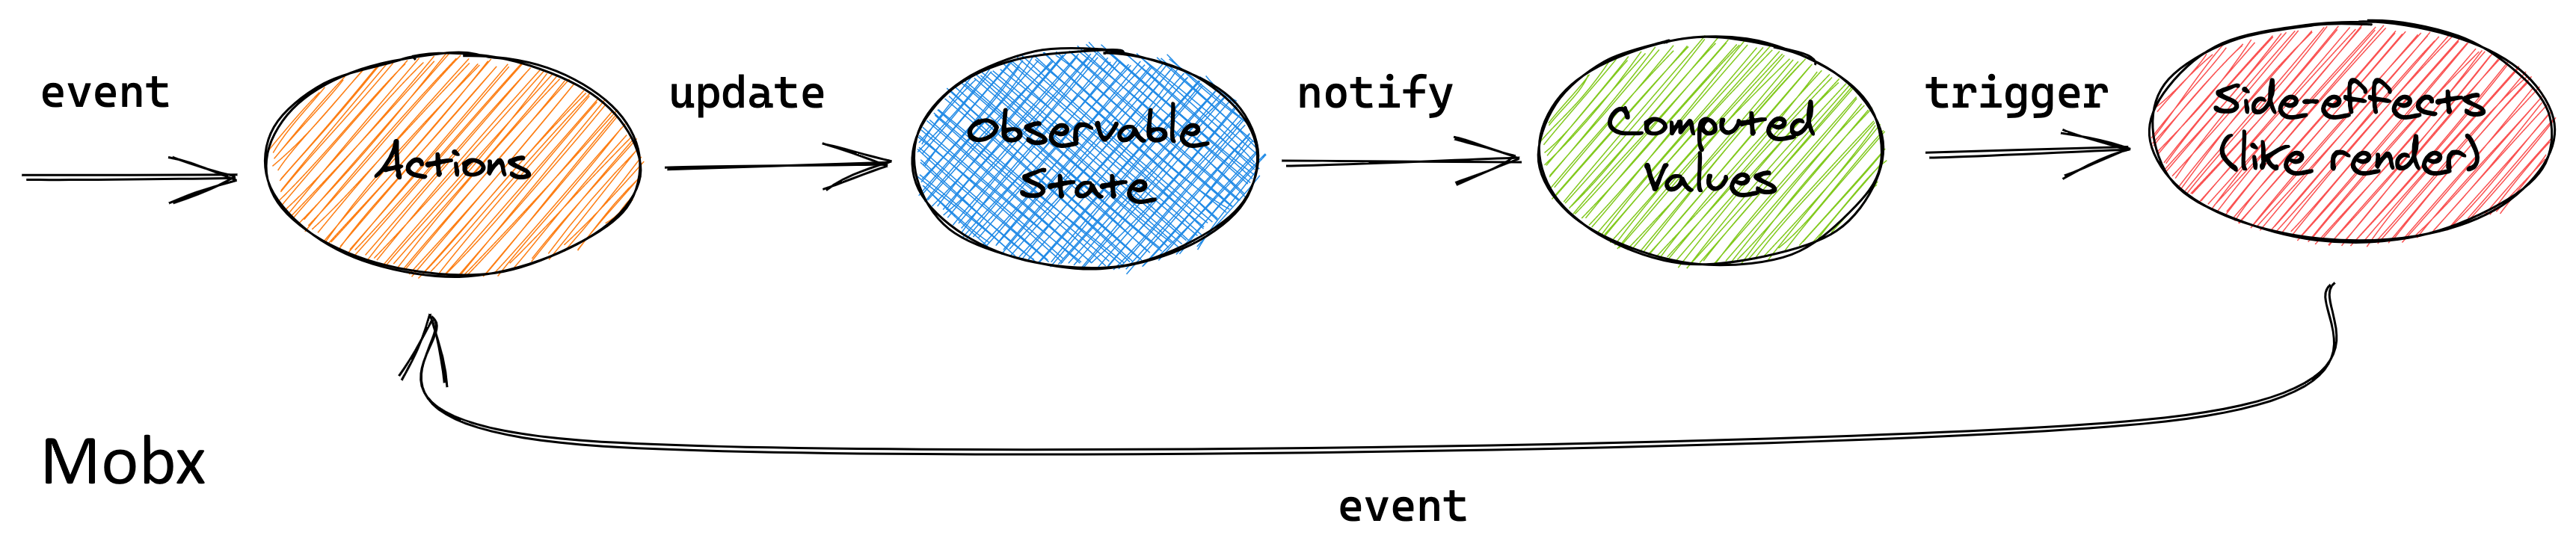
While developing a web game engine in a former studio, I came to learn about the Flux pattern introduced by Facebook in 2015, which greatly improved the engine and game DX. It’s a great pattern and inspired other libs like Redux, Pinia and Mobx (though this one is closer to MVVM).

So how does it work with Cocos Creator?
The best part is that the engine supports many web standards (even when building natively for Android or IOS), meaning that a few node libraries can be integrated seamlessly into your code base. So I just did the basic initialization for Mobx.
First, we need to install
NPM: npm install --save mobx
import { _decorator, CCBoolean, CCInteger } from 'cc';
//@ts-expect-error - Cocos can't properly import this library
import mobx from 'mobx/dist/mobx.cjs.development.js';

const { ccclass, property } = _decorator;
export const { makeAutoObservable, autorun, reaction } = mobx;

// Define your state class
@ccclass('GameStateStore')
export class GameStateStore {
    @property(CCInteger)
    gameSpeed = 200;

    @property(CCInteger)
    pipeSpeed = 200;

    @property(CCInteger)
    highScore = 0;

    @property(CCInteger)
    currentScore = 0;

    @property(CCBoolean)
    isReady = false;

    @property(CCBoolean)
    isPlaying = false;

    @property(CCBoolean)
    isGameOver = false;

    @property(CCBoolean)
    isRestarting = false;

    constructor() {
        makeAutoObservable(this);
    }

    // ...and then define your actions

    incrementScore(value: number): void {
        this.currentScore += value;
    }

    resetScore(): void {
        this.highScore = Math.max(this.highScore, this.currentScore);
        this.currentScore = 0;
    }

    setIsGameOver(value: boolean): void {
        this.isGameOver = value;
    }

    get getIsGameOver(): boolean {
        return this.isGameOver;
    }

    // ...
}

// Create an instance of GameState
export const gameStore = new GameStateStore();
//devtools
//@ts-expect-error - Cocos can't properly import this library
window.__MOBX_DEVTOOLS_GLOBAL_STORES_HOOK__ = { stores: { gameStore }, $mobx: mobx.$mobx };
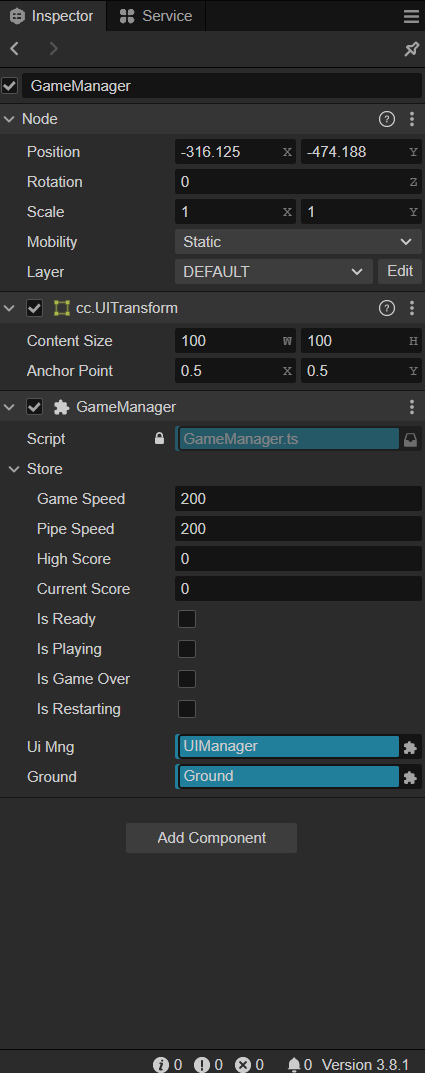
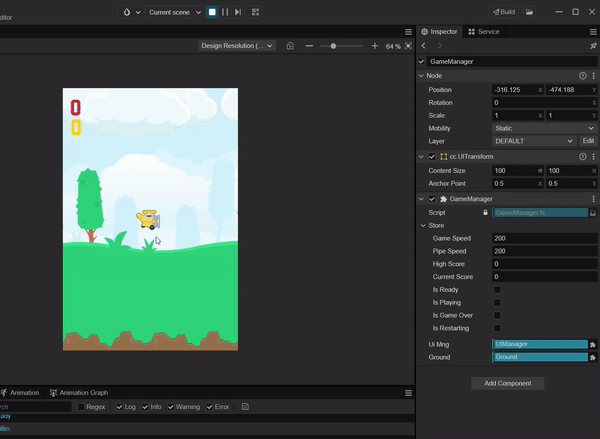
We can use this state store script and add it to our GameManager node, which will control the Actions flow to mutate our data in the store.
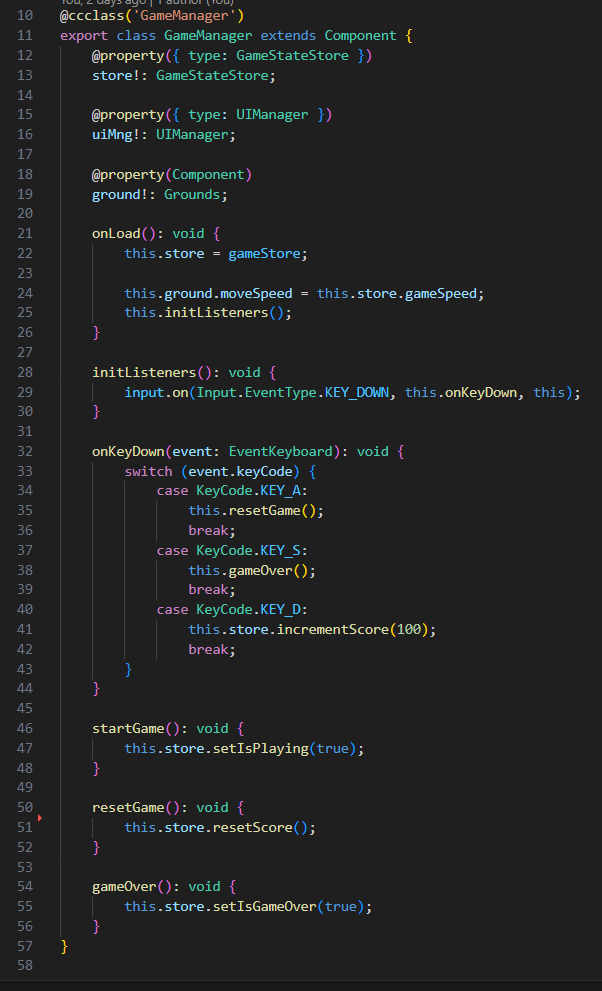
While in our UIManager, it will subscribe to the store changes and trigger the animations.
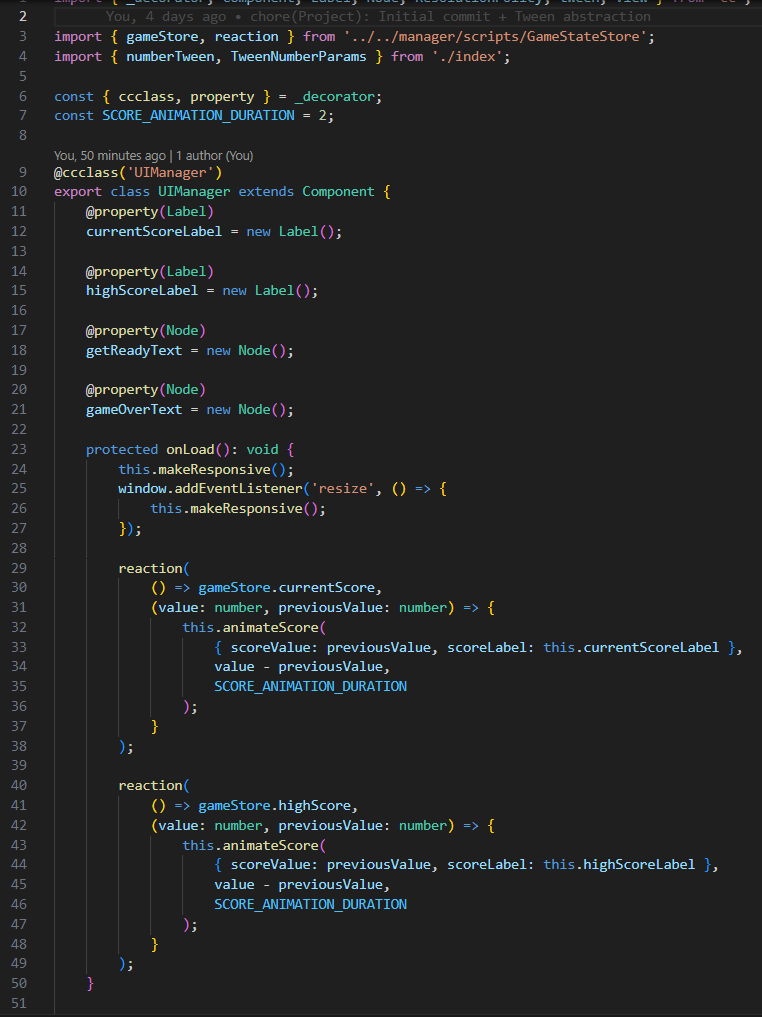
Notice that now each manager has clear responsibilities, and our game state is predictable. No prop drilling, only a single source of truth to rely on.
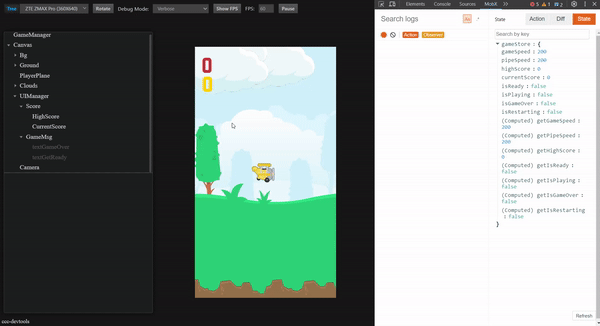
Results
We’re done! Now you can see the results and debug it in the browser as you would doing your web app.
And that is a wrap. So I hope this can help you guys while developing your games!
I’m really excited to learn more about Cocos and how I can use my web development skills to iterate and build games faster on this tool.