How to add VR support to your Universal Render Pipeline project


One advantage of developing Unity titles built on the Universal Render Pipeline (URP) is that they’re supported on a wide variety of platforms with minimal changes to render settings. Your project can run on any platform from mobile devices to consoles, PCs, and even VR.
To those who haven’t developed for VR before, it can be daunting to figure out where to get started. Whether you’re just starting your project or have an existing URP project that you’ve published on other platforms, we’ll go over the steps to add VR support so that it can run on multiple VR platforms with minimal effort.
Adding the right packages
One thing that every VR Unity project needs is the XR Plug-in Management package. This package makes it easy to configure your project for the VR platforms that you’d like to build for, from Meta Quest and Magic Leap to PlayStation®VR2 (PS VR2).
Another useful package is the XR Interaction (XRI) Toolkit. This package decreases your setup time by providing prefabs that implement movement options common in most VR titles, such as teleporting, snap turns, and more. Read more about the options the XRI package provides in this blog.
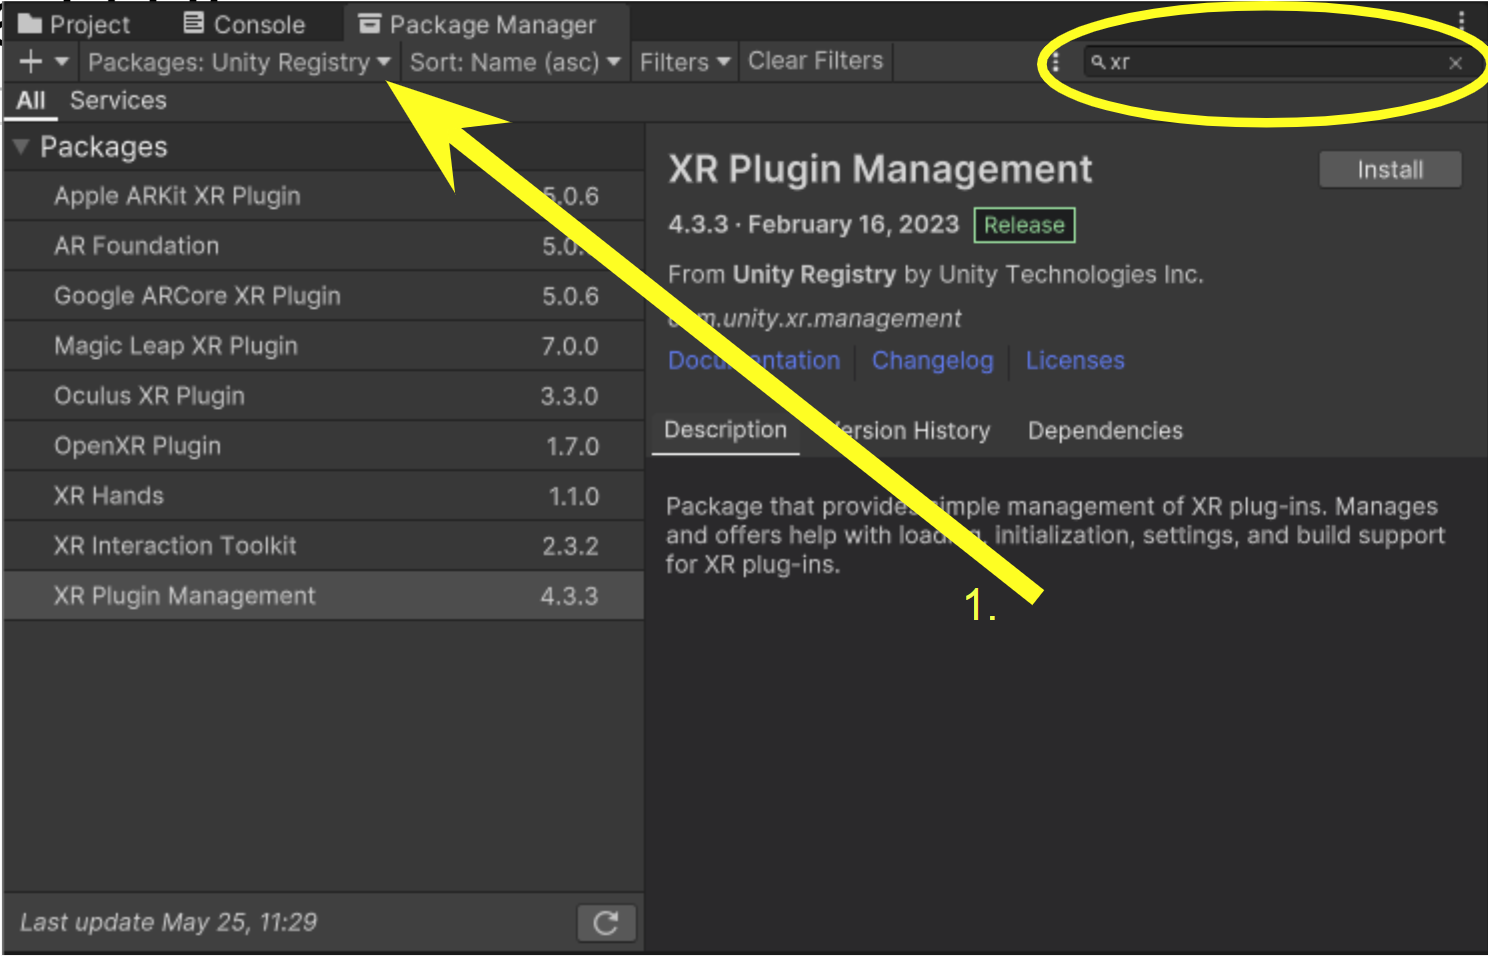
To add these packages to your project, open the Window menu and click on Package Manager. In the Package Manager window, click on the “Packages: In project” dropdown to expand the options, then click the “Unity Registry” option to make the Package Manager list all available packages.
Unity supports a lot of packages, so type “xr” in the search bar of the Package Manager window to filter the list so that only XR-specific packages are shown. Next, click on the XR Plug-in Management package, then choose the Install button to add it to your project. Follow the same process for the XRI Toolkit package to add it, too.

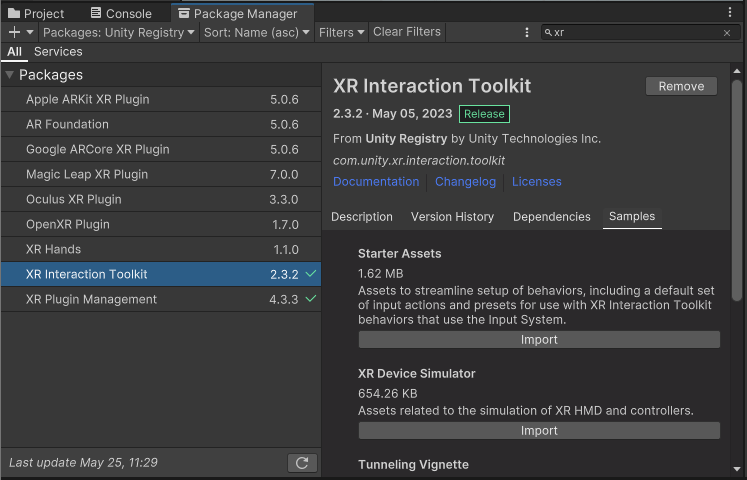
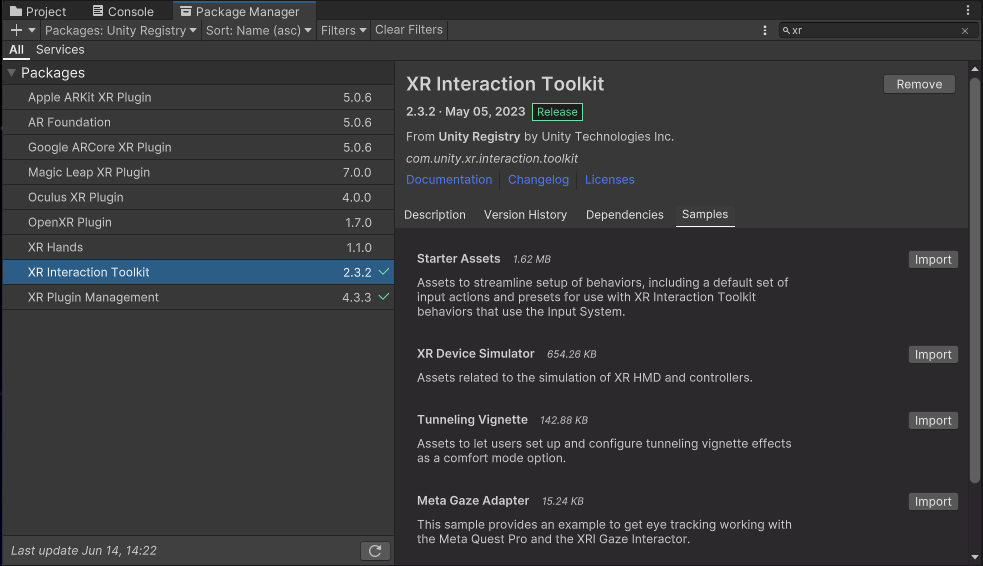
Next, let’s add the Sample Assets provided by the XRI team to help you get started. Click on the XR Interaction Toolkit package in the Package Manager, then the Samples tab in the package details panel. Then, click the Import button next to Starter Assets to add assets that will streamline the setup of VR behaviors and input actions.

With these packages installed, you’re more than halfway to developing for VR.
Enabling VR support for specific platforms in your project
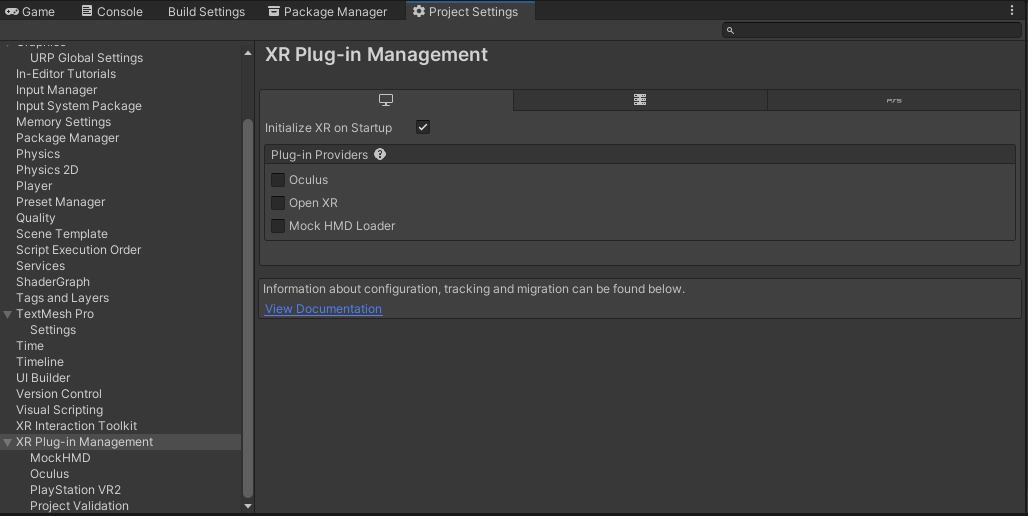
Next, you need to specify which VR platforms you want to target. To do that, open your Project Settings and click the XR Plug-in Management tab (which was included when you installed the package) to see the list of available plug-in providers that you can select for your project. Plug-in providers is another name for VR platforms. Select an option, such as Oculus or Open XR, and Unity will install the package(s) specific to that platform.

Some XR platforms use the Windows, Mac, and Linux build target in the Build Settings, but others run on different targets. For example, building for PS VR2 requires switching the build target to PlayStation®5 (PS5), while others require switching to Android or iOS. Make sure you switch to the correct build target while you’re developing so that you can catch any important errors and warnings early. Keep in mind that to develop games for PS5, you have to register as a PlayStation developer.
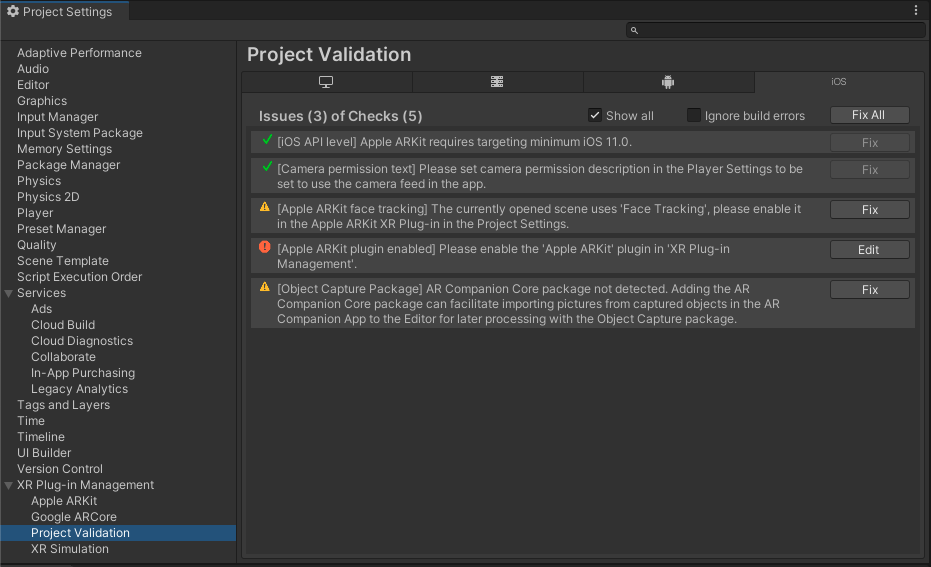
Each XR plug-in provides validation checks to make sure that your project is properly configured to build for XR. To find them, go to the Project Settings window, then click the Project Validation tab under the XR Plug-in Management tab to see if there are any warnings or errors to take care of. Most checks include a “Fix” button to resolve the issue for you.

With the right plug-in providers selected, you’re now ready to start building for your VR platform(s) of choice. However, you still need to map VR controls to your existing player character. That’s where the Starter Assets provided by the XRI Toolkit come into play.
Adding the VR player controller
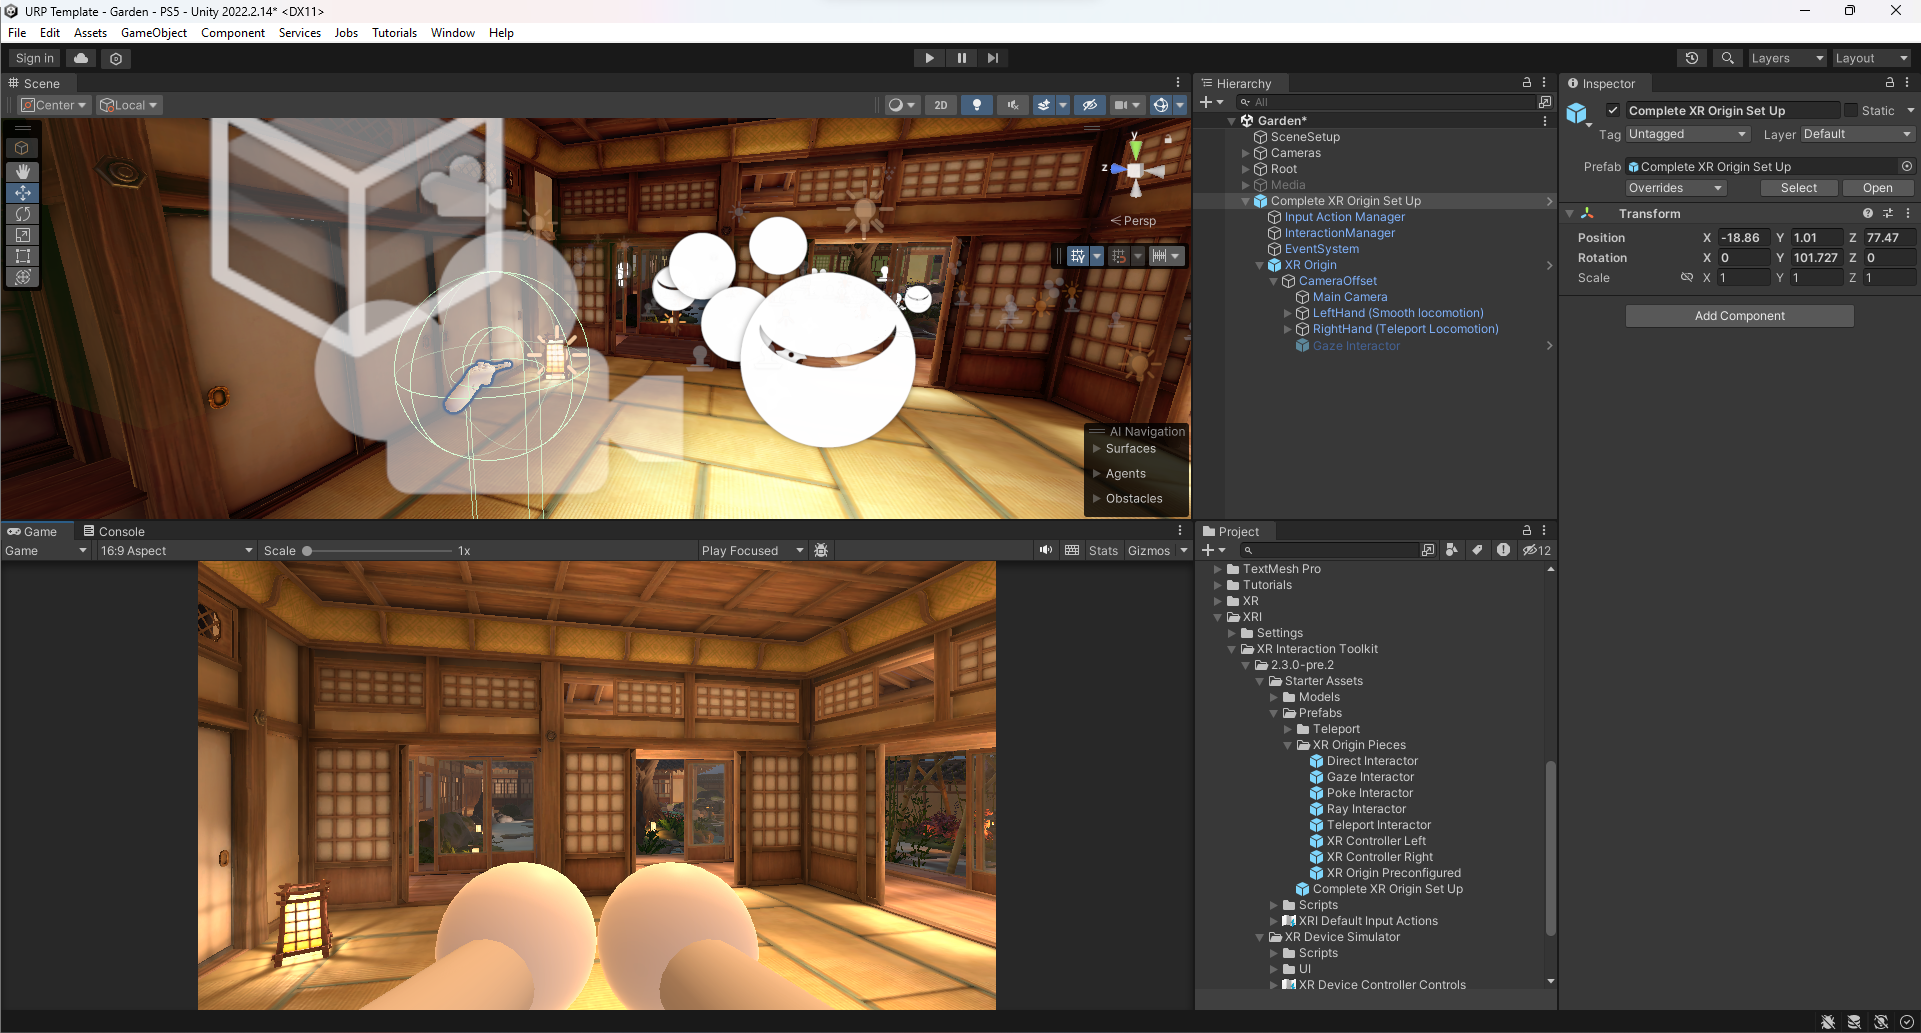
In the Project Window, go into the Samples/XR Interaction Toolkit/2.3.2/Starter Assets/Prefabs folder, then drag the Complete XR Origin Set Up Prefab into your Scene. This Prefab comes preloaded with all the components you need to configure VR input for your player controller.
The Prefab has a nested XR Origin Prefab that handles most VR controller setups. It has two game objects that represent the player’s left and right hands, as well as a Main Camera nested in a Camera Offset GameObject that handles moving the camera depending on whether or not a player is in a sitting or standing mode. Since the Complete XR Origin Set Up Prefab includes its own Main Camera, if you already have a Main Camera object in your Scene, then make sure to disable it so that you don’t have multiple cameras trying to render your player’s main view at once.

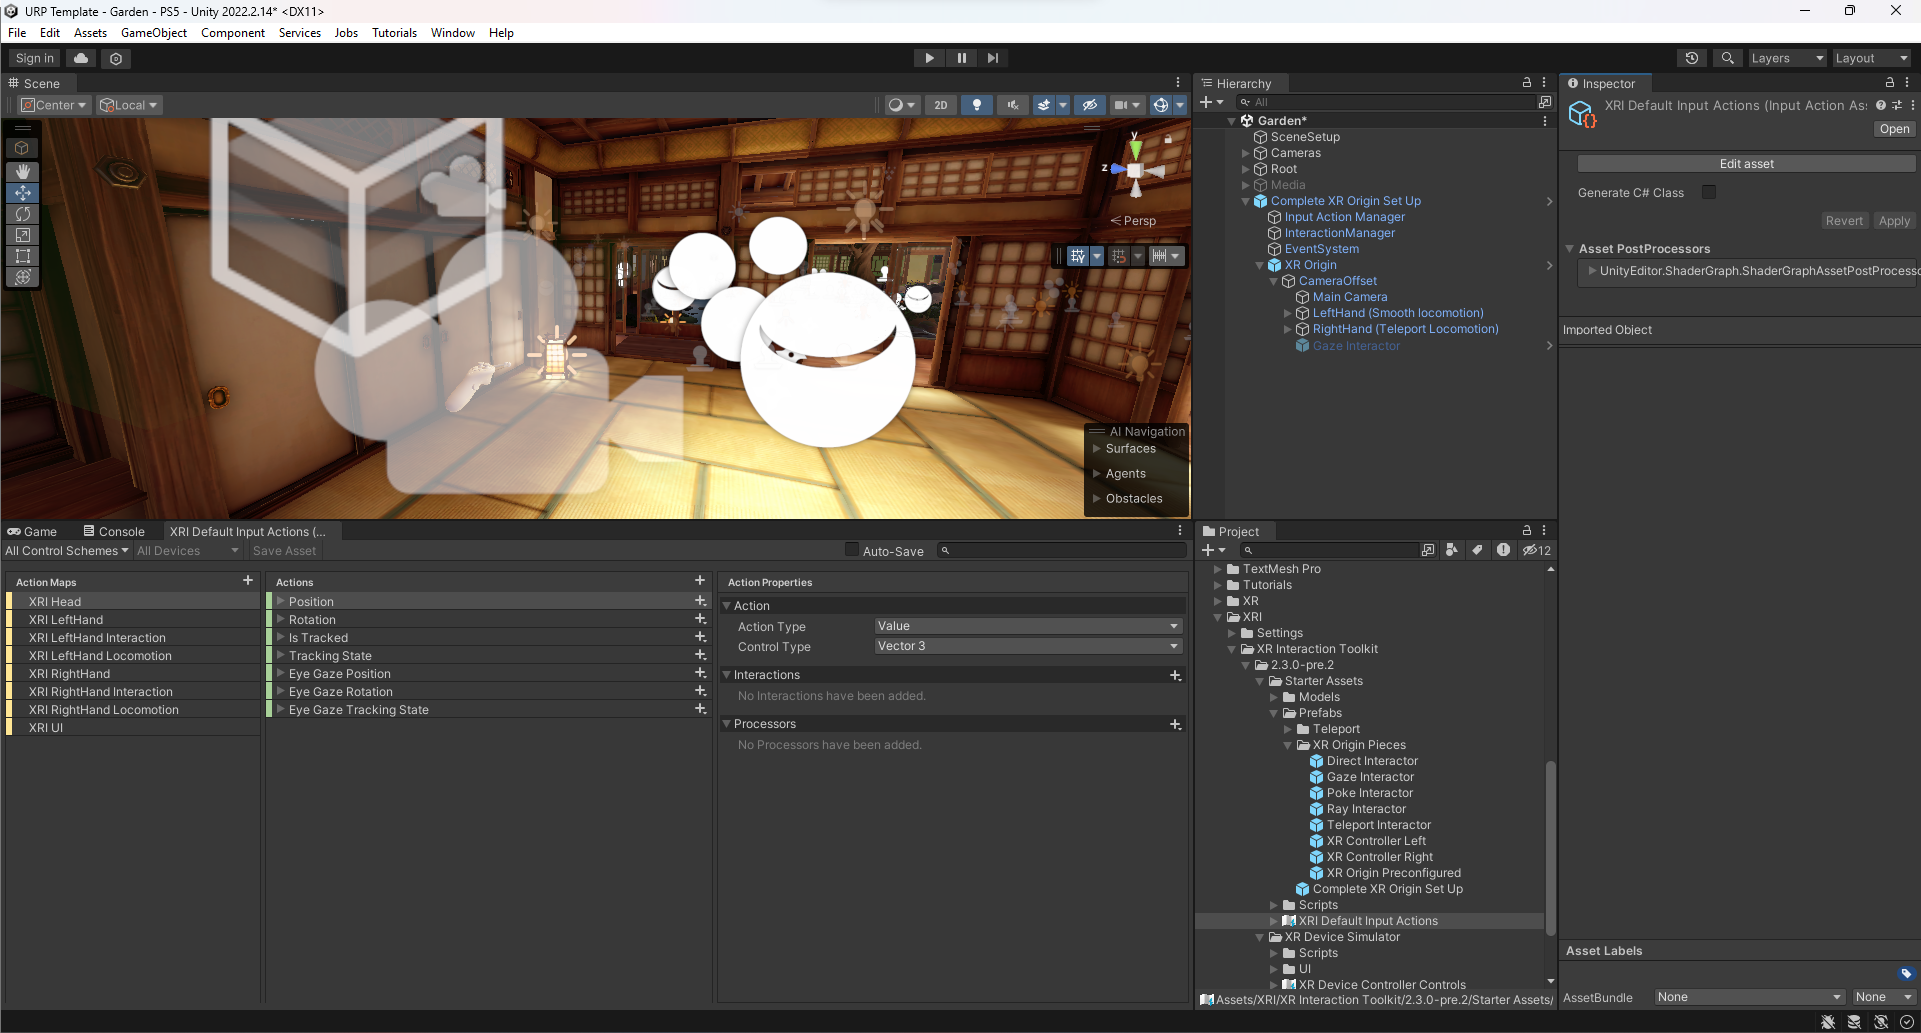
The XRI Toolkit also comes with an Input Map that maps actions to common VR controls. These controls are standard across most VR platforms, so there’s no extra coding required to ensure your input is recognized on a variety of platforms, including Meta Quest, Magic Leap, and PS VR2. Make sure you copy and paste any scripts that were important for game state tracking from your original player controller to the newly added Complete XR Origin Set Up Prefab. Feel free to rename the Prefab to something that’s easier to remember, like VR FPS Controller.
The XR Origin GameObject includes a lot of components that can be pretty confusing at first. Think of the XR Origin component of the XR Origin Prefab as the driver of all the other XRI components. Without it, XR locomotion doesn’t work. The rest of the components are providers that allow specific XR locomotion to be possible. These providers correspond to a different type of VR locomotion, from teleporting to snap turns to grabbing surfaces with two hands and pulling yourself along, and so much more.
To learn how to tweak the locomotion values of the XR Origin Prefab to your liking, read the documentation. But for just getting started, using default values should work fine.
Taking the target platform’s specs into account
Of course, not all VR platforms are created equal, and it’s critical to keep the hardware specs of your target platform in mind, especially when VR titles need to hit a consistent 60, 90, or 120 frames per second to minimize motion sickness. This can be achieved by reducing your max eye resolution, tweaking the anti-aliasing options for your Main Camera, reducing the number of dynamic lights in favor of baked lights, reducing the amount of alpha transparencies used in your GameObjects, and tweaking GameObjects’s LOD values so that they only render a higher-geometry version when the player is up close to them. For more suggestions, read our guide on optimizing graphics performance.
The good news is that it’s very easy to switch between different quality settings depending on the quality level you’ve specified for each platform. In the Quality tab of the Project Settings window, you can create and customize quality levels that set unique renderer, anti-aliasing, LOD, and lighting settings to help you get the most out of each platform. Learn more about adjusting quality settings.
Testing the VR setup
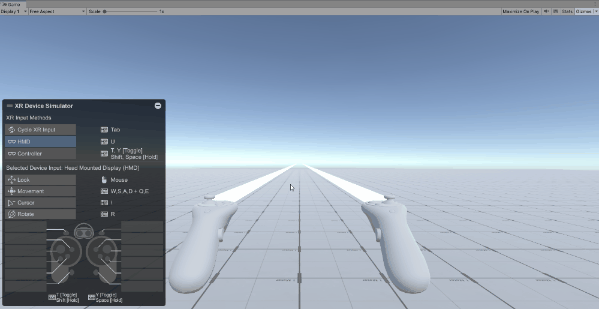
Now that your project is configured to target your VR platform(s) of choice, it’s time to test the newly added XR rig in your project. There are two recommended methods for VR testing: use the XR Device Simulator from the XRI Toolkit to test the setup in the Editor or build the player and run it on the device.
There is a handy tool available in Unity called the XR Device Simulator, which allows you to simulate XR controls inside of the Game view of the Editor when you’re in Play mode. You can save time by testing your locomotion settings without building your project. To add the XR Device Simulator to your project, open the Package Manager window, go back to the XRI Toolkit package, click on the Samples tab, and, under the Sample Assets, click the Import button next to the XR Device Simulator.

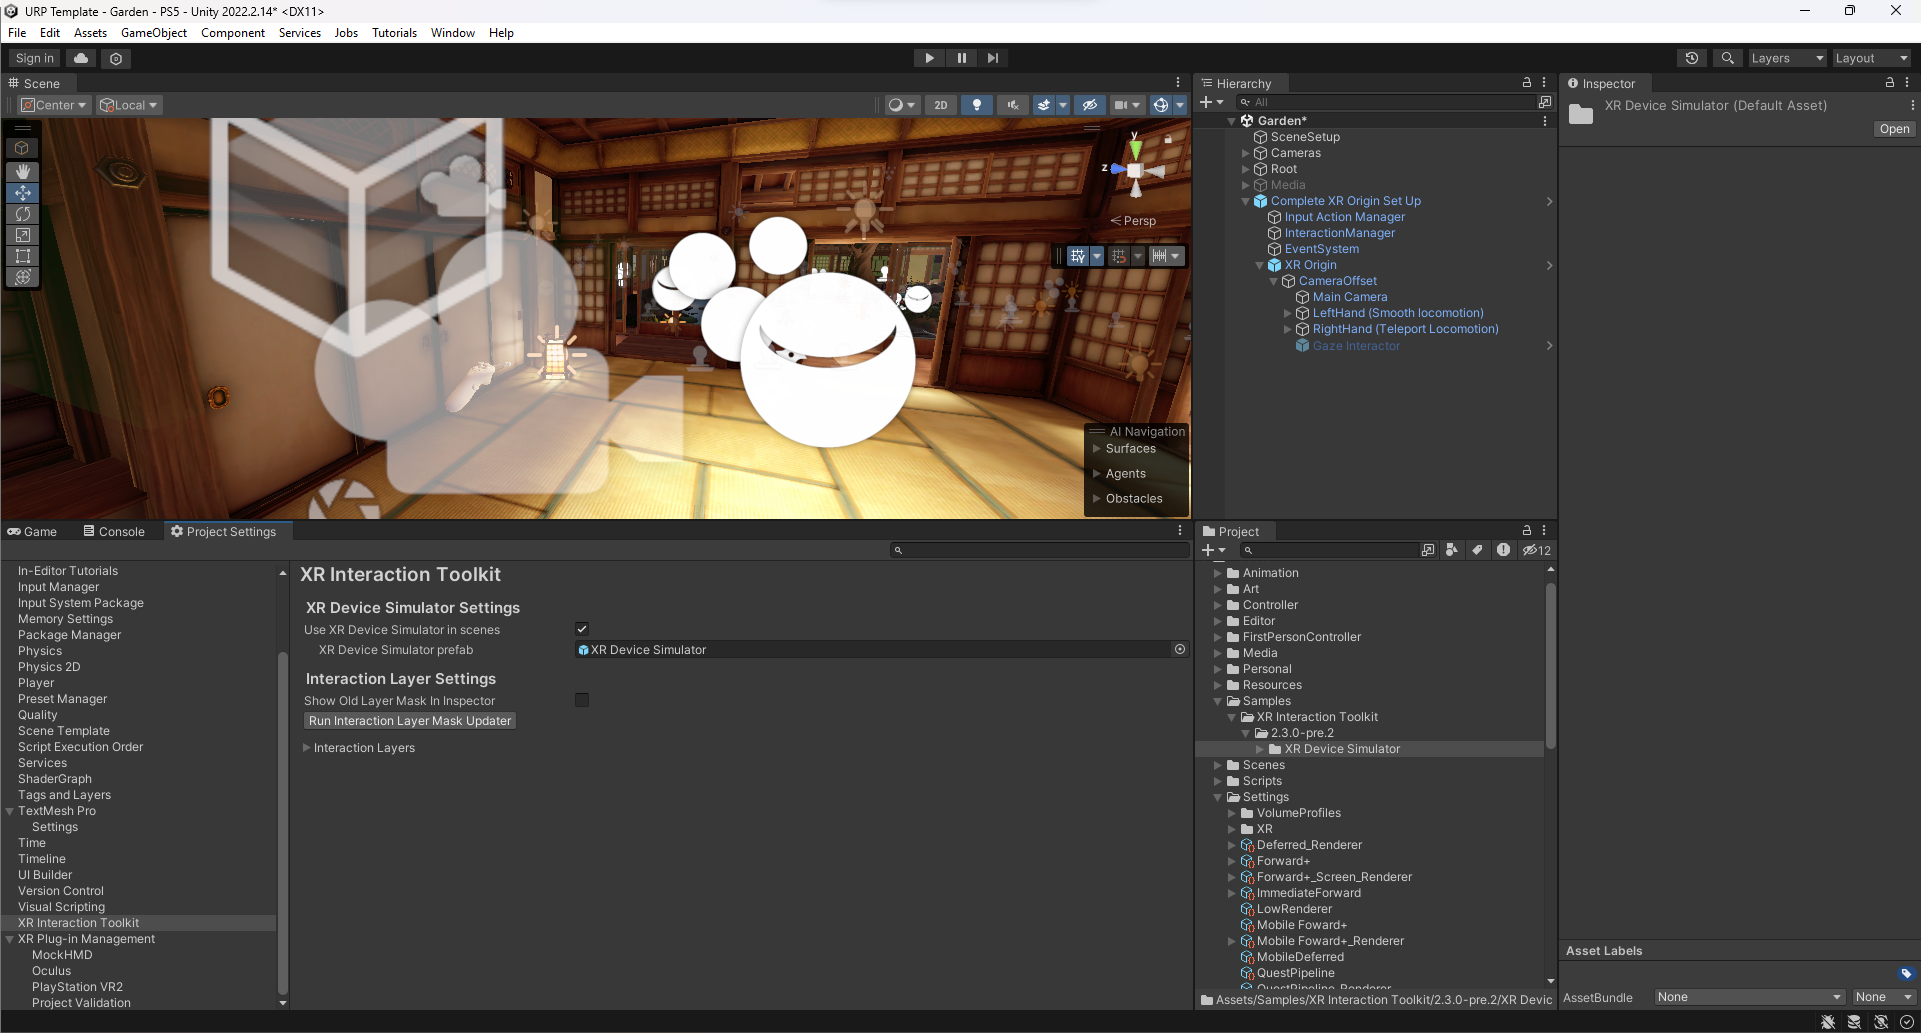
After it’s installed, open the Project Settings window and click on the XRI Toolkit tab. In this tab, enable the “Use XR Device Simulator in scenes” checkbox to add the XR Device Simulator at runtime when you enter Play mode. You can also drag and drop the XR Device Simulator Prefab from the Project window straight into your Scene.
Now, when you enter Play mode in the Editor, you’ll be able to use WASD and mouse controls to move your XR Rig and press Tab to switch between moving all the controls, just your left hand, or just your right hand. It’s not a 1:1 match to actual VR input, but it will help you test if your locomotion settings are working as expected right away.
Just remember that before you build your project, you need to either disable the “Use XR Device Simulator in scenes” checkbox in the XRI Toolkit Project Settings window or disable/delete the XR Device Simulator from your scene. Otherwise your VR controls won’t work properly on the device. This is because the XR Device Simulator simulates VR input from either a mouse and keyboard or a game controller and ignores input from actual VR controllers.
The second method for testing your XR Rig is to simply build and run it on your target platform. Each XR device’s setup for running Unity builds is unique, so read the documentation on how to connect them to your dev machine for the most up-to-date information. Once your device is connected, choose Build and Run in the Build Settings window to create the build for your target platform and load it onto the device.
After the build is running on-device, you can test the input yourself and see what works and what doesn’t. The only limitation is waiting for the build to finish and having a device available to test on.
With just these steps, along with some minor tweaking of foveated rendering settings, I was able to get the Japanese Garden scene of the new URP Template running on the PS VR2, which was showcased at GDC 2023.
I hope this quick guide helps you get started adding VR support to your project. If you’re confused about any part of the VR setup, you can review Unity’s guide for configuring your project for XR for more information.
The XR and URP teams are both working hard to ensure that developing for multiple platforms is as simple as possible. Please share any Universal Render Pipeline feedback in the URP forum and XR feedback in the XR forum. Watch for future technical blogs from Unity developers as part of the ongoing Tech from the Trenches series.
Is this article helpful for you?
Thank you for your feedback!
- Unity Labs
- Copyright © 2024 Unity Technologies