Daily news, dev blogs, and stories from Game Developer straight to your inbox
Sponsored By
Featured Blog | This community-written post highlights the best of what the game industry has to offer. Read more like it on the Game Developer Blogs.
Designing maps that complement game mechanics
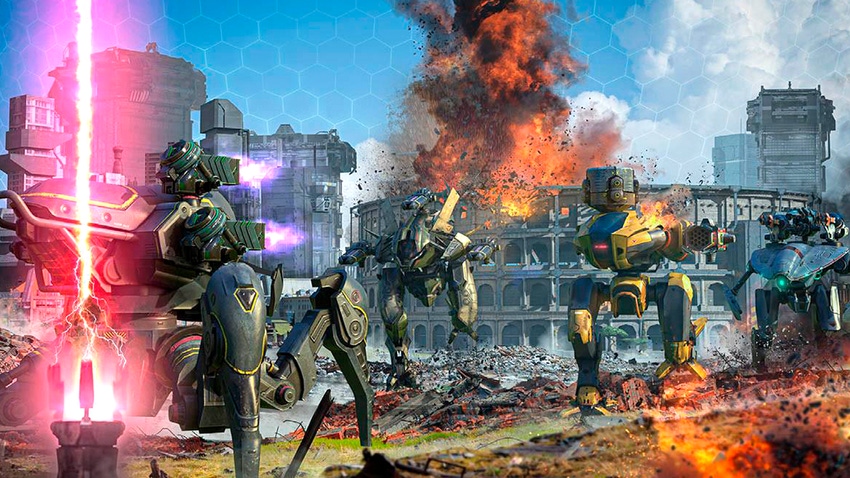
Good level design must support the actual game mechanics – this affects both level design, and ultimately, player enjoyment. This article shows how we do things with our popular multiplayer mobile shooter game War Robots.
Denis Kozin
February 22, 2024
19 Min Read
Effective level design facilitates map creation from the development side, but it allows players to enjoy the gameplay itself. Of course, both of these statements are only true if the level design supports the actual game mechanics.
My name is Denis Kozin and I’m a Senior Level Designer at MY.GAMES (Pixonic). In this article, I’ll share how when creating maps for War Robots, we take into account the basic game mechanics: enhancing their positive aspects, while also smoothing out any shortcomings.
But first, a little about the game itself. War Robots is a mobile session PvP shooter about huge robots. Players are divided into two teams and fight in a particular battle mode: beacon capture or deathmatch. The core gameplay is defined by the following mechanics:
Shooting
Moving
Battle modes
In one way or another, each of the above influences the appearance of the game maps. Later, we’ll discuss how to take into account the features of each of these mechanics in terms of level design.
Shooting features
Automatic vertical aiming
In War Robots, players can only aim the sight manually within the horizontal plane – that is, they can only move the sight to the left and right. In the vertical plane, the sight automatically moves to the center of the enemy robot. An example is shown in the picture below: the enemy is below the player, so the aim automatically lowers to their level (along with the camera) While this type of aiming simplifies shooting control, it can also lead to some gameplay problems.

One of these problems is that the player has poor control over aiming at enemies at different heights. If the enemy is too high, the player won’t see them because they will be out of camera view. However, if the player points horizontally at the enemy, the camera itself will still rise way up to meet them. But then, if the player accidentally moves the aim to the left or right, the camera will fall back down. These poorly controlled camera jumps can be annoying for players.

To avoid this effect, we don’t include large elevation changes within our level design. As a rule, all our maps have three height levels, with a height difference of approximately “one robot”. This is enough to diversify the layout and avoid problems with the camera.
For example, the image below shows three levels of elevation on the Powerplant map: the majority of the map is the first level, the low ground is zero level, and the rooftops and hills are at the second level.

Another problem occurs when multiple enemies are at different heights in the same shooting line. In this case, the sight automatically focuses on the nearest enemy, even if they are not actually available to shoot.
In the picture below, there are two enemies in front of the player, but the aim is focused on the enemy on the lower deck of the ship, although it’s impossible to shoot this target. Of course, there is also a button to manually switch between targets, but here, it’s an unnecessary maneuver that would just distract the player.

To avoid this, we try not to use multi-level geometry that can be navigated from above and below at the same time. Instead, we use a stepped geometry to reduce the likelihood of these kinds of aiming issues.

Another problem with automatic aiming is that the position of the aiming point differs from the location of the guns.
Robot guns are always located on top or side of the body, but the aiming points are exactly in the center. That is, the player’s shells fly out of the cannons, and enemy shots fly into the center of the body.

Thanks to the difference in the position of these points, you can stand behind cover so that the center of the robot is hidden, while the guns still look out of the edge. Players can use this feature to safely shoot from behind cover.
This can be a problem in combat: imagine the enemy is calmly standing behind cover shooting at you, but you can't do anything in response – this can be very annoying.
This problem can be divided into two parts: abuse of the side guns and abuse of the top guns.

Abuse of side guns has less impact on the gameplay, because you can only stick out one side gun from behind cover (and you won’t do much damage with it). This is good, because level design cannot solve this problem: players constantly work with the covers and will always find an opportunity to stick the side gun over the edge.
The top-gun type of abuse is a more serious problem. One robot can have three (or even four) top guns – and these produce significant damage. Fortunately, this problem can be mitigated with the help of level design.
First, we bake the solution into the cover metrics itself; the minimum cover height must be no less than the position of the top guns on the tallest robot.

Second, we carefully place inclined surfaces on the maps. These can also be used to abuse the top guns if the inclined surface blocks the robot's aiming point; in this case, it is better to make it lower or place similar inclined surfaces in those places on the map where there is no point in abusing them with the top guns.

Homing missiles and area damage
Some gun types have mechanics that affect cover metrics. For example, they can fire homing missiles that will circle around cover from above and then damage the robot behind it. It turns out that if all the covers are of a minimum height, players will have nowhere to hide from these missiles. This gives us an additional metric — the cover height that’s sufficient to avoid an attack by homing missiles. So, we place both low and high cover on the maps, maintaining a balance between open positions and safe space.
Using the Dead City map as an example, you can see that most of the covers are low (marked in red), but there are also high ones (marked in green).

Some guns fire missiles that deal area damage. If a robot is standing right at the edge of cover, it can be damaged by shooting the area next to the cover. This feature also needs to be taken into account when designing layouts. If we need to secure an area without giving players the opportunity to take up a defensive position, we use narrow covers. If we want to place a well-defended area, we need to make sure that the cover is wide enough that the player behind it has the ability to avoid area damage.
A good example is shown in the picture below. Behind a narrow cover, a robot cannot avoid area damage, but behind an adjacent wide one, it can.

Different shooting distances
In shooters, it’s common for guns to differ in firing distance. In our game, these arms are divided into long-range, medium-range and short-range. To maintain player demand for all types of guns and to give them more tactical choice during combat, we realize that the maps should include the ability to fight at different ranges. Emphasis on combat distance is determined by the ratio of cover to open space: more cover shifts the emphasis toward close combat range, while more open space shifts the emphasis toward long range.
Below are two fragments of the Rome map. We clearly see the contrast between spaces and different numbers of shelters.

Another example is the Factory map. It has a zone for close (red frame) and medium (green frame) combat distances. In these areas, the emphasis is placed on only two of the three distances; and it’s like that with all our maps.

Why don't we use three distances on each map? This is due to the size of the maps and a set of mechanics that prevent us from increasing this size: battles last 10 minutes and involve 12 players. If we increase the size of a map, we won’t be able to evenly distribute gameplay across all its zones while also keeping the battle duration within 10 minutes.

On top of this, players already have plenty of tactical choices in combat. Each time the player lands on a random map, of which there are quite a few to choose from, and this level rotation also supports all gun types.

Features of movement
Control
War Robots is a mobile game, so the controls are less responsive than they might be on PC. As a result, the player's robot moves inaccurately: there is a discrepancy between actual movement and player intention. We must also take this into account when constructing the layout:
We make environments more spacious and wider: arenas are large enough to allow maneuvering; corridors are wide enough so as not to cling to walls when moving; bridges and ramps are wide enough so that you don’t accidentally fall off them.

No platformer elements: if the player can walk or jump somewhere, it should be easy – don't force them to fight with controls. For example, on the Castle map there is a ravine that players can jump over without any problems. To do this, you don’t need to go to the very edge of the cliff or run up before jumping.

Low speed
Most of our robots have relatively low speed compared to the range of their guns. This affects the typical map size, predisposing them to feature certain combat distances. With this in mind, we have small maps for close combat distance (800x800 m), medium maps for medium combat (1000x1000 m) and large maps for long-range combat (1200x1200 m). That said, many players already perceive the maximum-sized maps as being too large – they actually get bored walking from the spawn to the collision points.

The example shows one of these large maps, the Springfield map. It takes about 40 seconds to walk from the spawn to its center. The player will spawn in a battle up to six times – in other words, for four minutes out of ten minutes, they’ll be walking from the spawn point to the collision spot.

Low speed not only affects map size, it also impacts the trajectory of movement. In the context of slow robots, the problem of confusing map paths is especially acute. So, we try to simplify this – accordingly, we don’t use complex trajectories, like a zigzag.
For example, in the Springfield map there is a corridor that used to have a half-open gate. To pass it, you had to move along a zigzag trajectory. At some point, we decided to open this gate, so now players can quickly go through this corridor in a straight line.

Another thing we do is simplify approaches to higher ground. The picture below shows both bad and good examples. Taking a long ramp is a bad decision: it takes too much time to climb. After a while, another one was implemented nearby, which was much faster to climb.

Third, we monitor frequent traffic junctions. The image below illustrates a bad example from the Powerplant map. If a player needs to capture a beacon in the lowlands, they’ll jump down, but can only go back up along two ramps located at opposite ends of the map – inconvenient and time-consuming. A good solution was adding lifts closer to the beacon.

Robot size
In our game, size can vary significantly from robot to robot. (For example, spiders are wider than bipeds, and Titans are twice as tall as other mechs.) Nevertheless, they should all be able to move around the map without any problems. Robot types were introduced into the game over time, and the level design didn’t take their features into account – at least, not at first.

So, with the introduction of spiders, we had to expand the passages on the maps. At the same time, we determined the maximum width of the spiders and no longer released wider robots.

Titans were designed to be the same width as spiders, but they were supposed to be much taller than regular robots. We have passages on our maps that are limited in height. Ordinary robots can pass without any problems, but Titans unable to do so – or worse, they might even get stuck there. Accordingly, we had to increase passage height wherever possible. For instance, we broke the bridges on the Springfield map, so now the Titans can easily pass.

Where passage heights could not be raised, we intentionally lowered them so that the Titans would not get stuck there. In the image below, you’ll see how metal beams appeared under the ceiling in the Dreadnought tunnels.

To ensure that new Titans and robots don’t have problems moving in the future, we’ve introduced metrics for the height and width of robots: for a regular robot to fit in a low passage, it must be no higher than 25 meters. In turn, in order for Titan to avoid getting stuck, it must be no lower than 28.5 meters.

Jumping and flying
Many robots, in addition to walking, can use abilities that allow them to jump or fly, and this definitely affects map layout design. As a result, a whole list of things to be taken into account has come about. There must be free space on the map to use abilities, so we place a minimum number of objects in the gameplay area that cannot be jumped over or flown over.

We must also keep in mind that players can jump or fly onto the roof of almost any building on the map. This means they must have a flat surface to walk on without any problems. If there are objects on top that can serve as cover, they must meet shelter height metrics.

Jumping and flying robots can attack enemies from the air. Accordingly, the geometry of the map should allow players on the ground to take cover from these attacks; high objects or spaces covered by a roof are suitable for this.

Players can land after jumping or flying almost anywhere on the map. This means that there shouldn’t be places on the map where a robot can get stuck: objects should not form narrow cracks and holes. On the Castle map, robots were getting stuck in a hole between some pipes, and we had to quickly close it.

Additionally, complex geometry should have simplified colliders. The picture below shows a good example of an object with complex geometry: a metal structure from the Canyon map. To prevent robots from falling inside, its collider is simplified to a cube that replicates the dimensions of the object.

Map kill zones
For a long time, most of our maps didn't have their own mechanics. The first one later appeared – so far the only one – the kill zone. This is an area where robots are instantly destroyed upon entry. What's interesting is that this mechanic synergizes with robot movement mechanics. Let's look at some examples.
On the Carrier map, the gameplay zone, the ship, is surrounded by a kill zone: water. It doesn't directly affect gameplay, but it becomes significant when robots use jumping and flying abilities. In these cases, players risk falling in the water if the ability is not accurately executed. This adds tension, and generally feels fun. So, the use of movement abilities adds meaning to the mechanics of the map.

There is a kill zone running through the entire Castle map. Mechanics now play a much larger role in gameplay. When using movement abilities such as jump, fly (and now, dash) there is an even higher risk to end up in the kill zone. Now, you might accidentally lose your robot right in the center of the gameplay area.
But the main thing is that the kill zone mechanics themselves now support the movement mechanics. Robots with jumping and flying abilities have additional tactical opportunities to get across the abyss along the shortest path.

The situation with the Factory map is essentially the same as Castle: in the center of the map there is a kill zone modification: the damage zone. There, robots are not instantly destroyed, but receive periodic damage. Thus, the risk of using movement abilities remains. In addition to this, robots have the ability to quickly overcome damage zones without receiving damage, while reaching the target along the shortest path.

Mode features
Our game has four modes: two for capturing beacons and two for robot elimination. These modes can all be played on the same maps, but each has its own level design features.
Domination
This is the main game mode, and all the maps are built primarily for it:
There are 5 beacons on the map
2 teams of 6 players
Each team has its own spawn base
Controlling beacons brings points to the team
The first team to score a given number of points wins
The goal for players is to capture the beacons, and accordingly, the layout is built around those beacons. The example below shows the location of the beacons in the Factory map. (This scheme is created during the map concept stage.) The turquoise dots here are beacons, and the red and blue ones are team spawn zones.

The most intense clashes take place around the beacons. To support them, we create arenas in these places – these are spacious areas suitable for battles with a large number of players.

Beacons are connected by passages and flanks, along which players can attack the enemy or move to capture and defend already captured beacons.

We place team spawn zones, one for each team, at different ends of the map.

This map layout based upon beacons lends itself to player fights; they must capture beacons and the map geometry is built with this task in mind.
But there is one problem with Domination mode: it takes players too long to walk from the spawn point to the enemy collision zone, especially on large maps; this problem was solved in a new mode, Beacon Rush, which eventually became the most popular in the game.
Beacon Rush
This is the same as Domination, but players can now spawn near beacons. Along with this feature, a minimap was added to the mode – players can choose a spawn location. The blue and red circles represent allied and enemy beacons and spawns, the red and blue triangles are the other players.

The introduction of additional spawns led to some positive gameplay changes:
The time it takes to get close to the enemy has been reduced; players no longer need to walk for a long time from the starting spawn to a collision point
The dynamics of the battle have increased; clashes near beacons have become fiercer, as players will now spawn directly on them
The importance of capturing beacons has increased; for example, you can capture a beacon next to an enemy base and spawn at the enemy’s rear
So, merely introducing additional spawns made this mode the most popular in the game.
Team Deathmatch
Let's move on to “killing” modes. The first of these is Team Deathmatch, a classic shooter mode:
2 teams of 6 players
The goal is to destroy enemy robots
The team that destroys all enemy robots wins
This mode is played on the same maps as the beacon modes. Building a layout from beacon capture also already contains all the elements necessary for TDM: arenas, flanks and sniper positions.

But in this mode, we use three spawn zones per team; there are no beacons where you can land, so having three spawn zones allows players to quickly get to the part of the map they need. In addition, if the enemy has blocked one of the spawn zones, the player spawn at an adjacent one and go behind the enemy.

The spawn zones are marked with markers which allow players to better navigate the map. In addition, when a player sees a marker while advancing on an enemy base, they understand that an enemy can spawn in this place at any moment, and they should not turn their back on that point.

Since there are no beacons in this mode, the player's goal is to shoot at each other – this means that crossing open areas of maps becomes especially dangerous. Therefore, we need to motivate players to move in closer: this will increase the dynamics and maintain different combat distances. Placing additional shelters in excessively open areas of the map helps us achieve this.

Free for All
The last mode is a free for all battle:
Only 6 players
The goal is to destroy enemy robots
The player with the most kills wins
This mode uses the same maps again, but the front line, where most of the shelters on the map are located, doesn’t apply here. In such conditions, collisions are more often one-on-one, and can happen at any place on the map, as long as it is not an open field.

Since players are fighting for themselves, at the beginning of the battle they need to be distributed throughout the map so that everyone has the same number of enemies around them. That’s why we have twelve spawn points, evenly distributed around the perimeter of the map.
In addition to this, the player spawns at the maximum distance from their opponents. This means that at the beginning of the battle, all of the players are distributed across the spawns one at a time, and with each subsequent spawn, the player ends up in the safest place on the map. This is how we avoid situations where a player spawns directly in front of an enemy and then immediately gets killed.

Although the spawns are distributed along the entire perimeter of the map, there are often open spaces between adjacent ones. We place additional covers at these places: this way we create a safe zone around each spawn point.

Wrapping up
And that’s how we do it! Level design should complement the mechanics of the game, and, as we’ve demonstrated properly, doing so can have a big impact on the overall player experience. Crucially, failing to do this can break the core of the game – so stay vigilant and good luck with your level designs!
Read more about:
Featured BlogsAbout the Author(s)
You May Also Like


